![]()
The Complete Docker Installation on Ubuntu (2024)

Docker is a product-based service that simplifies the management of application processes. It stores the processes in isolated containers and adds a complete filesystem for them to operate individually. This grants application processes more freedom as they are not dependent on the environment. You can think of docker containers as virtual machines that let you create and run images; they are robust, portable, and resource-friendly.
Table of Contents
Let’s go over the complete and simplified installation of Docker for Ubuntu!
Install Docker in Ubuntu Using Apt Installer
Docker has published and maintained its official repository. However, the apt package manager can download and install Docker on your system. To do this, you must add the docker’s repository to your system’s “apt” sources list.
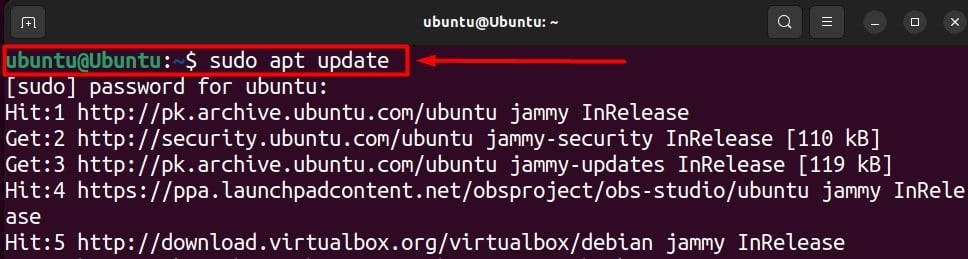
To follow along with this method, start by updating your apt packages list by running the following command on your Ubuntu System:
sudo apt update
You will be prompted to provide the “sudo” password to update the packages list. Once you have updated them, you can choose to upgrade the available packages by running the command “sudo apt upgrade.” However, upgrading these packages is not a required step.
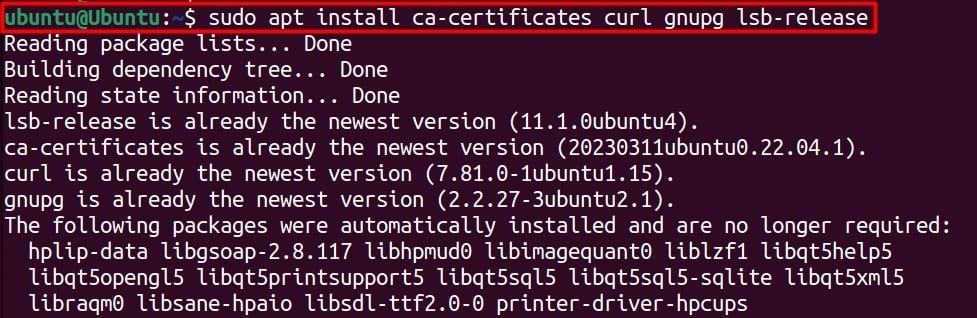
To be able to add the Docker’s official repository to the list of apt sources, you will require some tools. To download them on your Ubuntu system, open a new terminal session and run the following command:
sudo apt install ca-certificates curl gnupg lsb-release
Sometimes, these tools are available on your system. However, if you are running a fresh installation of Ubuntu or if you are unclear about the availability of the following tools, then in that case it is recommended to run the above-mentioned command:
After downloading the pre-requisite tools, you can start by adding the Docker’s GPG key to your system. This key will act as an apt validation file for your Docker packages during installation. To do this, let’s create a new directory in the system “apt” directory, by running the following command:
sudo mkdir -p /etc/apt/keyrings
Once that is done, run the following command to download the Official Docker’s Linux Key, convert it into OpenGPG encoding, and save it inside the keyrings directory that you have created above:
curl -fsSL https://download.docker.com/linux/ubuntu/gpg | sudo gpg --dearmor -o /etc/apt/keyrings/docker.gpg
Afterward, you need to change the permissions for the Keyring file so that the “apt” package manager can detect and read from it:
sudo chmod a+r /etc/apt/keyrings/docker.gpg
After that, add the Docker Package to your system’s apt list by running the following command:
echo "deb [arch=$(dpkg --print-architecture) signed-by=/etc/apt/keyrings/docker.gpg] https://download.docker.com/linux/ubuntu $(lsb_release -cs) stable" | sudo tee /etc/apt/sources.list.d/docker.list > /dev/null
This command will automatically detect your system architecture and download the suitable package release for the package list. The package will be verified using the GPG key you added earlier, and the docker repository will be added as the new package in the list.

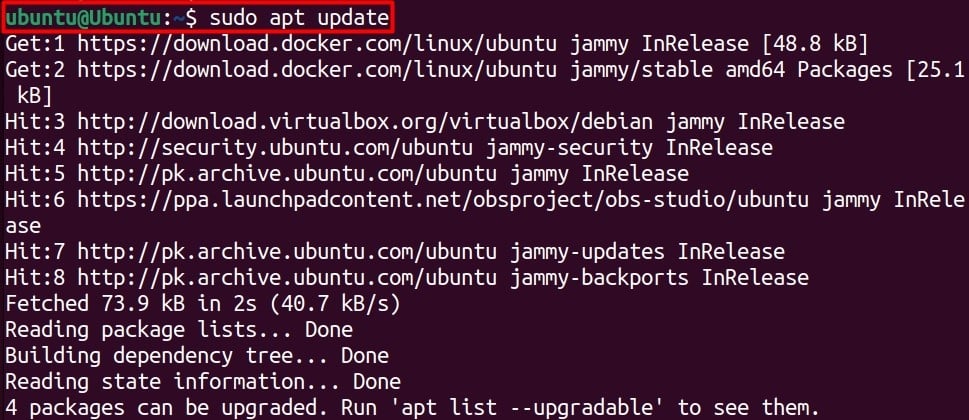
To ensure that the apt package manager reads the Docker’s repository as a source, you need to run the update command once more. Therefore, execute the following command:
sudo apt update
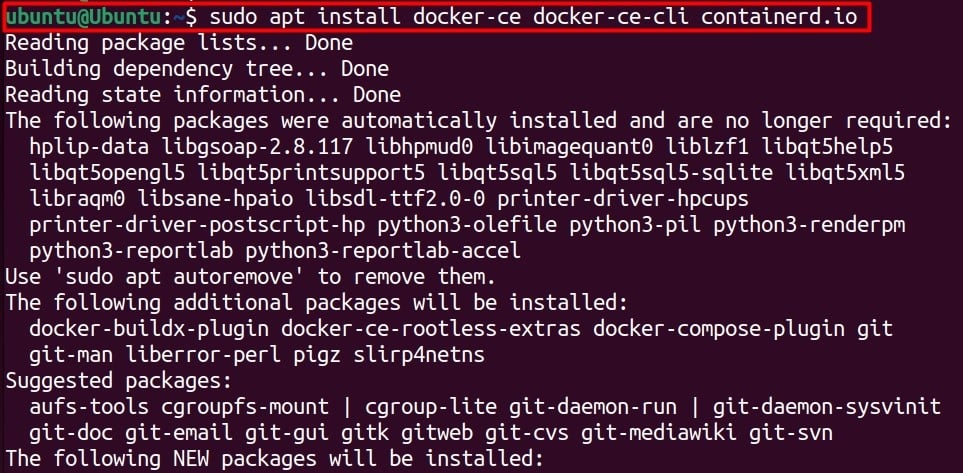
At this point, you can use the apt package manager and its “install” option to download and install Docker in your system:
sudo apt install docker-ce docker-ce-cli containerd.io
This command will install the latest Docker Community Edition to your system. There are three installation files in this command: docker-ce for Docker Engine, docker-ce-cli for Docker Command Line Interface, and containerd.io, which will manage containers.
You have successfully installed Docker on your Ubuntu machine through the apt package manager. You can move on to the “Verify the Docker Installation” part.
Install Docker Using the Installation Script
Docker’s Installation via script is a more convenient way as the script automates the installation process for all the components. It’s more of a laid-back approach, and it’s completely non-interactive. You just have to execute two commands and let the system do the rest for you.
The first step is to download the script file by executing the following command in your terminal window:
curl -fsSL https://get.docker.com -o get-docker.sh

Once the script is downloaded on your system, execute the installation script by running the following command:
sudo sh get-docker.sh
You will be asked to provide the sudo password to execute the shell script. Once you have provided the password, the downloading and installation process will begin:
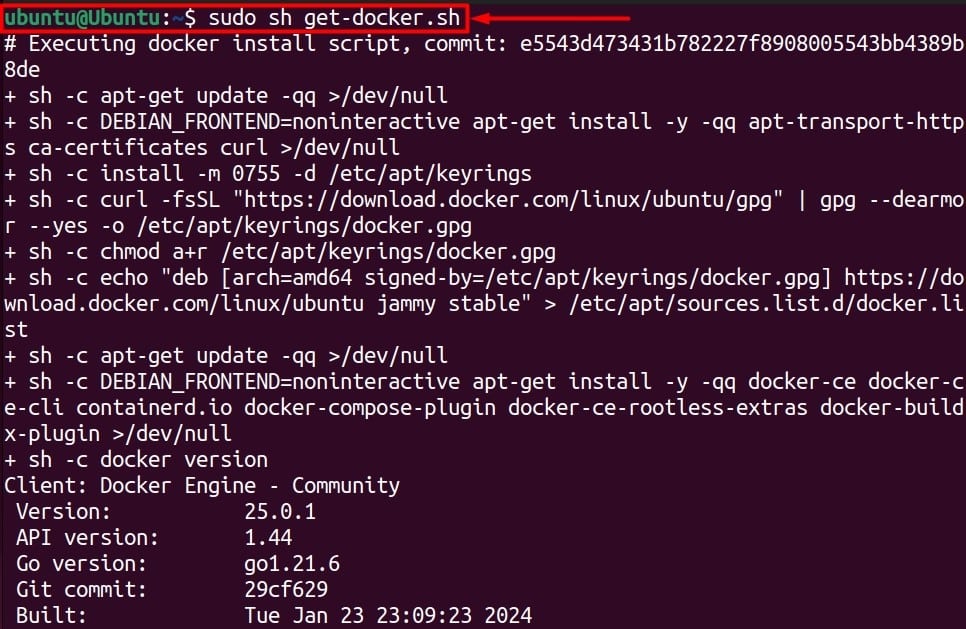
After the installation process is complete, you will see a confirmation message or prompt on the terminal screen
Note: The script is an easier solution, but it lacks customization; you can’t modify the script source, and it doesn’t update dependencies. Another flaw is that scripts are not designed to do updates for docker.
Verify the Docker Installation
After the docker has been installed, by either the apt method or by the shell script method, the next step is to verify that the installation was successful and everything works perfectly. To do this, open up a new terminal session and type the following command inside of it:
sudo docker run hello-world
By executing this command, docker will try to find the “hello_world” template locally or pull it from the internet (Docker’s Repository). Once that is done, it will show the output of the “hello_world” template on the terminal:
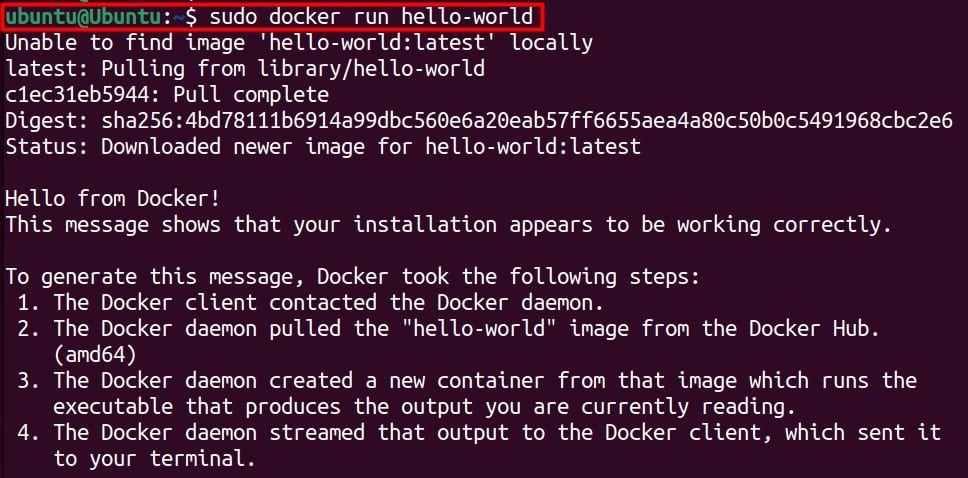
With the “Hello from Docker!” message, docker is now installed on your system, and the installation is working correctly.
Dealing With Permission Denied Error: In case you get a permission denied error while trying to execute the hello-world command, then you can run the following command to reset the docker socket:

sudo chmod 666 /var/run/docker.sock

This error can occur when you install the shell script, as scripting doesn’t configure or set your ports.
Affordable VPS Hosting With Dracula Servers
Dracula Servers offers high-performance server hosting at entry-level prices. The plans include Linux VPS, Sneaker Servers, Dedicated Servers & turnkey solutions. If you’re looking for quality self-managed servers with high amounts of RAM and storage, look no further.
Dracula Server Hosting is also Perfect for Hosting Telegram.Forex App with built-in support for MT4 with trade copier. Check the plans for yourself by clicking Here!
Creating a Dedicated Users Group for Docker
Instead of giving sudo privileges to every user, you can create a docker group and assign users to that group so that they can use docker commands without requiring sudo privileges. Adding users to the docker group will also avoid the prefix sudo with every command, even if you are the only user of the system.
To create a dedicated user group for docker, run the following command:
sudo groupadd docker
Afterward, add the current user to the “docker” group by running the following command:
sudo usermod -aG docker $USER
If you want to add a user that is not the “current user,” then replace the “$USER” with the user’s name on your system.
Uninstall Docker From Ubuntu
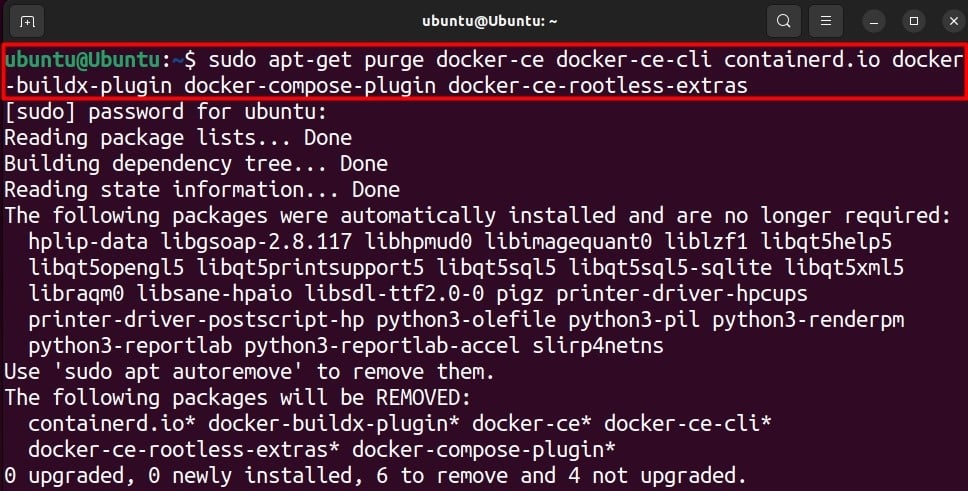
If you want to uninstall docker completely from your Ubuntu System, then open up a new terminal session and execute the following command inside of it:
sudo apt-get purge docker-ce docker-ce-cli containerd.io docker-buildx-plugin docker-compose-plugin docker-ce-rootless-extras
This command will not only docker but also docker plugins, rootless extras, and even dependencies.
However, uninstalling docker does not automatically remove images, containers, and docker/project configuration files from your system. You have to do it manually by executing the following commands:
 sudo rm -rf /var/lib/docker
 sudo rm -rf /var/lib/containerd
Additionally, you can ensure that no orphan packages are left in your system by executing the following commands:
sudo apt-get autoclean
sudo apt-get autoremove
With all of these commands, you have successfully uninstalled Docker and all of its files from your Ubuntu machine.
Managing Docker System Services
To manage the running of docker’s services on your Ubuntu system, you will use the “systemctl” and control the service’s behavior. The most commonly used systemctl commands for docker services are as follows:
sudo systemctl start docker  # Starts Docker Service
sudo systemctl stop docker  # Stops Docker Services
sudo systemctl restart docker # Restarts Docker Service
Moreover, if you want to toggle the running of docker’s service at boot time, you will use the following commands:
sudo systemctl enable docker #Dockers Starts with System Boot
sudo systemctl disable docker #Docker doesn’t Start with System Boot
With these, you can configure the running of docker’s service on your system efficiently.
Basic Docker Commands
To get you started with docker, here is a list of basic docker commands:
- Pull an Image: To download a Docker image from the Docker Hub or another registry, use:
docker pull <image_name>- List Images: View the list of locally available Docker images:
docker images- Run a Container: Start a container based on a specific image:
docker run <image_name>- List Running Containers: Check the containers currently running on your system:
docker ps- List All Containers: View all containers, including stopped ones:
docker ps -a- Stop a Running Container: To stop a running container completely, the command is
docker stop <container_id>- Remove a Container: Delete a stopped container:
docker rm <container_id>- Remove an Image: Delete a Docker image:
docker rmi <image_name>- Execute Commands in a Running Container: Run a command inside a running container:
docker exec -it <container_id> <command>That is it for this guide.
Conclusion
Docker can be installed on your Ubuntu system through various methods. However, the two most recommended methods for installing docker on your system are using the “apt” package installer or the docker’s installation shell script.
To use the apt installer to install docker, you must get the GPG key for docker from its official repository to add the docker’s repo into your apt sources. After this, you can download/install Docker and its packages to your system.
For the shell script, use the command mentioned in the guide to download the script and execute the script with sudo privileges. Once the installation is done, verify its integrity and working by running the docker’ hello_world template.
Subscribe
Login
0 Comments
Oldest