![]()
Set Up A Free Custom Domain Email with Gmail
If you’re just starting out with your business, then it would make sense that you keep your spending to a minimum.
There are quite a few great email providers out there, and almost all of them, require you to pay to use a custom domain for your email.
NOTE: One that does not require you to pay for using your own domain in your email, though, is Zoho, but we’ll cover that in another tutorial.
For now, we’ll cover how to leverage a 3rd party service, and use it with Gmail, to send & receive mail.
That service is called Mailgun.
Mailgun is a tool for developers and is, as they advertise, “Powerful APIs that enable you to send, receive and track email effortlessly”. And they’ll let you send/receive 10,000 every month for free, which is great, if you’re just starting your business.
In case you don’t have much experience with this type of thing, don’t be scared off, it’s a lot easier than it sounds.
Basically, we want to use two components that Mailgun has to offer: email forwarding and a SMTP server.
Step 1 — Setting up Mailgun
First off, sign up with Mailgun, using your preferred email, and not the custom domain email that you want to set up, as you’ll probably have issues later when you’re verifying your domain.
After you’ve signed up, your account will, most likely, be inactive, and you’ll be asked to email Mailgun to activate it. They should respond after a few hours after you email them.
When that’s done, it’s time to add your domain.
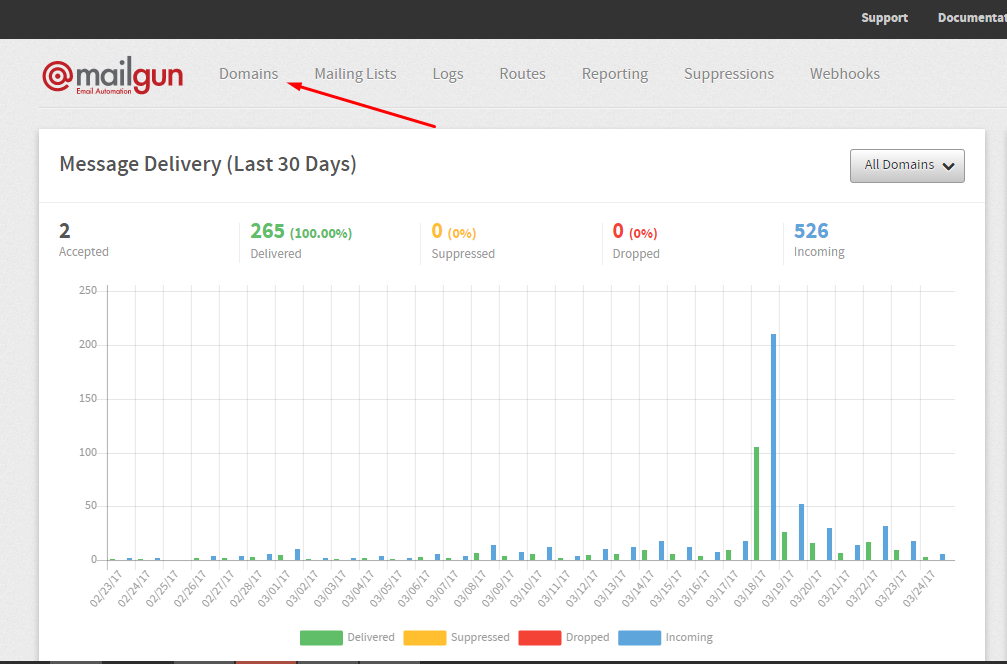
At the time of writing, the dashboard looks like this. Just look where the Domains section is located and head on there.
On the next page, add our domain to Mailgun.
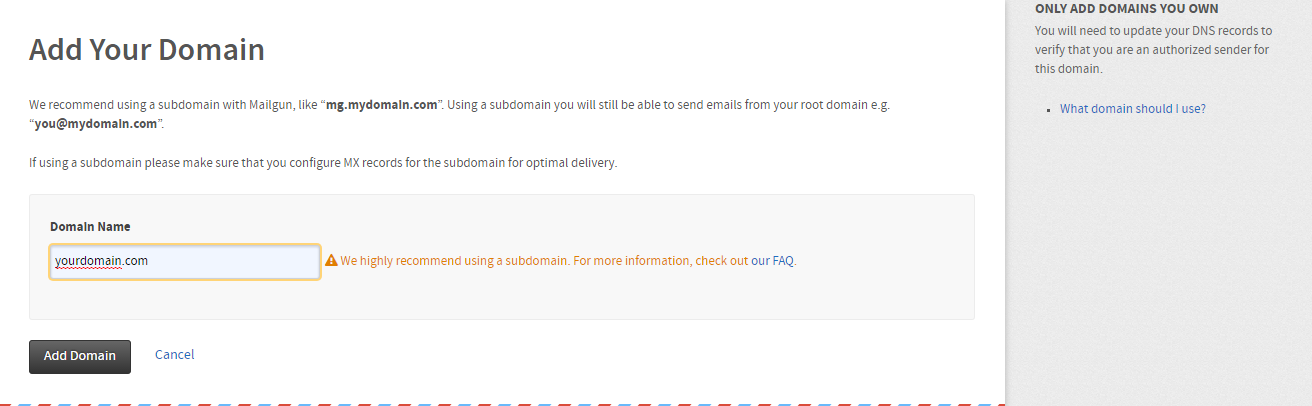
Click “Add Domain”, and that will take us to here:
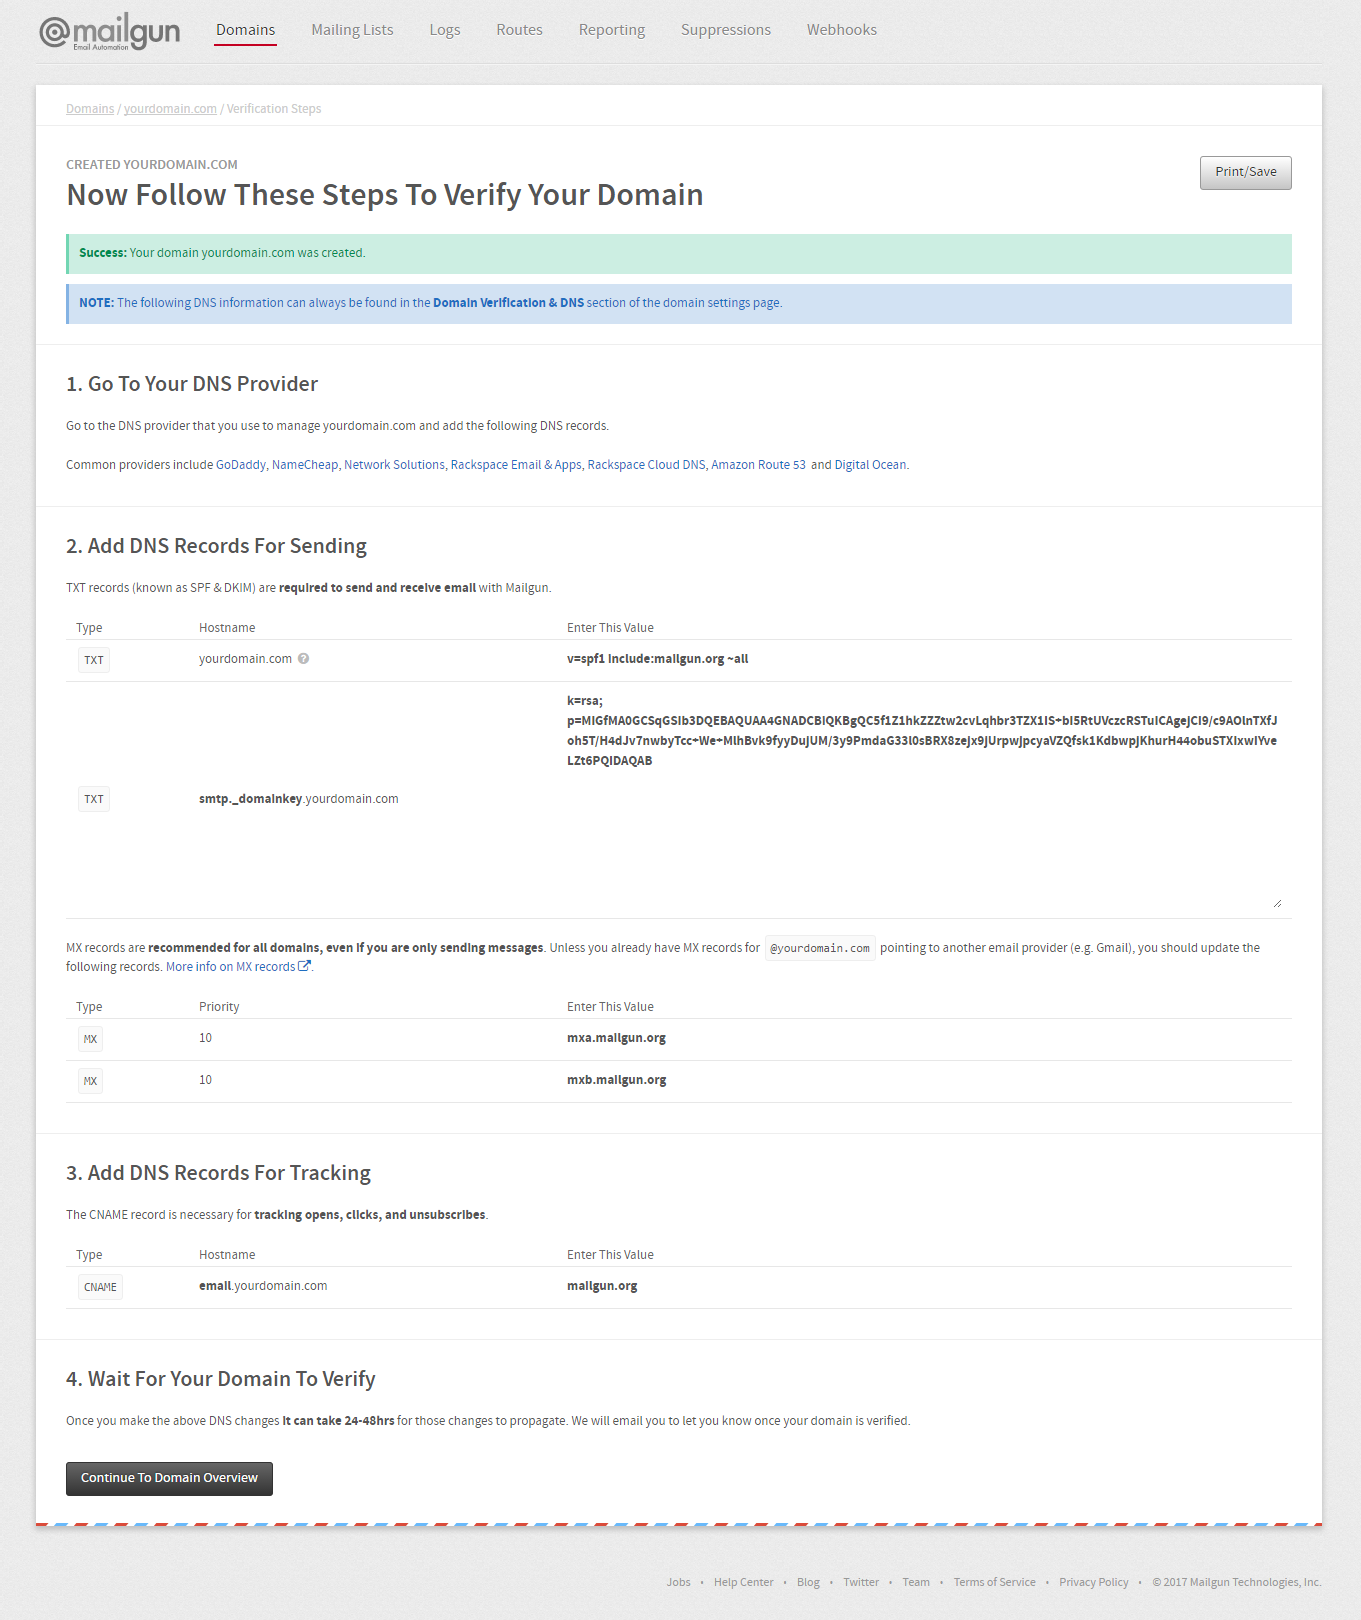
Mailgun is now providing us with some records that we’ve got to add to our domain. As you can see at the top, they have a few links that take you to popular registrar tutorial pages. If you use one of those, then click on one of the links, and you’ll be shown how to edit records. If you’re using Cloudflare, then you can stick around. If neither, then contact your DNS provider or leave a comment, and maybe we can be of assistance.
You’ll have to add each of those records and click “Continue To Domain Overview”. There, you’ll see green checkmarks or alerts, depending if you’ve added the records correctly.
If you haven’t, then you can edit them and click “Check DNS Records Now”, until everything checks out. Keep in mind, that changes may take effects in a minute or so. In my case, it was in a matter of seconds.

Okay, I’ve added the records in Cloudflare and here’s what I got.

If you’re using Cloudflare, notice the field outlined in red. You’ll want to set that to DNS only, as in the screenshot, otherwise you’ll get an alert in the Mailgun tracking section – but as they mention, that is optional.
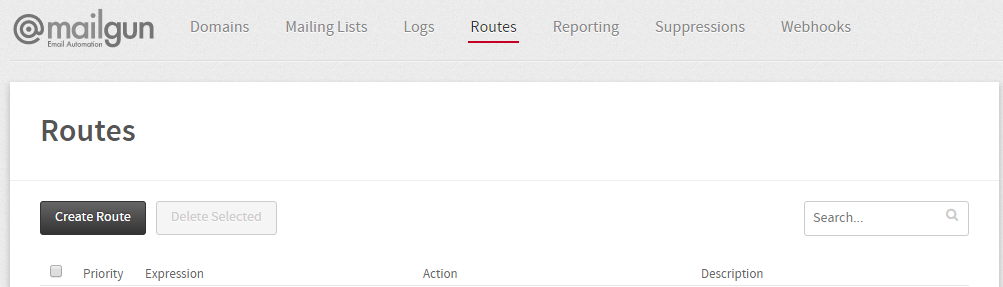
So now, that everything checks out, we’ll be adding routes. If everything is good on your end, go ahead and click on Routes in the top navigation.

Now you’ll want to click on “Create Route”.
You’ll be taken to this page where you set up forwarding.
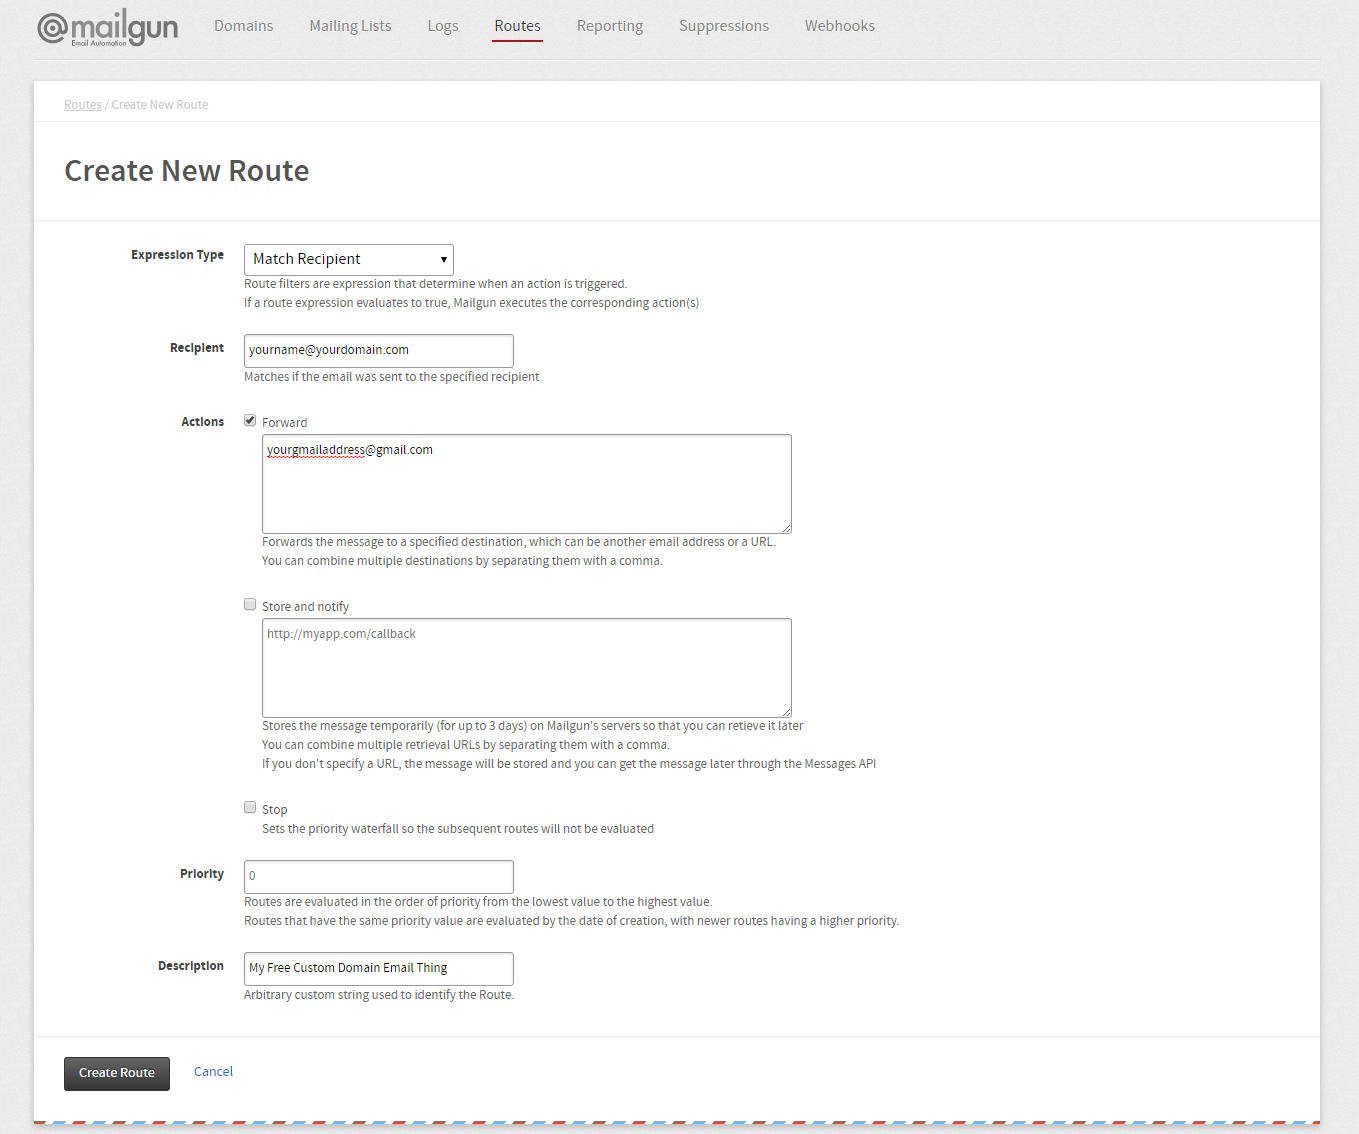
What we did there is:
- Changed “Expression Type” from “Catch All” to “Match Recipient”
- Added the custom email that we want in the “Recipient” field
- Checked the “Forward” checkbox to enable forwarding
- Entered our current Gmail address, where we want to receive emails ( And where we’ll send from )
Now you can click “Create Route”.
Step 2 — Setting up SMTP
The next step is to set up our SMTP credentials, that we’ll use so Gmail can send emails with.
In the navigation, click on “Domains”, and in the list of domains, click on your domain.
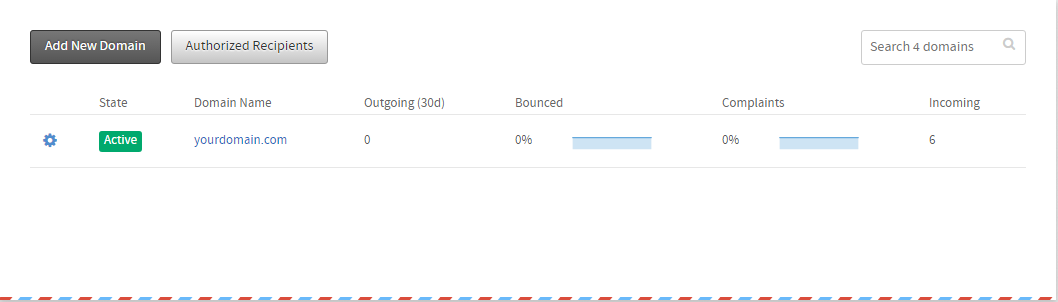
You’ll be taken to the page where you were checking if all your records are in order. What we’re interested in is the first section.
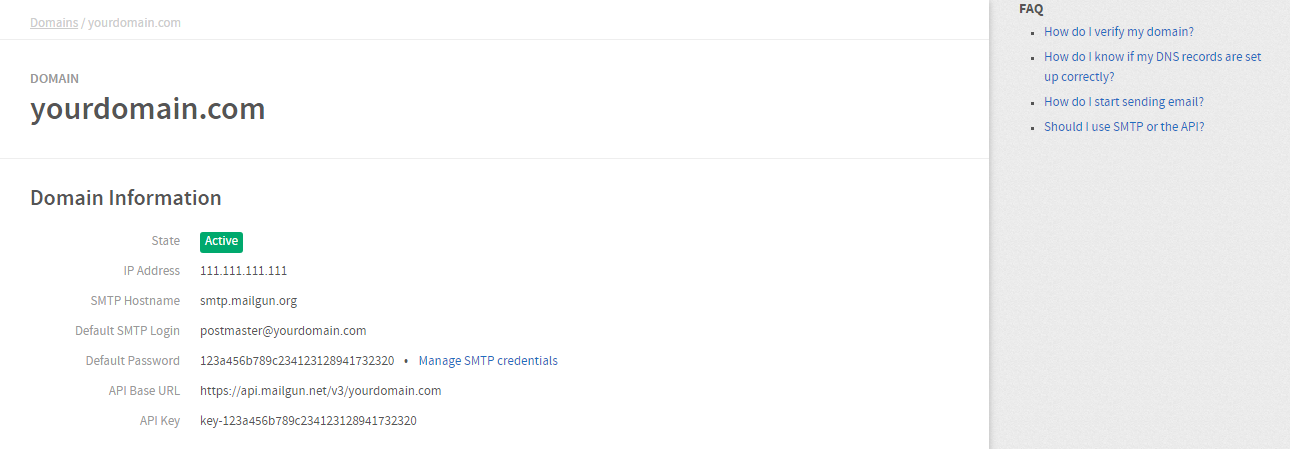
We’re going to create some new credentials that we’ll input into Gmail. Go ahead and click on Manage SMTP Credentials.
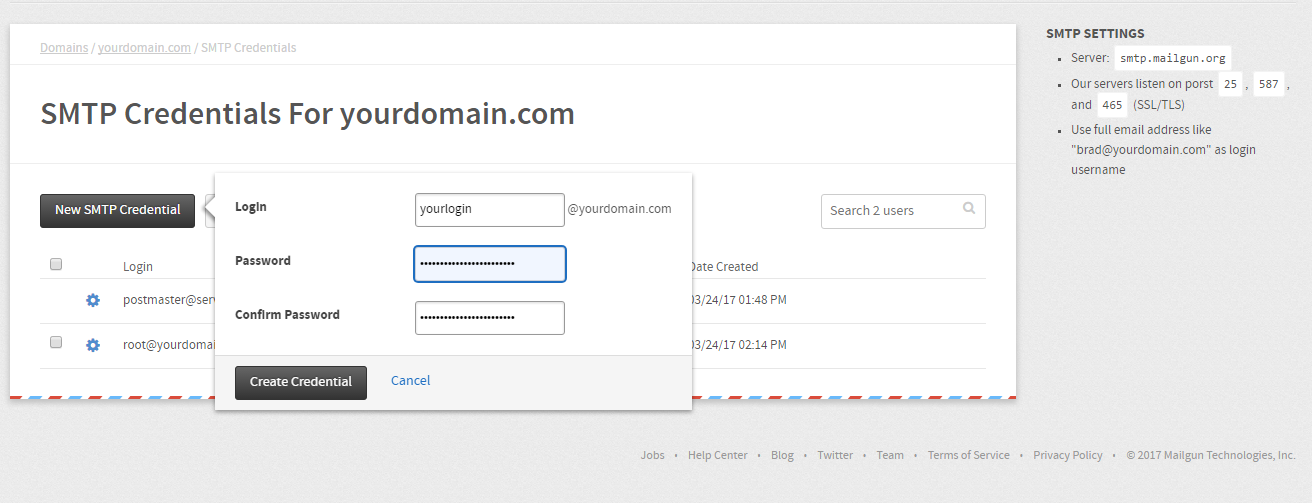
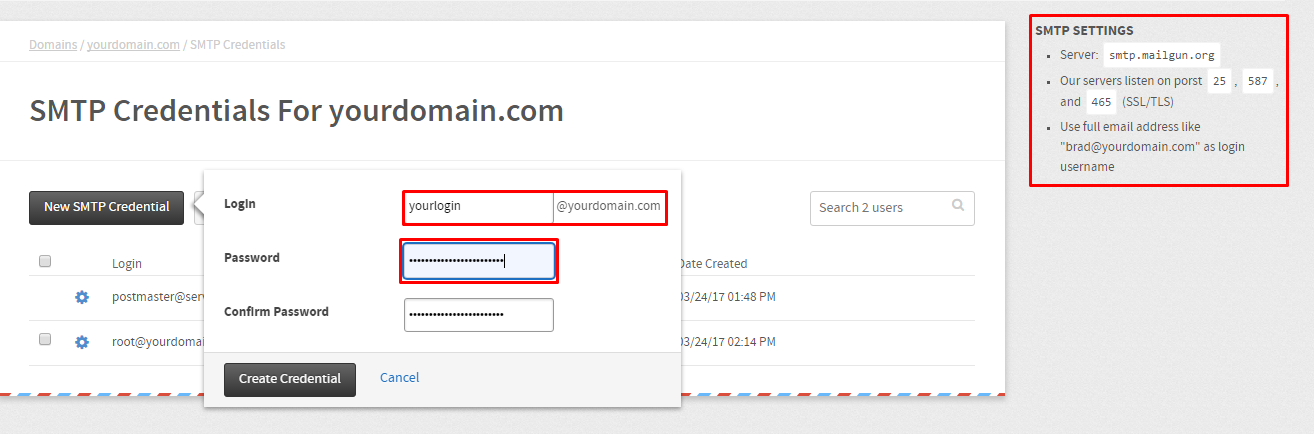
You’ll be taken to this page, where you’ll just have to click on New SMTP Credential, and input a Login and Password that you’d like – and remember them.
I highly recommend you use a complicated password for this.
Step 3 — Setting up Gmail
We’re pretty much done here. Now, we need to configure Gmail.
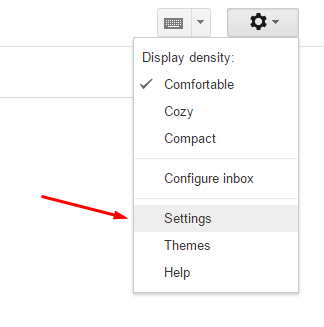
Head over into your account and go to Settings.
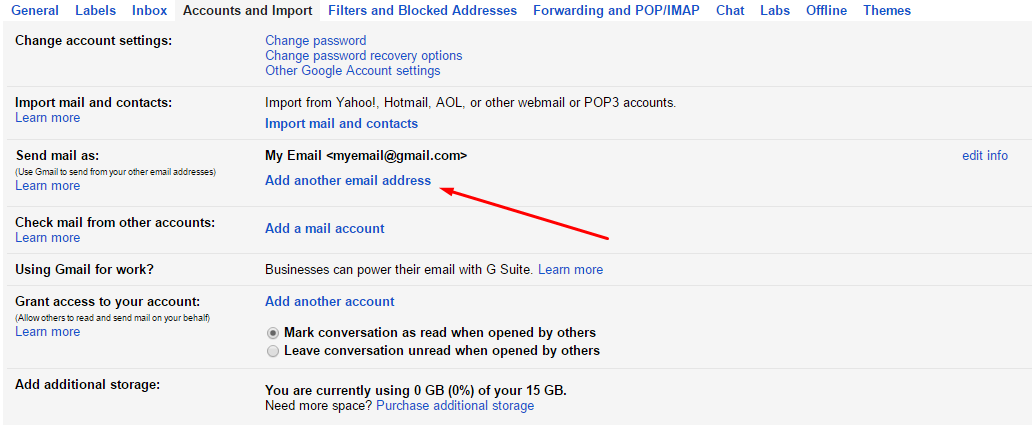
In the settings, click to the Accounts and Import tab.

And click on Add another email address.
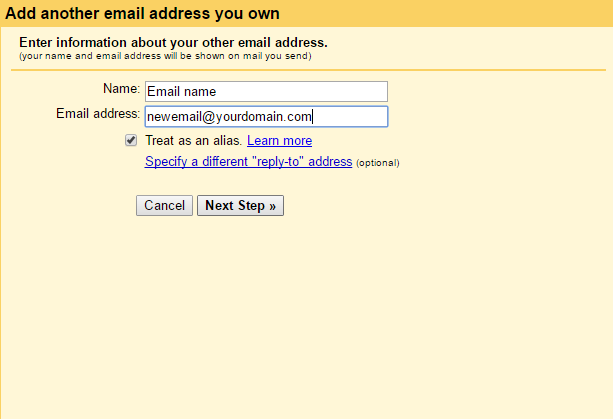
A small window will pop-up. Here, we’ll add what name we want displayed, and our custom domain email. And go to the Next Step.
In the next step, we’re filling in our SMTP credentials.
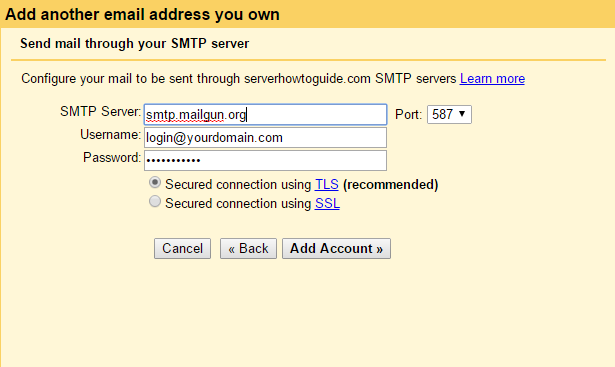
Remember earlier? These are the details that we’re filling out.
- Server: smtp.mailgun.org
- Port: 587
- Username: Your full email, ex. yourlogin@yourdomain.com
- Password: The password that you set earlier
Click on Add Account in the little Gmail popup, and you’ll be prompted with one more page, which asks you for a verification code sent to the email you’ve just added. Which you’ll receive in this Gmail account, since everything should be working now.
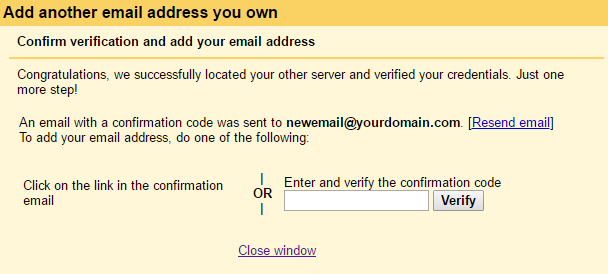
Copy paste that code, click verify, and you’re all set.
Hope this guide was useful, and if you’ve got any questions leave a comment or shoot us a mail.
Enjoy your service of free 10,000 emails on your new custom domain email!
Need an affordable & reliable server to start hosting your sites? Then feel free to check out our Linux KVM Plans, starting at 2GB RAM for only $5!
Subscribe
Login
0 Comments
Oldest