![]()
How to Change Read-Only File System to Read-Write in Ubuntu?
Are you having an error in the “Read-Only File System” while trying to edit a file on your Ubuntu machine? If that is the case, this guide has been designed especially for you.
Ubuntu’s File System, while being easy to understand and use, allows users to change the configuration according to their needs. One such feature is setting the access type for the entire file system. File System can have changeable Read-Write access, but the access cannot be changed with the normal “chmod” command.
The reason is that the File System’s access is defined at the time of mounting. Therefore, getting the error “Read-Only File” means the File System was mounted using Read-only permissions. This guide will explain how to change the File System’s permissions and fix the error “Read-Only File System.”
Table of Contents
Let’s get started.
How to Change Read-Only File System to Read-Write in Ubuntu?
To change a File System from “Read-Only” to “Read-Write,” you must unmount the file system and remount it again while allowing Read-Write access permissions. To do this, you can determine the file system causing the error and then use either the command prompt or the GUI to remount it.
Although the GUI method involves running a Disk-Check/Repair on the file system, it can be useful for various errors involving the File System or Disk in Ubuntu. Let’s discuss these methods in detail.
Remount File System Using Command-Line
To remount the File System using the command, you need first to get the “Device Name” of the File System. To do this, log into your Ubuntu, open up a new terminal session, and run the following command inside.
sudo fdisk -l
This command will check all the disks attached to your Ubuntu machine and list their details on the terminal.
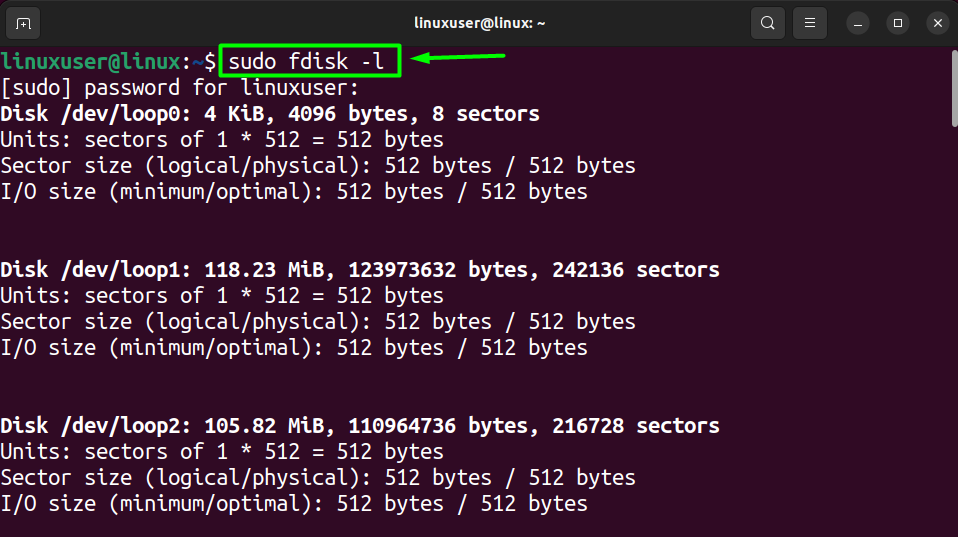
From this list, find the device name of your File System. By default behavior, It should be in the “/dev/sda” tab.
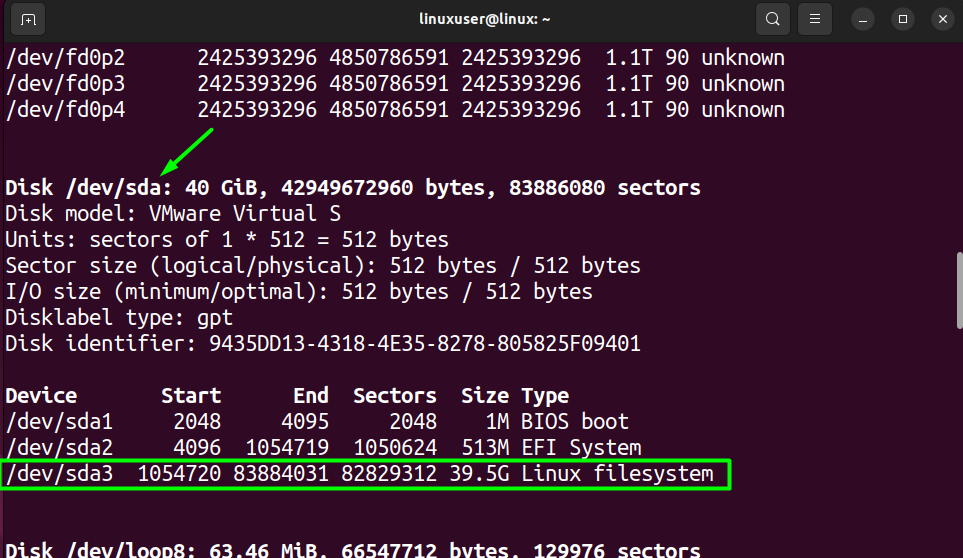
As you can see in the image above, the device name of the File System is “/dev/sda2/” for boot and “/dev/sda3/ for File System root. However, for you, it might be different. Therefore, make sure to use your device name in the upcoming commands.
The next step is to run a “File System Check,” which can sometimes fix the “Read-Only File System” if it is caused by an ambiguity in the File System’s configs file. To do this, run the following command in the terminal.
sudo fsck -f /dev/sda2
Once that is done, the next step is to use the “mount” command with the remount option to remount your File System. The command template is as follows.
sudo mount -o remount,[persimmon] [device] [mount point]
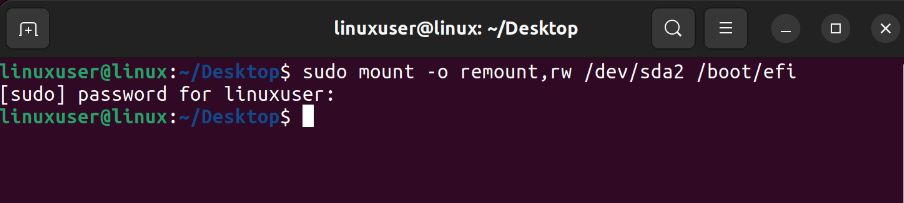
If your File System is separate for boot and File System Root, you should choose the mount point accordingly. Otherwise, you can simply run the following command.
sudo mount -o remount,rw /dev/sda2 /boot/efi
While running these commands, you will be prompted to provide the root user’s password. Therefore, type that in the terminal and then press the “Enter” key.
Once that is done, you must reboot your Ubuntu operating system by typing “reboot” in the terminal.
Additional Information: For “/dev/sda3/,” the command for remounting will be:
sudo mount -o remount,rw /dev/sda3
Use GUI to Run Disk Repair on File System
The second method uses the GUI tools Disks (Available on GNOME) to run a disk repair on the File system. This is helpful in case the error is caused due to corruption in the config file of the File System. Click the “Application” icon on your Ubuntu Desktop to do this.

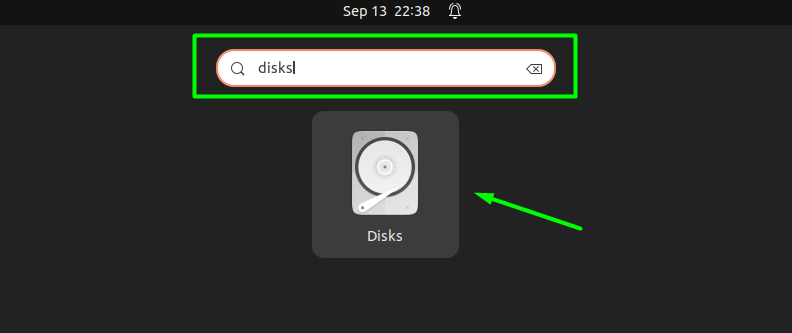
Within the Applications Tray, search for “Disks” and click on its icon to launch the Disk GUI Tool for Ubuntu.
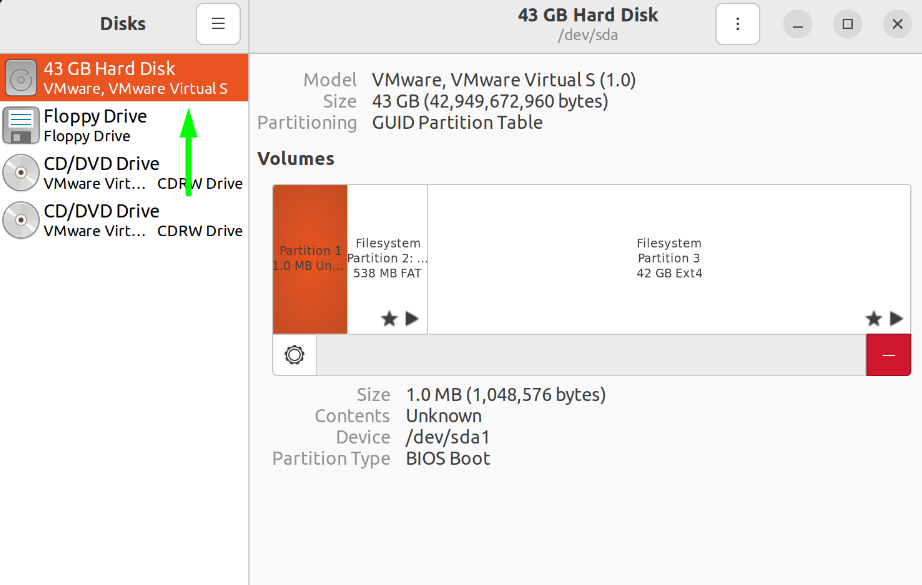
Once inside the Disks Application, choose your primary Hard Disk from the left-side navigation panel to show its different file systems on the Explorer Tab.
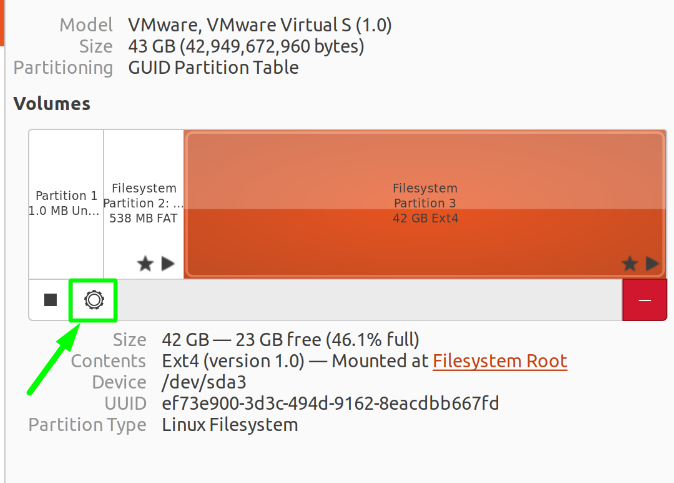
After that, in the right-side explorer screen, click on the File System that you want to repair and then click on the tiny “Gear” Icon.
After that, a new option list will appear, from which you will select “Repair File System.”
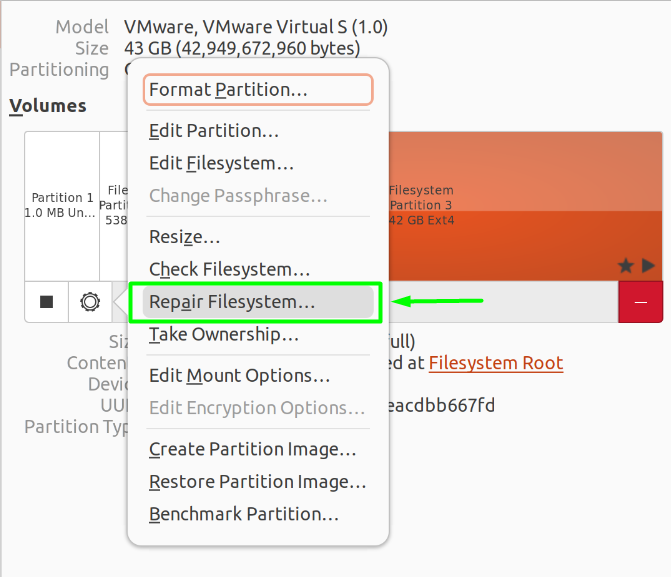
After that, wait for the Disks application to run a complete disk check and repair. Once that is done, reboot your Ubuntu and freely use your File System.
Affordable VPS Hosting With Dracula Servers
Looking for reliable and budget-friendly Virtual Private Server (VPS) hosting? Look no further than Dracula Servers. Dracula Servers offers a range of VPS hosting plans tailored to meet diverse needs. With competitive pricing, robust performance, and a user-friendly interface, it’s an excellent choice for individuals and businesses alike.
Explore the Dracula Servers website to discover hosting solutions that align with your requirements and take your online presence to new heights with their affordable and efficient VPS hosting services.
Visit Dracula Servers and experience reliable VPS hosting without breaking the bank.
What Causes the “Read-Only File System” Error in Ubuntu?
If the File System’s access permission is set to “Read-only,” then making any changes in the files placed within the file system prompts the error “Read-Only File System.” However, there are other reasons for this error, including corrupt or incorrect config files of the File System.
The config file can be corrupted by improper shutdown of your Ubuntu machine. Additionally, removing the portal storage device while the file system is in use can also corrupt the configuration if the file system is placed in a portable storage.
Conclusion
There are numerous reasons why you should change the file system access permission from “Read-Only” to “Read-Write.” However, the most common reason is an unwanted error “Read-Only File” when trying to make changes in the File stored inside your Ubuntu.
To change the access permissions, you must remount the File system using the “mount” command while ensuring that the access permissions are set to “rw” or Read-Write. This is because the access permissions for the File system are different from those for individual files that can be changed using the “chmod” command.
Another solution is to run a “Repair File System” scan on the current file system, as it will change the access permissions while trying to repair any errors related to the File System in Ubuntu. You can run the “Repair” scan using Ubuntu’s “Disks” application.
Check out More Linux Tutorials Here!
Subscribe
Login
0 Comments
Oldest