![]()
How to Fix “Must Run as Root” Ubuntu Error?
“Must Run as Root” is a common error when working with Ubuntu. If you encounter this error and cannot find a solution, you are at the right place.
You often encounter errors when executing commands in Ubuntu or launching certain services. One of these errors is the “Must run as Root” error. This error occurs when the user is trying to run a command or a program without having access privileges for it. This guide will explain all the different ways to solve this error in detail.
Table of Contents
Let’s get started!
How to Fix “Must Run as Root” Ubuntu Error?
To fix the “Must run as root” error, execute the commands with “sudo” privileges. This can be done using the “Sudo” command or by giving “sudo” rights to the user profile executing the command. Moreover, you can add a new user to Linux and give it “sudo” rights.
Apart from this, if the user tries to run the commands through a terminal session, then the user can access the root shell and run commands through it. However, this root shell will not have all of the tools/command-line utilities that do not come as default in your Linux Variation.
Let’s go through all of the solutions one by one!
Run the Commands With “sudo” Access
The first and the easiest solution is to run the command with sudo access. This solution works even if the current user is not added to the “sudo” users or administrator’s list. However, to do this, you will require the password for the root user of the linux machine.
The method to do this is quite simple. Add the keyword “sudo” at the beginning of the command you are trying to execute. For example, if you try to update the “apt” packages list in Ubuntu by using the command.
apt update
The following error displays on the terminal as a result of executing the above command.
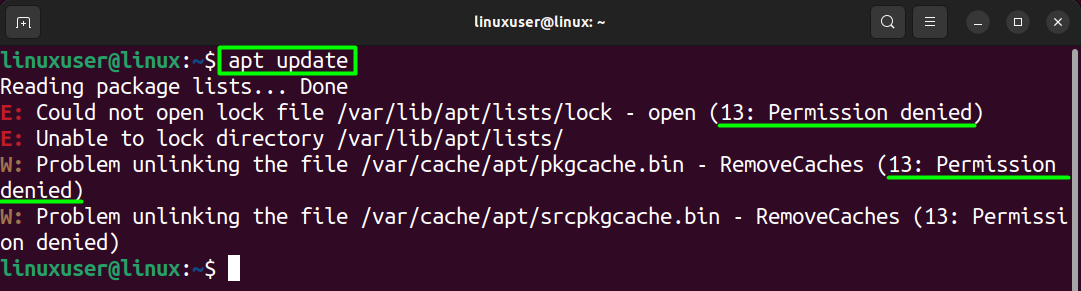
As you can see in the output, the error code is “13: Permission Denied.” To fix this, add the keyword “sudo” at the start of the command so the command becomes “sudo apt update”. This time, when this command is executed, the terminal will ask you for the “password” for the root user.
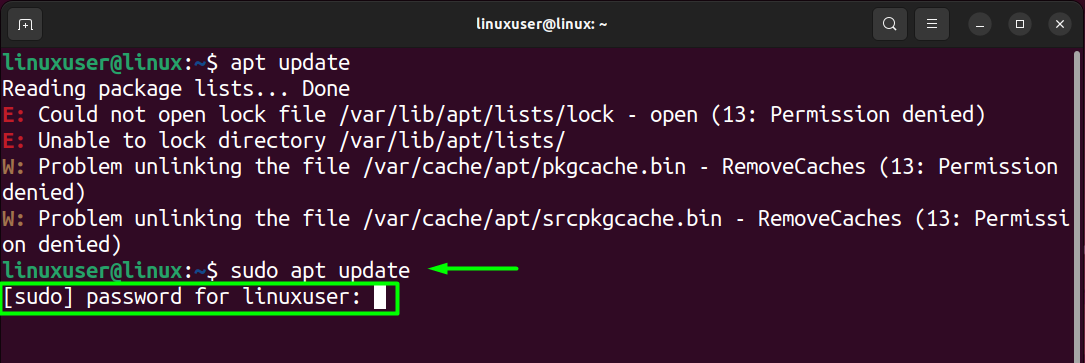
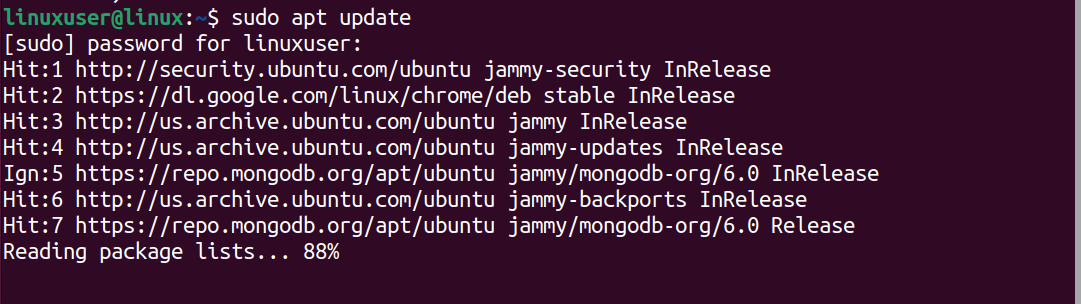
Type the password for the root user and press the “Enter” key, and the command will start to execute without any errors.
One thing to notice here is that different versions of Linux show a different error message for this error. As you can see in the screenshots above, in Ubuntu, you get a “Permission Denied”the message is “Permission Denied,” but in Kali Linux, the Error message says, “Please run as root.”
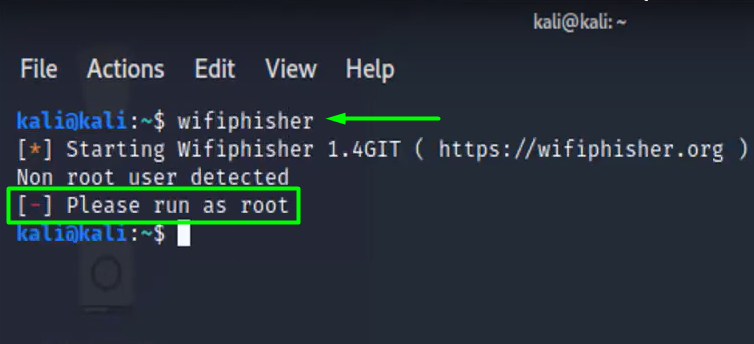
Despite the error message, the solution is the same for different linux distributions, which is to provide root access or “sudo” access to the command.
Switch to Root User Profile
If you are looking for a solution, you do not have to type “sudo” behind every command you run, and also, do not provide sudo user access rights to any user added to your Linux. Then, you can simply switch to the super user profile in the terminal.
To do this, open up a new terminal session on your Linux and type the following command inside it.
sudo su
Like the previous method, the terminal will ask you about the root user’s password when executing this command.

Therefore, type the root user’s password and press the “Enter” key. Once you do that, you will see that the user’s name inside the terminal has been changed to “root.”

However, be careful when running commands in this mode. Since you are not manually adding the “sudo” at the beginning of the commands, each command will be executed with the most rights. Any command that changes the system’s configuration can be executed without prompts, which can prove fatal without care.
Switching the Shell to Root Shell
Another method to grant root access to commands is by turning your terminal shell into a root shell. This also removes the need to specify the root privileges for every command. To do this, open a terminal session in your Linux and type the following command.
sudo -i
Running this command will ask for the root’s password. Once you have entered the password, your terminal shell will become a root shell with “root” as its user.

However, it seems a little similar to the previous method, but it isn’t. Looking at the directory displayed on the terminal, you are inside the root directory. You were inside the root user’s home directory in the previous method.
Adding Root Access in PHP Deployment
If you are trying to deliver a PHP application on Ubuntu or any other Linux and are facing the error “Must Run as Root.” Then, check the error statement to determine which file has this error, as you will need to configure that file. To demonstrate this, you can check out the screenshot below.

This error occurs when trying to deploy “provision” on myhost.com. To fix this, you have two different solutions. The first is to change the host’s configuration to “myhost.com”. The old configuration includes the following code:
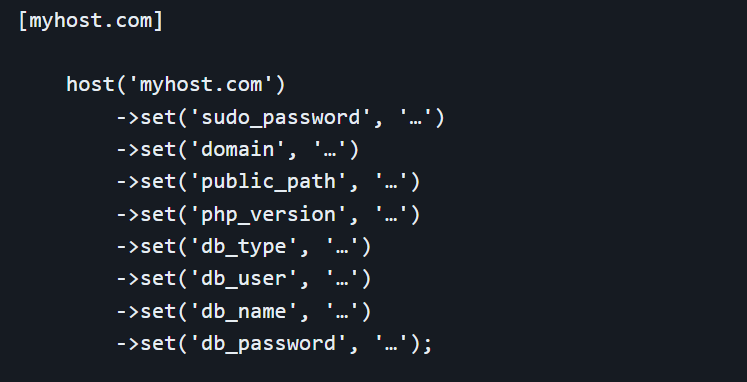
You need to add the following statement inside this configuration:
->set('become', 'root')Once done, try reloading the host’s configuration and check if the error is gone. Otherwise, while deploying “provision,” use the following command.
dep provision -o remote_user=ubuntu -o become=root
This command will ensure root access is available before the file is deployed.
Enable the Root User in Ubuntu
If you are working on Ubuntu, then chances are that the root user access is locked. This is a fail-safe mechanic placed inside Ubuntu to ensure that no command damages the system or configuration files. However, if you can switch the user to root by using any of the above methods, then most likely, the root user is already enabled.
However, to enable the root user on a fresh installation of Ubuntu, open up a terminal session and type in the following command.
sudo passwd root
The terminal will then ask you to type a password for the root user or a new password in case the root user already has a password:
After typing the new password and confirming it, you can easily switch to the root user using any of the above mentioned methods. However, if you feel unsafe and think that having the root user enabled can eventually harm your OS. Then, you can easily disable the root user by typing the following command inside a terminal.
sudo passwd -dl root
Once you have executed this command, type in the password for the root user, and you will get the following message on the terminal.
You have successfully locked the root user by removing its password.
Add a User To the Root Group
The last fix for this error is to provide root access to the user trying to run the commands. You must change the user account details with the “usermod” command to do this. This can only be done with the help of a root user or root access.
To do this, open up a terminal and type the following command. However, change the [username] with the user’s name to which you want to give root access.
sudo usermod -aG root [username]
Once this command is executed, you will be asked to provide the root user’s password. Afterward, you must verify that the user has been added to the root group. To verify this, use the following command template.
groups [username]
If you were to check the groups of the user “ubuntu” after modifying its access using the usermod command, you would get the following output.
With this, you can easily run commands using the user “ubuntu,” which now has root access.
Affordable VPS Hosting With Dracula Servers
Looking for reliable and budget-friendly Virtual Private Server (VPS) hosting? Look no further than Dracula Servers. Dracula Servers offers a range of VPS hosting plans tailored to meet diverse needs. With competitive pricing, robust performance, and a user-friendly interface, it’s an excellent choice for individuals and businesses alike.
Explore the Dracula Servers website to discover hosting solutions that align with your requirements and take your online presence to new heights with their affordable and efficient VPS hosting services.
Visit Dracula Servers and experience reliable VPS hosting without breaking the bank.
Conclusion
To fix the “Must Run as Root” Error in Linux, you must provide the respective command or application with root access. If you are trying to execute a command that results in this error, the quickest fix is to add the keyword “sudo” at the start of the command.
However, if you have to run multiple commands one after another and all require root access, adding “sudo” at the beginning of each command might not be a smart approach. In such cases, switching to the root user or becoming the root user is better.
Otherwise, you can simply add the user trying to execute the commands into the superuser group “root” with the help of the “usermod” command with the flags “-aG.”
If you are trying to deploy a PHP application on Ubuntu or any other Linux distribution, figure out the file causing the error. Once found, use the flag “-o become=root” while deploying the file. However, if it is being deployed to a host, then head to the host’s configuration and add the line “->set(‘become’, ‘root’).”
Check out More Linux Tutorials Here!
Subscribe
Login
0 Comments
Oldest