![]()
How to Install Anaconda Distribution on Ubuntu 18.04

In this tutorial we’ll install the latest version of Anaconda Distribution with Python 3.7 on a machine running Ubuntu 18.04. We’ll also show you how to update Anaconda and how to uninstall it from your machine. It is commonly used for scientific computing, predictive analytics and large-scale data processing. Shipping with over 1,400 data science packages, it’s an industry standard for developing, testing, and training on a single machine.
Anaconda is a very popular open-source package manager, environment manager and distribution of Python and R. It’s the most popular data science and machine learning platform
Get a High RAM VPS at Entry-level Pricing
Starting with 2GB RAM at $6.99/month
Take your pick from our KVM VPS that offer a generous amount of RAM at an affordable price. We've got 5 plans for you to choose from, our cheapest featuring 2GB RAM at $6.99/mo.
[Main Features] - SSD Drives
- KVM Virtualization
- 1Gbps Shared Uplink
- Location: Chicago, IL
Pick one of our KVM plans
Table of Contents
Step 1 – Download the Anaconda Install Script
We’ll install Anaconda via the bash installation script made available on the Anaconda website.
To locate the script for the latest version of Anaconda, visit the Anaconda Downloads Page and retrieve the first download link – either from the big Download button or the link under it, corresponding to your preferred Python version.
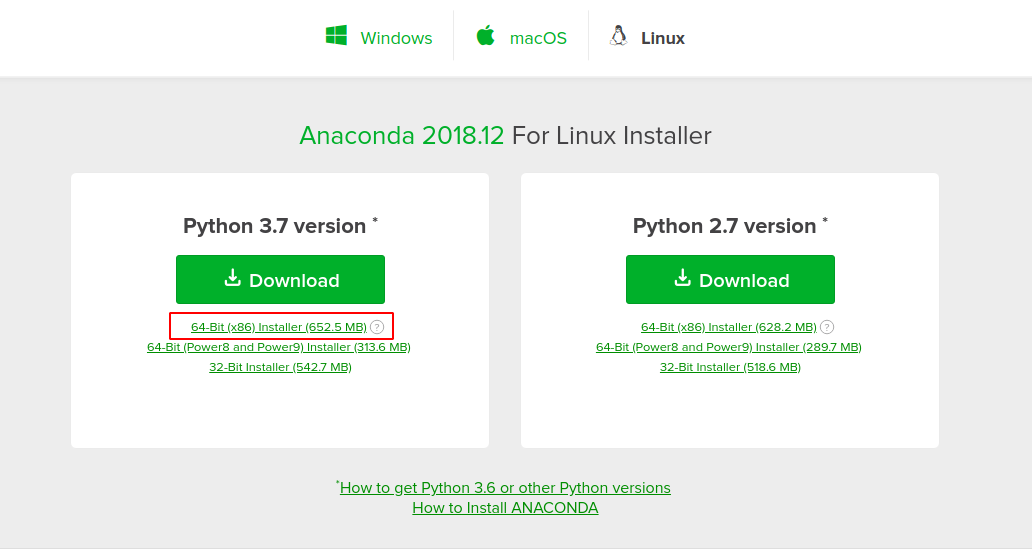
NOTE: As you can see, at the time of writing, the latest version is
Anaconda 2018.12. Do keep this in mind if you intend on copy pasting the following commands.
To keep things clean, let’s change our directory to /tmp and download the script there. In our example, I’ll be downloading Anaconda 2018.12 with Python 3.7.
$ cd /tmp
$ wget https://repo.continuum.io/archive/Anaconda3-2018.12-Linux-x86_64.sh
Step 2 – Verify the Installer Script’s Integrity
Once the script has been downloaded, it’s recommended that we check the file’s integrity by verifying the script’s hash via the sha256sum command, after which we’ll check the hash that the command returns against the hash shown on the Anaconda website. Just follow these steps:
While still in the /tmp directory, run the sha256sum command to verify your script’s checksum. In my case, when checking the latest version at the time of writing, the command looks like this:
$ sha256sum Anaconda3-2018.12-Linux-x86_64.shThe following is my output:
1019d0857e5865f8a6861eaf15bfe535b87e92b72ce4f531000dc672be7fce00 Anaconda3-2018.12-Linux-x86_64.shNow it’s time to check against the hash shown in the Anaconda Docs, under hashes for Python 3, for my version.
To do this, visit the Anaconda with Python 3 on 64-bit Linux page, and find the version you’ve downloaded.
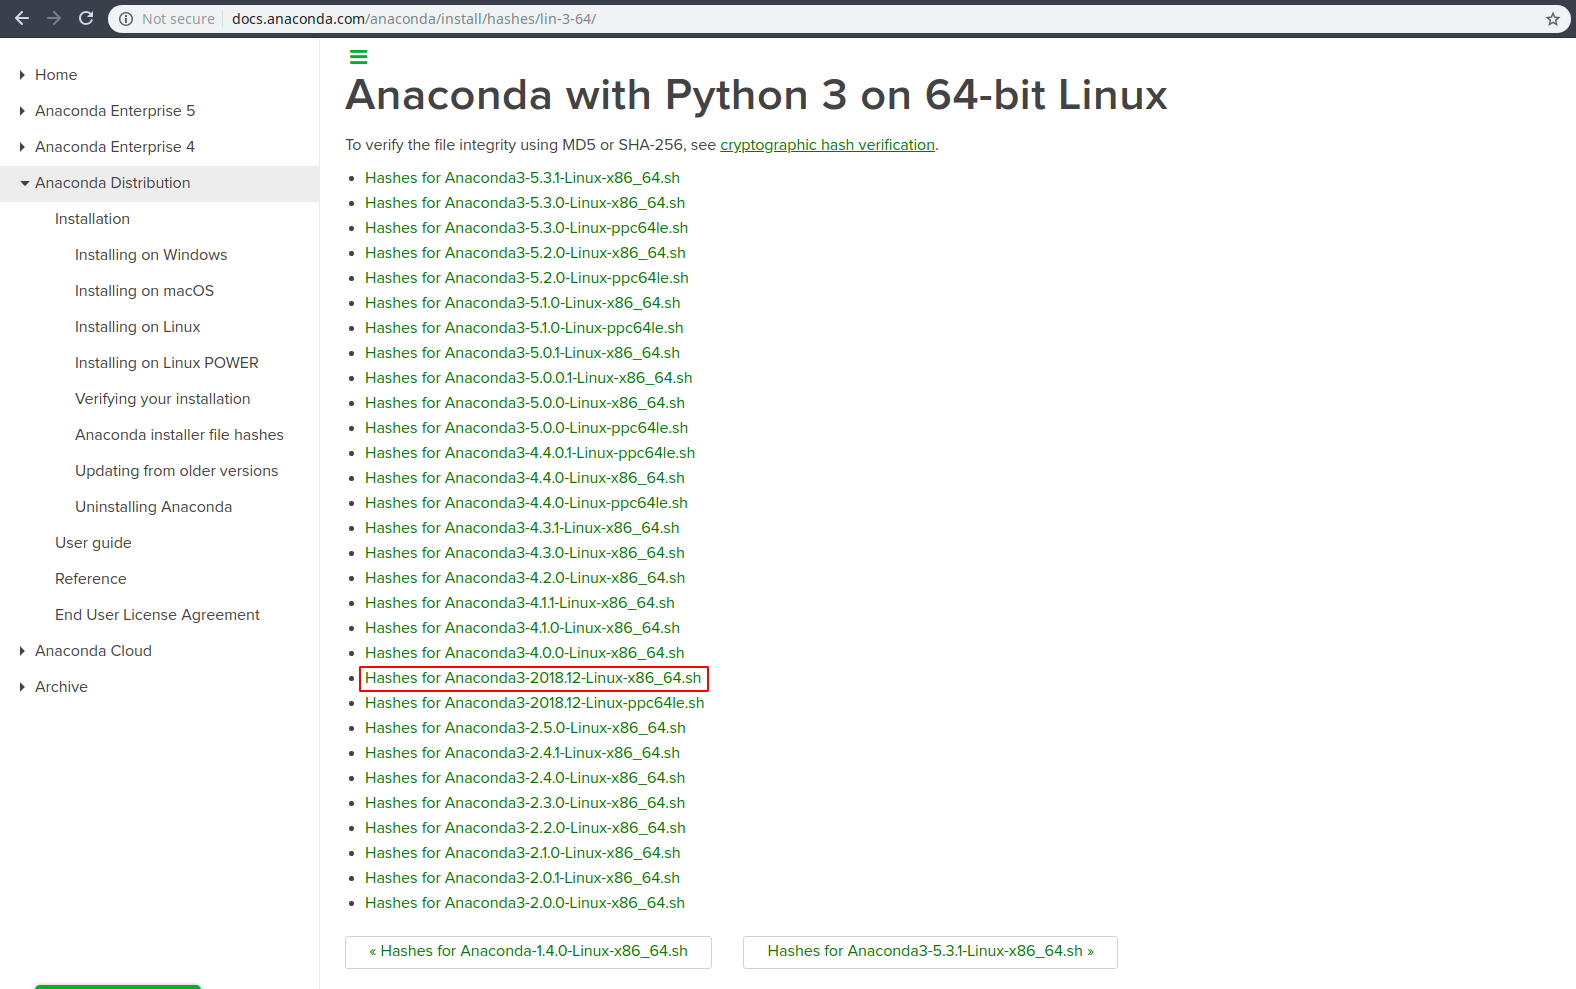
In my case, the latest version is Anaconda3-2018.12-Linux-x86_64.sh.
When you’ve located the link to the Hashes Page for your version, click it and you’ll be presented with some data regarding the script you downloaded, among which is the script’s sha256.
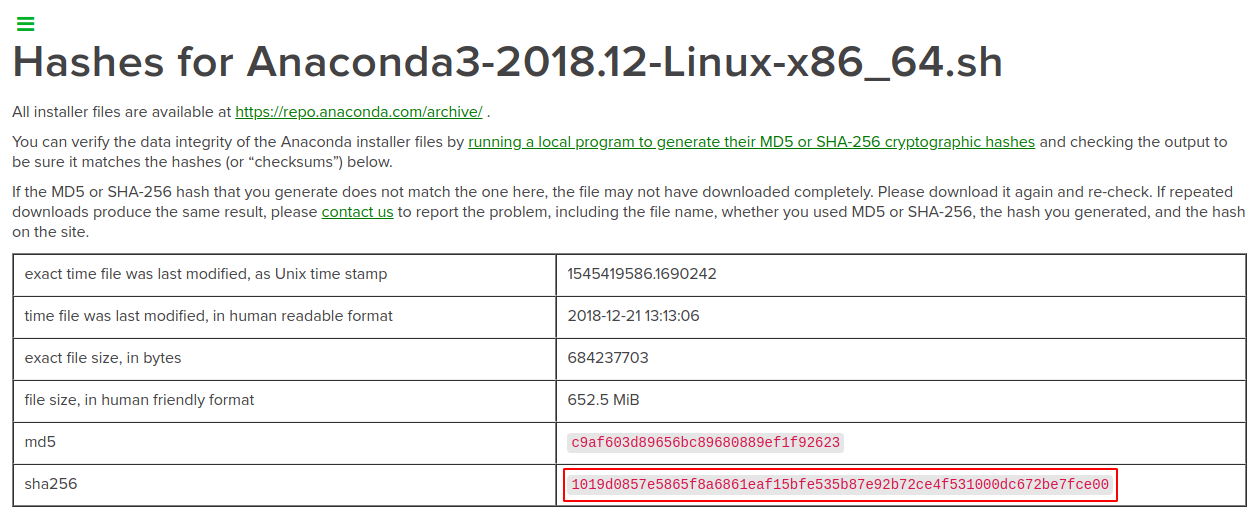
The hash displayed matches the hash in the command-line output, when I ran the sha256sum command, so I can confirm the integrity of the Anaconda installer that I’ve downloaded and proceed with the installation.
Step 3 – Run the Anaconda Installer Script
To start the Anaconda install process, run the installer script:
$ bash Anaconda3-2018.12-Linux-x86_64.shThe initial output will ask you to review the license agreement. You can press ENTER to read through the agreement.
Welcome to Anaconda3 2018.12

In order to continue the installation process, please review the license
agreement.
Please, press ENTER to continue
>>>
At the end of the agreement, you’ll reach a prompt asking you to type yes or no with regards to accepting the license terms.
If you type yes, you’ll then be informed where the Anaconda default install location is, and if you’d like to change it:
Anaconda3 will now be installed into this location:
/root/anaconda3

  - Press ENTER to confirm the location
  - Press CTRL-C to abort the installation
  - Or specify a different location below

[/root/anaconda3] >>>
If you’d like to install it in the default location just press enter and the install process will commence.
The installation may take a while, depending on your machine and internet connection, as Anaconda comes with over 1400 packages.
After the packages are installed, you’ll be presented with the following prompt.
Do you wish the installer to initialize Anaconda3
in your /root/.bashrc ? [yes|no]
[no] >>>
If you want to use the conda command, then type yes and press enter.
You’ll be then presented by another prompt confirming the installation of Anaconda on your Ubuntu machine, and another one asking if you’d like to install VSCode.
Initializing Anaconda3 in /root/.bashrc
A backup will be made to: /root/.bashrc-anaconda3.bak


For this change to become active, you have to open a new terminal.

Thank you for installing Anaconda3!

===========================================================================

Anaconda is partnered with Microsoft! Microsoft VSCode is a streamlined
code editor with support for development operations like debugging, task
running and version control.

To install Visual Studio Code, you will need:
  - Administrator Privileges
  - Internet connectivity

Visual Studio Code License: https://code.visualstudio.com/license

Do you wish to proceed with the installation of Microsoft VSCode? [yes|no]
>>>
Anaconda is not dependent on Visual Studio Code. You can choose depending on your preference. To find out more about VSCode, you can check out their website.
[Example] Running the Anaconda Installer Script
The enable the conda command, run the following command to load the new PATH environment variable that Anaconda just added earlier:
$ source ~/.bashrcStep 4 – Verify the Anaconda Installation
To verify that Anaconda, you can use the conda command, and the output will display information on the current conda install:
$ conda infoThe output will look something like this:
     active environment : base
    active env location : /root/anaconda3
            shell level : 1
       user config file : /root/.condarc
 populated config files :
          conda version : 4.5.12
    conda-build version : 3.17.6
         python version : 3.7.1.final.0
       base environment : /root/anaconda3  (writable)
           channel URLs : https://repo.anaconda.com/pkgs/main/linux-64
                          https://repo.anaconda.com/pkgs/main/noarch
                          https://repo.anaconda.com/pkgs/free/linux-64
                          https://repo.anaconda.com/pkgs/free/noarch
                          https://repo.anaconda.com/pkgs/r/linux-64
                          https://repo.anaconda.com/pkgs/r/noarch
                          https://repo.anaconda.com/pkgs/pro/linux-64
                          https://repo.anaconda.com/pkgs/pro/noarch
          package cache : /root/anaconda3/pkgs
                          /root/.conda/pkgs
       envs directories : /root/anaconda3/envs
                          /root/.conda/envs
               platform : linux-64
             user-agent : conda/4.5.12 requests/2.21.0 CPython/3.7.1 Linux/4.15.0-22-generic ubuntu/18.04 glibc/2.27
                UID:GID : 0:0
             netrc file : None
           offline mode : False
That’s it, you have now successfully installed Anaconda on your Ubuntu 18.04 machine.
Updating Anaconda
When you want to update Anaconda you just have to run two commands:
- First update the
condatool:$ conda update condaYou’ll be prompted to confirm you want the update. If you wish to go through with it, then type
yandENTERto confirm. - Once
condais updated, use the command to update Anaconda:$ conda update anacondaWhen prompted to confirm, type
yandENTERto confirm the update.
Uninstalling Anaconda
To uninstall Anaconda from your Ubuntu 18.04 machine, follow these steps:
- Remove the entire Anaconda installation directory. The command may very, depending where you chose to install it.
$ rm -rf ~/anaconda3 - Remove the contents added by Anaconda to
~/.bashrc:# added by Anaconda3 2018.12 installer # >>> conda init >>> # !! Contents within this block are managed by 'conda init' !! __conda_setup="$(CONDA_REPORT_ERRORS=false '/root/anaconda3/bin/conda' shell.bash hook 2> /dev/null)" if [ $? -eq 0 ]; then \eval "$__conda_setup" else if [ -f "/root/anaconda3/etc/profile.d/conda.sh" ]; then . "/root/anaconda3/etc/profile.d/conda.sh" CONDA_CHANGEPS1=false conda activate base else \export PATH="/root/anaconda3/bin:$PATH" fi fi unset __conda_setup # <<< conda init <<< - Remove Anaconda related hidden files and folders in your home directory:
$ rm -rf ~/.condarc ~/.conda ~/.continuum
Conclusion
Well done. You’ve successfully installed Anaconda on your Ubuntu 18.04 and also learned how to update or uninstall it. You can now hopefully work on your data science projects.
If you’ve encountered any issues when following this tutorial, feel free to get in touch with us via the comment section or by contacting us on email or our social channels.
Get a High RAM VPS at Entry-level Pricing
Starting with 2GB RAM at $6.99/month
Take your pick from our KVM VPS that offer a generous amount of RAM at an affordable price. We've got 5 plans for you to choose from, our cheapest featuring 2GB RAM at $6.99/mo.
[Main Features] - SSD Drives
- KVM Virtualization
- 1Gbps Shared Uplink
- Location: Chicago, IL
Pick one of our KVM plans
Subscribe
Login
0 Comments
Oldest