![]()
Install and Configure FreeRADIUS & daloRADIUS on Debian 9 with MySQL
What is FreeRADIUS?
FreeRADIUS is very popular open-source RADIUS server. It’s been developed since the dial-up era, and it’s still going strong today, being used by a great deal of companies around the world, including many Fortune 500 companies.
FreeRADIUS supports all of the authentication protocols and offers the AAA protocols ( Authentication, Authorization, and accounting). It’s typically used for managing users and keeping track of bandwidth usage, and it’s a popular solution for networking software such as OpenVPN, SoftEther, Squid Proxies and WiFi hotspots.
In this tutorial we’ll install FreeRADIUS on a machine running Debian 9. We’ll also configure it to use MySQL, and we’ll install daloRADIUS which is an open-source control panel for managing your RADIUS server.
Should you want to use a different operating system, do visit one of our other tutorials:
- Install and Configure FreeRADIUS on Ubuntu 18.04 with MySQL
- Install & Configure FreeRADIUS on CentOS 7 with MySQL / MariaDB
Table of Contents
How to set up FreeRADIUS?
We present 2 methods to set up your RADIUS server:
1. Manual FreeRADIUS Install – By following this tutorial you’ll be setting up FreeRADIUS on a Debian 9 machine. Along with other configurations you may need to make, this may take 30 minutes if you’re familiar with FreeRADIUS to several hours if you’re just starting.
2. Instant FreeRADIUS Server Deployment – You can deploy your server instantly and it will have FreeRADIUS + MySQL + daloRADIUS set up in less than 5 minutes, by using our FreeRADIUS KVM Servers. Should you also need it, you can also opt for our priority support addon which will ensure that you receive our assistance with any RADIUS related issue from then on.
Method 1 – Instant FreeRADIUS Server Deloyment
If you need to set up RADIUS servers fast and don’t have time to learn the intricacies of the software, then you can rely on our FreeRADIUS Server Plans. All you have to do is choose one of the available packages, and one of our available addons if needed, and the server will be set up in less than 5 minutes. After which, you’ll see all your related credentials the first time you SSH onto the server.
Pre-Installed FreeRADIUS Servers
Automatic FreeRADIUS 3 + daloRADIUS Set Up
Instantly deploy machines with FreeRADIUS + MySQL + daloRADIUS GUI Panel already set up, receive the credentials and take over from there! You also get our custom WHMCS Module to help you manage it from our dashboard.
Pick one of our FreeRADIUS KVM plans
P.S. We're available for hire, if you need help. Click here to contact us.
Method 2 – Manual FreeRADIUS Install
Should you choose to install manually, then we’ve got you covered. Should you encounter any issues with following this tutorial, then hit us up and we’ll try to help solve the problem as soon as we can.
Without further ado, let’s get to setting up our RADIUS server.
Install LAMP Stack on Debian 9
NOTE: If you already have LAMP Stack installed on your Dabian 9 machine, or don’t want to install the daloRADIUS FreeRADIUS GUI, then feel free to skip to the FreeRADIUS installation
Before anything else, make sure you update & upgrade your system.:
$ apt update
$ apt upgrade
Install Apache
$ apt install apache2Apache should be running right away. To check it’s status run the following:
$ systemctl status apache2
● apache2.service - The Apache HTTP Server
Loaded: loaded (/lib/systemd/system/apache2.service; enabled; vendor preset:
Active: active (running) since Thu 2019-05-16 19:05:47 UTC; 8s ago
Main PID: 29784 (apache2)
CGroup: /system.slice/apache2.service
├─29784 /usr/sbin/apache2 -k start
├─29786 /usr/sbin/apache2 -k start
└─29787 /usr/sbin/apache2 -k start
May 16 19:05:47 debian_radius systemd[1]: Starting The Apache HTTP Server...
May 16 19:05:47 debian_radius apachectl[29773]: AH00558: apache2: Could not reli
May 16 19:05:47 debian_radius systemd[1]: Started The Apache HTTP Server.
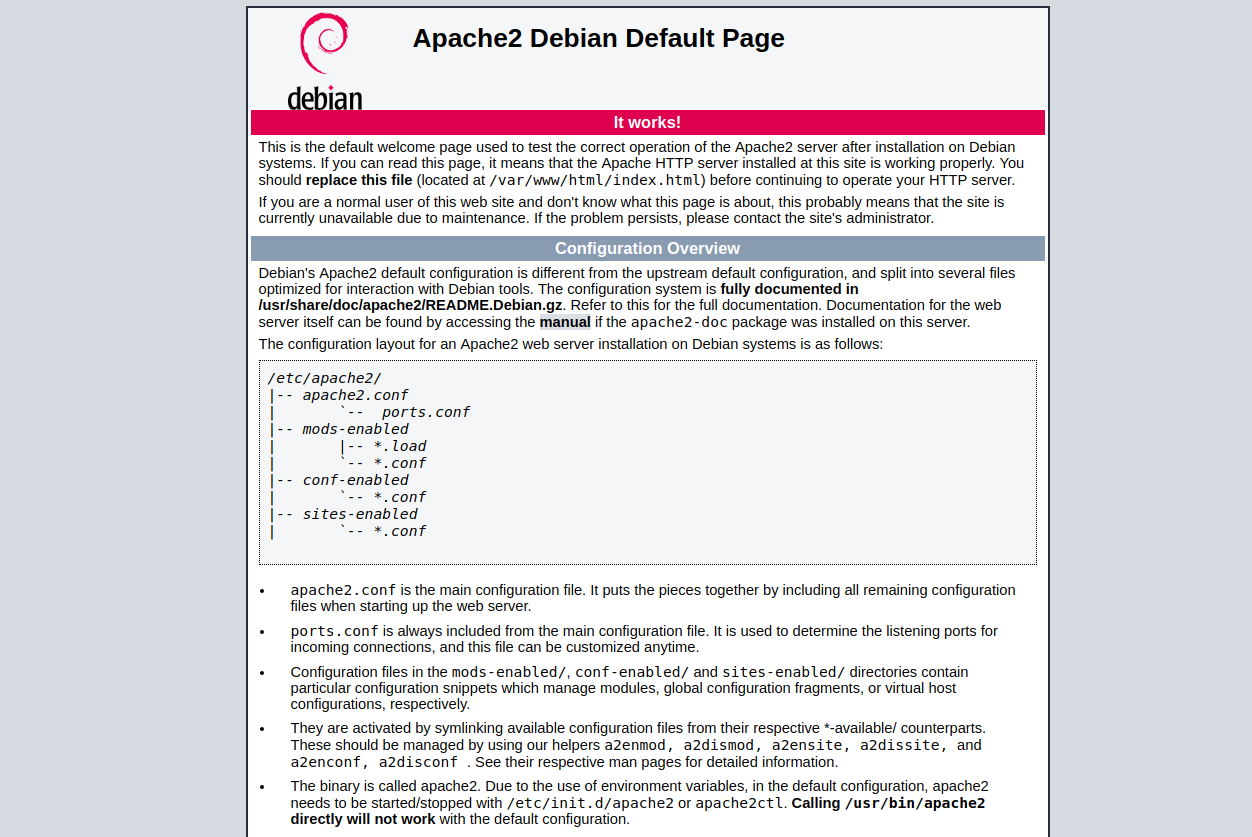
...You can also check that Apache is running by visiting http://your_server_ip_or_domain, and should see something like the following screenshot:
Install MySQL on Debian 9
Install MySQL by running the following command:
$ apt install mysql-serverMySQL comes with a script that helps you change some insecure defaults, such as:
- setting root password
- removing anonymous users
- disallowing remote login
- removing test database
Run the script with the command:
$ mysql_secure_installationWe recommend you answer the prompts as follows.
First press enter when prompted for the root password:
Enter current password for root (enter for none): EnterConfirm that you want to set the root password and then set a complicated password for MySQL.
Setting the root password ensures that nobody can log into the MariaDB
root user without the proper authorisation.

Set root password? [Y/n] Y
New password: S0me_Str0ng_Passw0rd
Re-enter new password: S0me_Str0ng_Passw0rd
Password updated successfully!
Reloading privilege tables..
 ... Success!
Confirm removing anonymous users.
Remove anonymous users? [Y/n] y
 ... Success!
Disallow root login remotely.
Disallow root login remotely? [Y/n] y
 ... Success!
Remove the test database.
Remove test database and access to it? [Y/n] y
 - Dropping test database...
 ... Success!
 - Removing privileges on test database...
 ... Success!
Reload privilege tables.
Reload privilege tables now? [Y/n] y
 ... Success!

Cleaning up...
At this point, MySQL should be successfully set up on your Debian 9 machine.
Install PHP on Debian 9
Run the following command to install PHP and common extensions:
$ apt install php libapache2-mod-php php-mysql php-common php-gd php-mbstring php-curl php-xmlNow configure Apache so it processes PHP content. Do this by editing the file /etc/apache2/mods-available/dir.conf in your favorite text editor:
$ nano /etc/apache2/mods-available/dir.confTo configure Apache to process PHP, add index.php as the first value of DirectoryIndex.
        DirectoryIndex index.php index.html index.cgi index.pl index.php index.$


# vim: syntax=apache ts=4 sw=4 sts=4 sr noet
Save and close the file when you’re done.
Finally restart Apache:
$ systemctl restart apache2Install FreeRADIUS on Debian 9
Install FreeRADIUS and it’s dependencies:
$ sudo apt install -y freeradius freeradius-utils freeradius-mysqlEnable FreeRADIUS so it runs after you restart the system:
$ systemctl enable freeradiusFor now stop FreeRADIUS so you can run it in debug mode and check if everything’s running correctly:
$ systemctl stop freeradiusNext, run FreeRADIUS in debug mode:
$ freeradius -XIf everything’s working OK, the output should be something like this:
...
listen {
  	type = "acct"
  	ipv6addr = ::
  	port = 0
   limit {
   	max_connections = 16
   	lifetime = 0
   	idle_timeout = 30
   }
}
Listening on auth address 127.0.0.1 port 18120 bound to server inner-tunnel
Listening on auth address * port 1812 bound to server default
Listening on acct address * port 1813 bound to server default
Listening on auth address :: port 1812 bound to server default
Listening on acct address :: port 1813 bound to server default
Listening on proxy address * port 37669
Listening on proxy address :: port 58519
Ready to process requests
Log into the MySQL console as root:
$ mysql -u root -p
Enter Password: S0me_Str0ng_Passw0rd
Create a database and user for RADIUS:
create database radius;
grant all privileges on radius.* to radius@localhost identified by 'str0ng_radius_p@ssw0rd';
flush privileges;
quit
Next, import the FreeRADIUS database schema that shipped with FreeRADIUS – it’s located at /etc/freeradius/3.0/mods-config/sql/main/mysql/schema.sql:
$ mysql -u root -p radius < /etc/freeradius/3.0/mods-config/sql/main/mysql/schema.sql
Enter Password: S0me_Str0ng_Passw0rd
Enable the FreeRADIUS SQL module by creating a symbolic link to the sql module from /etc/freeradius/3.0/mods-available/ to mods-enabled:
$ ln -s /etc/freeradius/3.0/mods-available/sql /etc/freeradius/3.0/mods-enabled/Open /etc/freeradius/3.0/mods-available/sql with your favorite editor…
$ nano /etc/freeradius/3.0/mods-available/sqlChange the following values, as well as uncommenting them by removing the # sign at the beginning of their lines:
dialect = "mysql"

server = "localhost"
port = 3306
login = "radius"
password = "str0ng_radius_p@ssw0rd"

radius_db = "radius"
Look for the line locating read_clients = yes. You’ll probably see that it starts with a # sign, which means that it’s commented out. Delete the # sign to enable FreeRADIUS to read clients from the database. It should look like this after you’re done:
...
        # Set to 'yes' to read radius clients from the database ('nas' table)
        # Clients will ONLY be read on server startup.
        read_clients = yes
...
Save and exit the file when you’re done.
Change the ownership and group for the SQL module to freerad with the following command:
$ chown -h freerad.freerad /etc/freeradius/3.0/mods-enabled/sqlRestart FreeRADIUS:
$ systemctl restart freeradiusInstall daloRADIUS on Debian 9
daloRADIUS is an open-source, advanced RADIUS web control panel. It provides an easy interface for managing users, graphical reporting, accounting, a billing engine, and it integrates with Google Maps. Common uses for daloRADIUS are managing ISP deployments and hotspots.
Prerequisites
First, install some required PHP extensions:
$ apt install php-mail php-mail-mime php-pearInstall the PHP Pear DB library:
$ pear install DBInstall daloRADIUS
Download the latest version of daloRADIUS from the daloRADIUS Project page on SourceForge.
The current latest version of daloRADIUS available there is daloRADIUS 0.9-9. To download it run the following command:
$ cd
$ wget http://liquidtelecom.dl.sourceforge.net/project/daloradius/daloradius/daloradius0.9-9/daloradius-0.9-9.tar.gz
Once downloaded, extract the archive using the following command:
$ tar -xzf daloradius-0.9-9.tar.gzAnd move the daloRADIUS folder to the root directory of your server:
$ mv daloradius-0.9-9 /var/www/html/daloradiusAdd the daloRADIUS SQL schema:
$ mysql -u root -p radius < /var/www/html/daloradius/contrib/db/fr2-mysql-daloradius-and-freeradius.sql
$ mysql -u root -p radius < /var/www/html/daloradius/contrib/db/mysql-daloradius.sql
Change the owner of the daloRADIUS configuration files:
$ chown -R www-data:www-data /var/www/html/daloradiusChange the permissions of the main daloRADIUS configuration file to 664:
$ chmod 664 /var/www/html/daloradius/library/daloradius.conf.phpOpen the daloRADIUS configuration file and change the database connection parameters as follows:
$ nano /var/www/html/daloradius/library/daloradius.conf.php...
$configValues['DALORADIUS_VERSION'] = '0.9-9';
$configValues['FREERADIUS_VERSION'] = '2';
$configValues['CONFIG_DB_ENGINE'] = 'mysqli';
$configValues['CONFIG_DB_HOST'] = 'localhost';
$configValues['CONFIG_DB_PORT'] = '3306';
$configValues['CONFIG_DB_USER'] = 'radius';
$configValues['CONFIG_DB_PASS'] = 'str0ng_radius_p@ssw0rd';
$configValues['CONFIG_DB_NAME'] = 'radius';
...Do make sure you’ve changed $configValues['CONFIG_DB_ENGINE'] = 'mysql'; to $configValues['CONFIG_DB_ENGINE'] = 'mysqli';, or else you may get an error when trying to log into daloRADIUS:
Error Message: DB Error: extension not foundSave and close the file when you’re finished, and restart freeRADIUS:
$ systemctl restart freeradiusVerifying daloRADIUS Installation
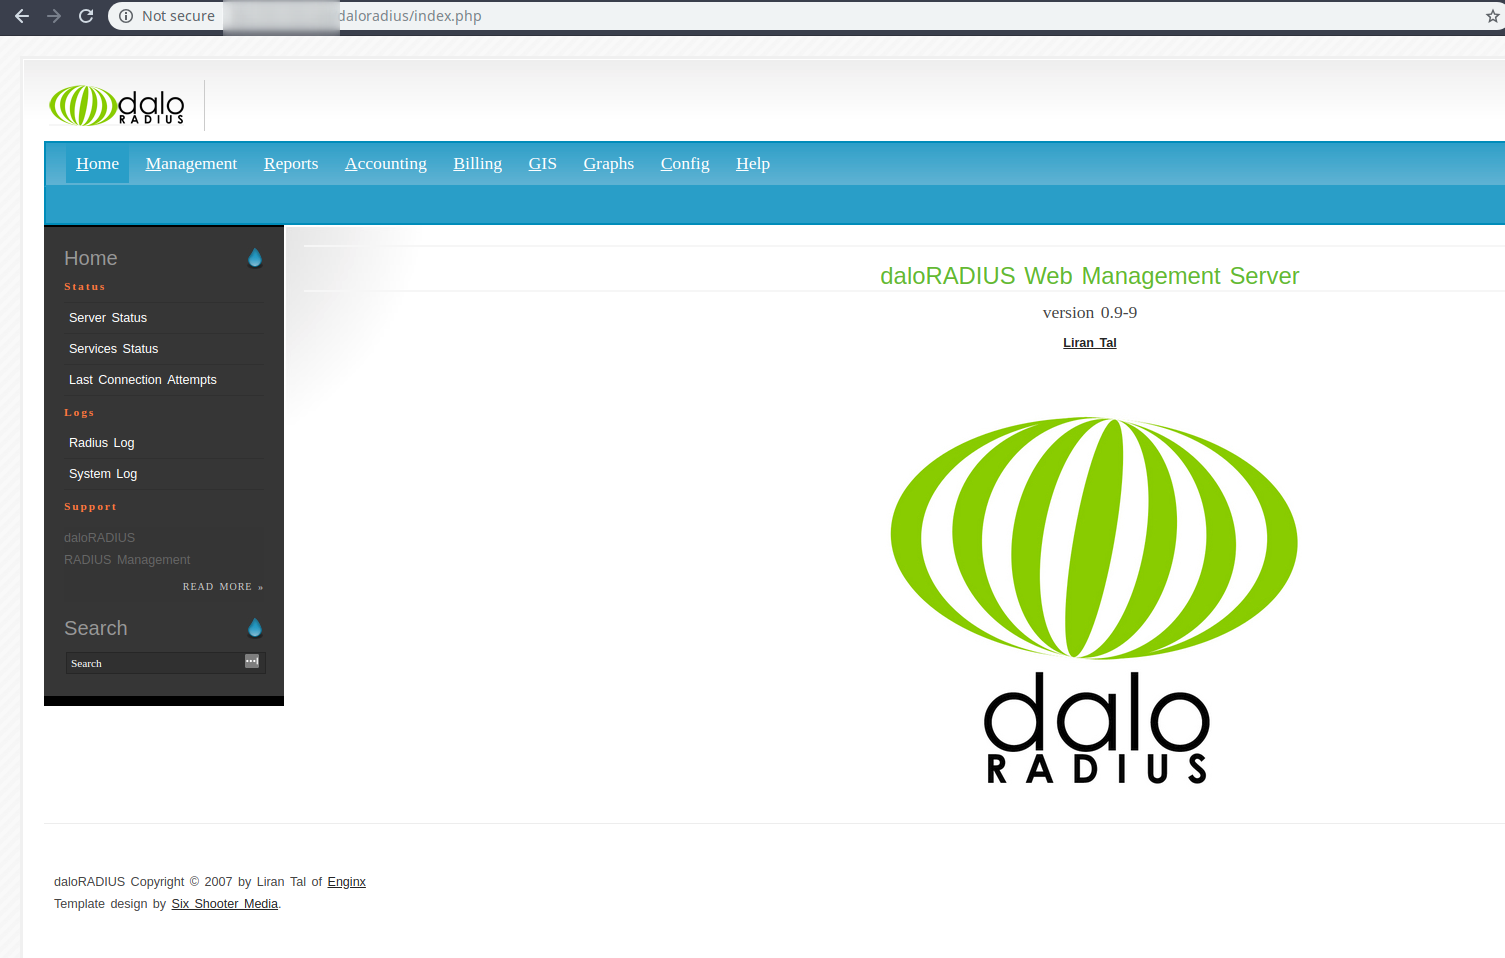
At this point daloRADIUS should be installed on your Debian 9 machine.
To test and use it, visit http://domain_or_server_IP/daloradius in your browser. In my case, I’m visiting:
http://my_server_ip/daloradius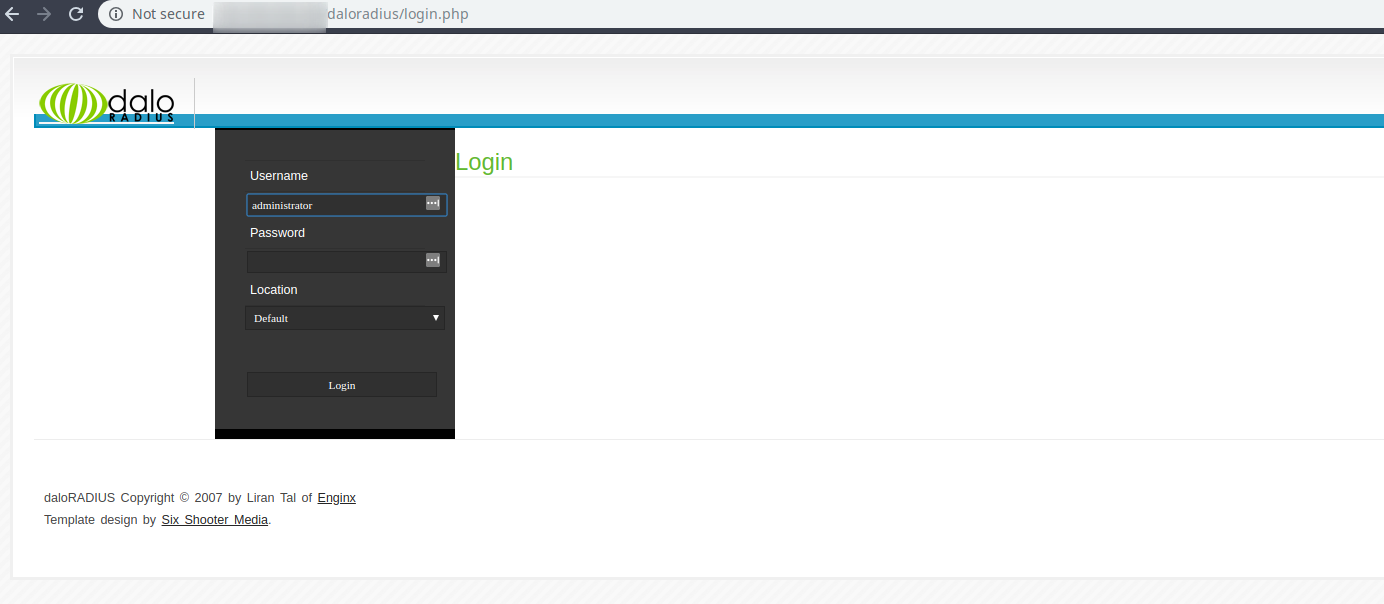
The default login credentials are:
Username: Administrator
Password: radius
Testing FreeRADIUS
FreeRADIUS and daloRADIUS should now be installed and configured. To make sure that the server works, we’ll create a user from the web panel and then send an Authentication request to the server.
Create NAS Client & User
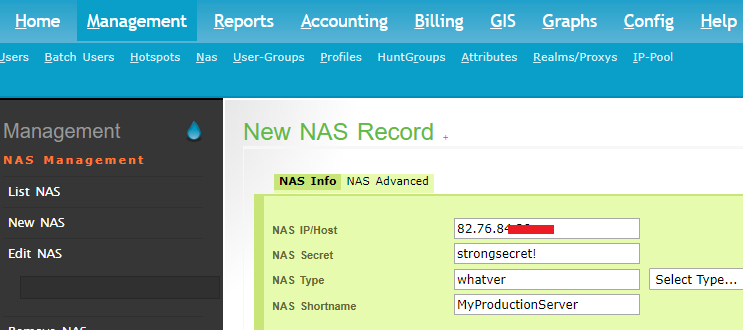
For another computer to connect to our RADIUS server, it needs to be added to the NAS Client Table in the RADIUS database.
We’re just starting, so we’ll need to add a new NAS. Do this by first navigating to Management > NAS > New NAS.
Now add a new User by navigating to Management > Users > New Users and filling the form similarly to the following:
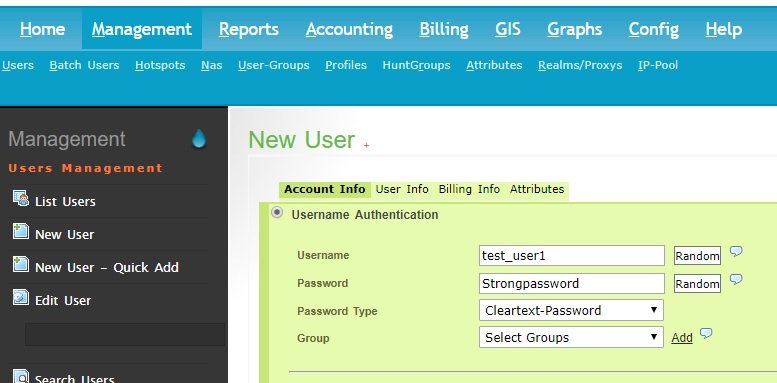
There are more attributes you can add to users and groups, but that’s beyond the scope of this tutorial.
Now we should test the NAS and User. Remember that every time a NAS is added, you need to restart FreeRADIUS so it fetches the updated table.
To test our setup, we’ll have to run in debug mode to check out the output. However, FreeRADIUS is probably still running. So to run it in debug mode we’ll have to stop the running service and start it in debug mode using the -X flag:
$ service freeradius stop
$ freeradius -X
You’ll see something like this:
...
Listening on auth address 127.0.0.1 port 18120 bound to server inner-tunnel
Listening on auth address * port 1812 bound to server default
Listening on acct address * port 1813 bound to server default
Listening on auth address :: port 1812 bound to server default
Listening on acct address :: port 1813 bound to server default
Listening on proxy address * port 46000
Listening on proxy address :: port 59411
Ready to process requests
Test with NTRadPing
To test our server we can use a nice tool called NTRadPing. You can download it here: ntradping.
To run it, just unzip the archive and run the executable. Fill it with the credentials you created earlier, while keeping in mind that the port RADIUS uses is 1812:
RADIUS Server/port: your_server_ip / 1812
RADIUS Secret Key: strongsecret!
Password: Strongpassword
And check the CHAP checkbox.
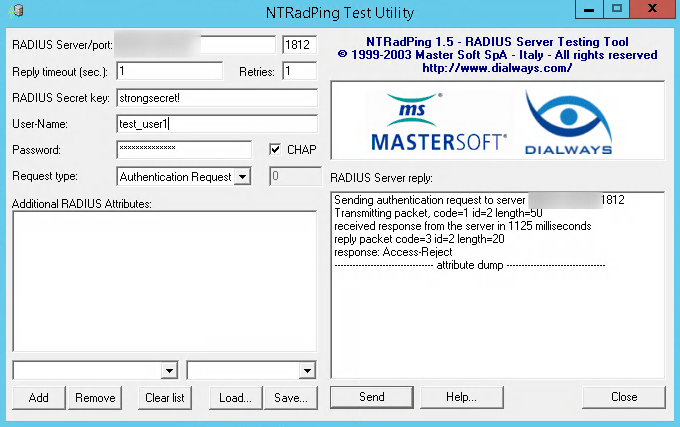
Now click send in NTRadPing. The output in NTRadPing should look something like this:
Sending authentication request to server xx.xx.xx.xx.:1812
transmiting Packet, code=1 id=2 length=50
recieved response from the server in 145 milliseconds
replay packet code=3 id=2 length=20
response: Access-Accept
-------------------attribute dump------------------
The output on the RADIUS server should look something like this:
(0) sql: SQL-User-Name set to 'test_user1'
(0) sql: EXPAND INSERT INTO radpostauth (username, pass, reply, authdate) VALUES ( '%{SQL-User-Name}', '%{%{User-Password}:-%{Chap-Password}}', '%{reply:Packet-Type}', '%S')
(0) sql:    --> INSERT INTO radpostauth (username, pass, reply, authdate) VALUES ( 'test_user1', '0x61a8a6390c46259cf64b56697fd5d78ad5', 'Access-Accept', '2019-05-06 19:00:56.660290')
(0) sql: Executing query: INSERT INTO radpostauth (username, pass, reply, authdate) VALUES ( 'test_user1', '0x61a8a6390c46259cf64b56697fd5d78ad5', 'Access-Accept', '2019-05-06 19:00:56.660290')
(0) sql: SQL query returned: success
(0) sql: 1 record(s) updated
rlm_sql (sql): Released connection (6)
(0)     [sql] = ok
(0)     [exec] = noop
(0)     policy remove_reply_message_if_eap {
(0)       if (&reply:EAP-Message && &reply:Reply-Message) {
(0)       if (&reply:EAP-Message && &reply:Reply-Message)  -> FALSE
(0)       else {
(0)         [noop] = noop
(0)       } # else = noop
(0)     } # policy remove_reply_message_if_eap = noop
(0)   } # post-auth = ok
(0) Sent Access-Accept Id 3 from 108.61.203.68:1812 to 213.136.66.127:56372 length 0
(0) Finished request
Waking up in 4.9 seconds.
(0) Cleaning up request packet ID 3 with timestamp +6110
Ready to process requests
Conclusion
And that’s it. You’ve successfully installed FreeRADIUS + daloRADIUS with MySQL on Debian 9.
Should you encounter any issues, don’t hesitate to get in touch with and we’ll do our best to be of assistance.
Pre-Installed FreeRADIUS Servers
Automatic FreeRADIUS 3 + daloRADIUS Set Up
Instantly deploy machines with FreeRADIUS + MySQL + daloRADIUS GUI Panel already set up, receive the credentials and take over from there! You also get our custom WHMCS Module to help you manage it from our dashboard.
Pick one of our FreeRADIUS KVM plans
P.S. We're available for hire, if you need help. Click here to contact us.
Ignoring request to auth address * port 1812 bound to server default from unknown client
same here. Even though the sites-enabled/default and sites-enabled/inner-tunnel and mods-enabled/sql ar set properly according to the official docs ( with read_clients = yes and client_table = “nas” and sql added under proper sections )
hy can we changes reset counter to every 20 minutes every day if can how to set ?