![]()
Install and Configure Nginx on a Server running Ubuntu 18.04

Introduction
Nginx (pronounced engine-x) is an open source high-performance web server that was written to address some of the performance issues associated with Apache. While some may consider it less user friendly than Apache, it is a great alternative to it. It is still one of the most popular web servers and it’s responsible for hosting some of the most popular websites on the internet.
Table of Contents
Installation
Log into your server to begin.
Assuming this is the first time logging into our server, we’ll update our local package index to make sure we’ve got the latest package listings, afterwards we’ll install Nginx.
$ sudo apt update
$ sudo apt install nginx
Now Nginx should be installed and running.
You can check if everything’s working by typing:
$ systemctl status nginxThe output of the command suggests that it’s running.
The best way to check, however, is to make sure that Nginx is serving up pages in the browser. To do this you can just navigate to your server’s IP address in the browser.
Say your server’s IP is 87.65.43.21, then you’ll visit http://87.65.43.21
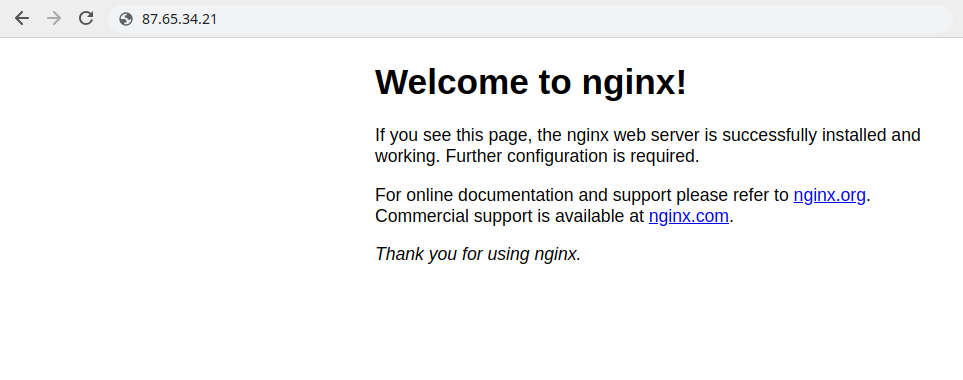
This is the default page included with Nginx so you can check if everything’s working.
Managing Nginx
Let’s learn some basic commands before moving forward.
Stop the Nginx
$ sudo systemctl stop nginx.serviceStart Nginx
$ sudo systemctl start nginx.serviceRestart Nginx
$ sudo systemctl restart nginx.serviceReload ( After you change some configurations, this command reloads Nginx without restarting it )
$ sudo systemctl reload nginx.serviceSetting up a Server Block & Adding a Basic Site
Nginx web server uses server blocks to encapsulate configurations that you can use to host one or multiple websites on your server. As an example, we’re setting up a domain called beholdmystuff.com – you should replace this with your own domain name.
The default server block set up upon Nginx installation is configured to server files out of the /var/www/html directory. While this works well for a single site, it could get complicated if you wanted to host multiple sites on the same server.
A good practice is to use a directory structure to server different sites from different directories. So let’s create the following directory /var/www/beholdmystuff.com/html from where to serve our files.
Following this example you could set up directories for other sites you’d want to host alongside this one.
Example:
/var/www/website1.com/html to serve website1.com
/var/www/website2.com/html to server website2.com
Getting back to our live example, let’s create our beholdmystuff.com directory, using the -p flag to create any necessary parent directories:
$ sudo mkdir -p /var/www/beholdmystuff.com/htmlNow we’ll assign ownership of the directory to the $USER environment variable ( in our case it’s root ):
$ sudo chown -R $USER:USER /var/www/beholdmystuff.com/htmlNext, let’s create a simple index.html page using our favoite text editor. I’m a nano guy so I’m using nano ( pls don’t judge ):
$ nano /var/www/beholdmystuff.com/html/index.htmlAdd the following HTML to it:
<h1>... My stuff</h1>
Save and close it when you are finished.
For Nginx to serve the content, it needs a server block with the correct directives. We won’t be modifying the default server block, but we’ll create a new one at /etc/nginx/sites-available/beholdmystuff.com
$ sudo nano /etc/nginx/sites-available/beholdmystuff.comNow paste in the following configuration block. It’s similar to the default one, but modified for our new directory /var/www/beholdmystuff.com/html
server {
        listen 80;
        listen [::]:80;

        root /var/www/beholdmystuff.com/html;
        index index.html index.htm index.nginx-debian.html;

        server_name beholdmystuff.com www.beholdmystuff.com;

        location / {
                try_files $uri $uri/ =404;
        }
}
NOTE: If you don’t have a domain name ready, and want to just test things out, you can use the server’s IP as the server_name. This means you can replace server_name beholdmystuff.com www.beholdmystuff.com; with server_name your_server_ip;
Now we’ll enable the file by linking it to sites-enabled , which Nginx reads during startup.
$ sudo ln -s /etc/nginx/sites-available/beholdmystuff.com /etc/nginx/sites-enabled/Right now, there are two server blocks enabled to respond to requests. This one that we’ve just created and the default one that Nginx set up.
beholdmystuff.com: Will respond to requests for beholdmystuff.com and www.beholdmystuff.com.
default: Will respond to any requests on port 80 that do not match the other two blocks.
To avoid a possible hash bucket memory problem that can arise from adding additional server names, it is necessary to adjust a single value in the /etc/nginx/nginx.conf file. Open the file:
sudo nano /etc/nginx/nginx.confFind the server_names_hash_bucket_size directive and uncomment it by removing the # symbol.
...
http {
    ...
    server_names_hash_bucket_size 64;
    ...
     }
...
Save and close the file when you’re finished.
Now we’ll use nginx -t to check if there are any syntax errors.
$ sudo nginx -tIf there aren’t any issues we can restart Nginx to enable our changes:
$ sudo systemctl restart nginxNginx should be serving your doman name. Visit your domain in your browser, or your IP (if you used your IP as server_name ). You should see something like this:

Awesome!
Now that you’ve successfully set up Nginx you should check out an overview of some of the most important files and directories. You don’t have to memorize them, it’ll just save you a lot of time later on when you’re experimenting yourself and getting into more advanced configurations.
Nginx Important Configuration Files
We recommend you get familiar with important Nginx files and directories. You can skip if you’d like but it’s good to get at least an overview of these so you can configure things yourself later on.
Content
/var/www/html – this is where your web content resides. The default page you saw earlier is called index.nginx-debian.html and is the only file there right now. Your content is served from here by default.
Check by typing:
$ ls /var/www/htmlYou can modify the Nginx config files to server pages from a different directory, but this one is the default.
Server Configuration
The Nginx configuration files are located in /etc/nginx and the main configuration file is nginx.conf, which puts all the pieces together by including all of the configuration files when you start the web server.
/etc/nginx: This is where the configuration files are located.
/etc/nginx/nginx.conf: The primary configuration file which puts all the pieces together by including all the configuration files when you start the web server. This can be modified to change Nginx global configurations.
/etc/nginx/sites-available: This directory contains the server blocks for each of your websites. For Nginx to use these configuration files they must be linked in /etc/nginx/sites-enabled . Your typical flow will be to create a server block for a website here, and then enable it in sites-enabled so that Nginx can serve it.
/etc/nginx/sites-enabled: The directory where you’ll enabled websites that you want to be served. This is done by linking to the configuration files found in /etc/nginx/sites-available
/etc/nginx/snippets: This directory contains configuration snippets that you can reuse and include in the Nginx configuration.
Logs
/var/log/nginx/access.log: Every request to the webserver is recorded here, unless you configure Nginx to do otherwise.
/var/log/nginx/error.log: Here’s where Nginx errors are recorded.
Conclusion
Now you should have the basic info on how to set up a basic website using Nginx and be well on your way to setting up fast websites that can handle a good deal of requests.
Should you need an affordable server to set up your websites or just experiment you can check out or 2GB RAM KVM VPS Plan starting at just $9.99.
Don’t hesitate to let us know if this tutorial worked for you or if you need extra clarification, if you get errors etc.
Happy hosting!
Subscribe
Login
0 Comments