How to Set Up a Remote Desktop with X2Go on Ubuntu 18.04

Windows Servers are the main candidate for Remote Desktop Connection. However you don’t always need Windows, and you just need a server with a GUI. On top of that, Linux servers are a lot cheaper.
You may have tried VNC or xRDP to remotely connect your Ubuntu server and found them to be sluggish and are desperately searching for an alternative. While they are great solutions, in some instances they are slow, clunky, and can be insecure.
Installing X2Go on Ubuntu 20.04: This guide should also apply to installing X2Go on Ubuntu 20.04, except for the last part where we discuss fixing an error, because you won’t encounter that issue. For a more detailed guide specifically on installing on Ubuntu 20.04, you can check out Connect to Ubuntu 20.04 Remote Desktop using X2Go on ByteXD.com.
Introduction
I’m not sure why, but X2Go is not as popular as a solution as VNC or xRDP. Frankly, I find that appalling. Why? Because it’s a whole lot faster and provides a smoother experience than other remote desktop solutions.
Table of Contents
How Does X2Go Work
X2Go is an open-source remote desktop software for Linux distributions. It provides a smooth and speedy connection even with slow internet. The question is how does X2Go work so fast?
X2Go uses a modified NX protocol that compresses data to minimize the amount of information transmitted. The NX protocol is what makes X2Go faster than other remote desktop solutions. It caches data to make the session as fast and responsive as possible.
For instance, if you open a menu for the first time, it will take a few seconds. On the second time, it will open almost instantaneously.
The connection is not only fast but also secure. NX protocol uses the SSH protocol to encrypt data before sending it through the network.
X2Go requires two components to work:
- Server: it is the remote desktop that is being accessed by the X2Go client. It’s where the sessions are started and maintained. The X2Go client can only be installed on a Linux distribution.
- Client: it’s an application that is used to access the remote computer (AKA X2Go server). The X2Go client is not exclusive to the Linux distribution. You can install and use it on Windows, Mac OS, and almost all Linux distributions.
X2Go uses older NX libraries. That is why it may have issues on newer 3D desktop environments such as Gnome/Unity or KDE. In our experience KDE has worked without a hitch with Ubuntu 18.04, but we couldn’t manage to get X2Go to work with GNOME. In some cases you can get some environments to work with a workaround.
If you do find one for GNOME and you’d like to share it, then we’d love to hear from you!
Nearly all older desktop environments such as LXDE and XFCE work without an issue and are marked as being always supported on the X2Go website.
A great thing about X2Go is that it also has a browser plugin available. You can remotely access another PC (X2Go server) from your web browser. On the web interface, even iOS and Android clients are available.
Note: if you are using X2Go over the web then port forwarding and Dynamic DNS are recommended.
Is X2Go Safe?
Yes, X2Go is safe to use.
X2Go uses an NX protocol to transmit information through a secure SSH connection. The SSH protocol is a network protocol that encrypts your data and makes it secure over an insecure network. SSH protocol is the popular choice for securing logins from one computer to another.
Why Use X2Go? What are the advantages?
X2Go is not as popular as VNC but there are several advantages to using X2Go. A few advantages of X2Go are:
- Faster than other remote desktop solutions
- Supports remote audio transmission, file sharing, clipboard, printing, and much more
- Easy to set up and use
- A readily available browser plugin for easy access and usage
- Secure connection via SSH protocol
After following this tutorial you’ll have a Ubuntu desktop that you can easily connect to, and hopefully, get your work done with more ease.
Prerequisites
- A server running Ubuntu 18.04 with a minimum of 2GB RAM is recommended. It would be even better with 4GB+ RAM.
- A non-root user with Sudo privileges. Accessing X2Go as a root user is not recommended. With the root privileges, a user can alter almost anything and everything on your computer. This can in turn compromise the integrity of your system and the data on it. <!– explanation on why not root –>
Get a High RAM VPS at Entry-level Pricing
Starting with 2GB RAM at $6.99/month
Take your pick from our KVM VPS that offer a generous amount of RAM at an affordable price. We've got 5 plans for you to choose from, our cheapest featuring 2GB RAM at $6.99/mo.
[Main Features] - SSD Drives
- KVM Virtualization
- 1Gbps Shared Uplink
- Location: Chicago, IL
Pick one of our KVM plans
Step 1: Install X2Go
We’ll need to add the PPA reference for X2Go, but your server may not have the add-apt-repository command available.
To fix that run the following command:
$ sudo apt-get install software-properties-commonNow let’s add X2Go’s PPA:
$ sudo add-apt-repository ppa:x2go/stableNext, refresh the database of the available software packages by running:
$ sudo apt-get updateWe can now install X2Go by running:
$ sudo apt-get install x2goserver x2goserver-xsessionWith X2Go installed, we’ll now need to install a desktop environment on our server.
Step 2: Install Your Preferred Desktop Environment
What is a Desktop Environment
Most Linux users, especially the most advanced tech maestros prefer the command line. It’s what Linux is known for.
It might sound surprising to most people that Linux offers an excellent graphical interface on top of its powerful shell. But that’s not all!
What’s different about the Linux interface is that you can choose your own desktop environment.
Note: DO NOT confuse Linux distributions with desktop environments.
A Linux distribution also known as Linux distro is an operating system made from a collection of software that is based upon the Linux kernel. Some Linux distros look very similar to each other and are even confused with one another. An example of such distributions can be Ubuntu and Linux Mint.
A desktop environment is installed on top of a Linux distribution as a software. The purpose of a desktop environment is to make the interface user-friendly. In Linux, the GUI is made up of four layers:
- X-server
- X-client
- Windows manager
- Desktop environment
These four layers get together to create the interface that we see on our computer screens.
In this tutorial, we’ll install XFCE, LXDE, MATE Desktop, and KDE Plasma Desktop. You can install whichever you prefer, or you can install all of them, and decide which one to use from X2Go.
XFCE and LXDE are more lightweight, so they’re recommended if you want your desktop environment to use fewer resources.
We’ll also focus on installing Minimum Desktop Environment, which means you’ll install only the core features and add other packages only if you need them.
Installing XFCE
XFCE is the most light-weight desktop environment. XFCE is also the recommended desktop environment for X2Go. XFCE seamlessly provides core functionality and requires fewer resources. This makes XFCE faster and an excellent choice for X2Go remote desktop.
$ sudo apt-get install xfce4How XFCE looks:

Installing LXDE
LXDE is our second recommendation for X2Go. It’s also very light-weight and requires fewer resources as compared to other desktop environments.
The GUI in LXDE is very basic but user-friendly. It’s known to work well with X2Go with composting disabled. Although, XFCE provides a higher number of features as compared to LXDE.
LXDE is the default desktop environment of Knoppix, Artix LXLE Linux, and Peppermint Linux OS (among others).
$ sudo apt-get install lxdeHow LXDE looks:

Installing MATE Desktop
MATE is one of the most popular desktop environments in Linux. MATE is a continuation of the GNOME 2 desktop environment. It was named MATE to avoid confusion with GNOME.
MATE was born when GNOME 3 replaced the traditional menu bar and taskbar. It created quite a frenzy among GNOME loyalists causing major controversy in the Linux and GNU community.
MATE is supported in almost all Linux distros including Debian, Ubuntu, and Fedora.
$ sudo apt-get install mate-core mate-desktop-environment mate-notification-daemonHow MATE Desktop looks:

Installing KDE Plasma Desktop
KDE Plasma is among the most popular desktop environments for modern Linux distros. KDE Plasma is (relatively) fully featured and not as light-weight as XFCE or LXDE.
KDE Plasma uses the KWin window manager to provide an interface very similar to the Windows operating system. KDE is the default desktop environment for Fedora KDE Plasma Desktop edition, KDE neon, and OpenSUSE among others.
$ sudo apt install kde-plasma-desktopHow KDE Plasma Desktop looks:

Step 3: Install the X2Go Client on your Computer
X2Go has two components – the X2Go Server, which is installed on the computer you want to remote control, and the X2Go Client, which is installed on the computer from which you want to remote control.
Now that we’ve got our desktop environment installed on your server, along with the X2Go Server, let’s go ahead and download the X2Go client from their page at https://wiki.x2go.org/doku.php
- For Windows look for the link to Windows installer
- For OS X, depending on your version, look for OS X 10.xx and higher DMG (The reason I’m not linking you directly because there will be new releases, most likely, and this way you’ll get the latest versions when you’re working – through this tutorial)
- If you’re on Debian or Ubuntu you can install X2Go Client by running the following command:
$ sudo apt-get install x2goclientStep 4: Connecting to the Remote Desktop
Go ahead and run the X2Go Client that you’ve just installed on your computer. The first time you run it you should see the following window, where you create your session. If you don’t see it then create a new session by clicking in the top menu, in the upper left corner, on Session → New Session.

In the Session Name field, you can name your session for ease of access – this doesn’t influence the connection in any way and it’s just for your reference. As you can see on the right, I’ve created multiple sessions to connect to the same server and named them according to what desktop environment I’m using.
In the Host field enter your server’s hostname or IP address.
In the Login field enter the user you used for your SSH connection.
In the SSH Port field enter the port your server uses for SSH, which is 22 by default.
In the Use RSA/DSA key for ssh connection, you can add your private key if you want to connect via SSH Keys. In my case, I’m not using SSH keys so I’ll just leave that empty, and X2Go will ask for my password when I click to launch the session.
In the Session type dropdown select the option that matches the desktop environment you installed. In our case, choose between XFCE, LXDE, MATE, or KDE, depending on which environment you have installed.
Additionally, you can click on the little seal image, next to << change icon, and browse to a different image to represent your session. I have also done that in the screenshot above and replaced it with the DraculaServers logo.
Click OK to save the session configuration.
You can now click on the session and a prompt should appear with your user already filled in and all you have to do is enter your SSH password and confirm to connect.
After a short wait, we should be connected to the server and see the desktop environment we installed & that we selected in our session.
Now you’ve got a working Ubuntu 18.04 Remote Desktop on which you can get your work done that’s always online.
Possible Issues/Errors
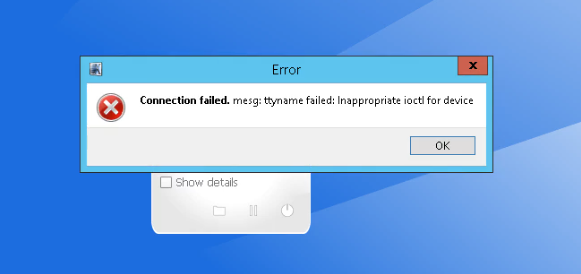
Connection Failed. Mesg: ttyname failed: Inappropriate ioctl for device
In case you get this error, one more thing we need to do before connecting is to edit /root/.profile.

To fix this, SSH into your server if you’re not already connected and edit /root/.profile with your preferred text editor. I’m a nano guy, so I’ll use nano:
$ nano /root/.profileIt probably looks like this at first:
# ~/.profile: executed by Bourne-compatible login shells.

if [ "$BASH" ]; then
  if [ -f ~/.bashrc ]; then
    . ~/.bashrc
  fi
fi

mesg n || true
We’ll just have to change the last line by adding tty -s && at the beginning of the last line. It should look like this:
# ~/.profile: executed by Bourne-compatible login shells.

  if [ "$BASH" ]; then
    if [ -f ~/.bashrc ]; then
      . ~/.bashrc
    fi
  fi

tty -s && mesg n || true
Save and close the file when you’re finished and try connecting to the server again. It should work without problems.
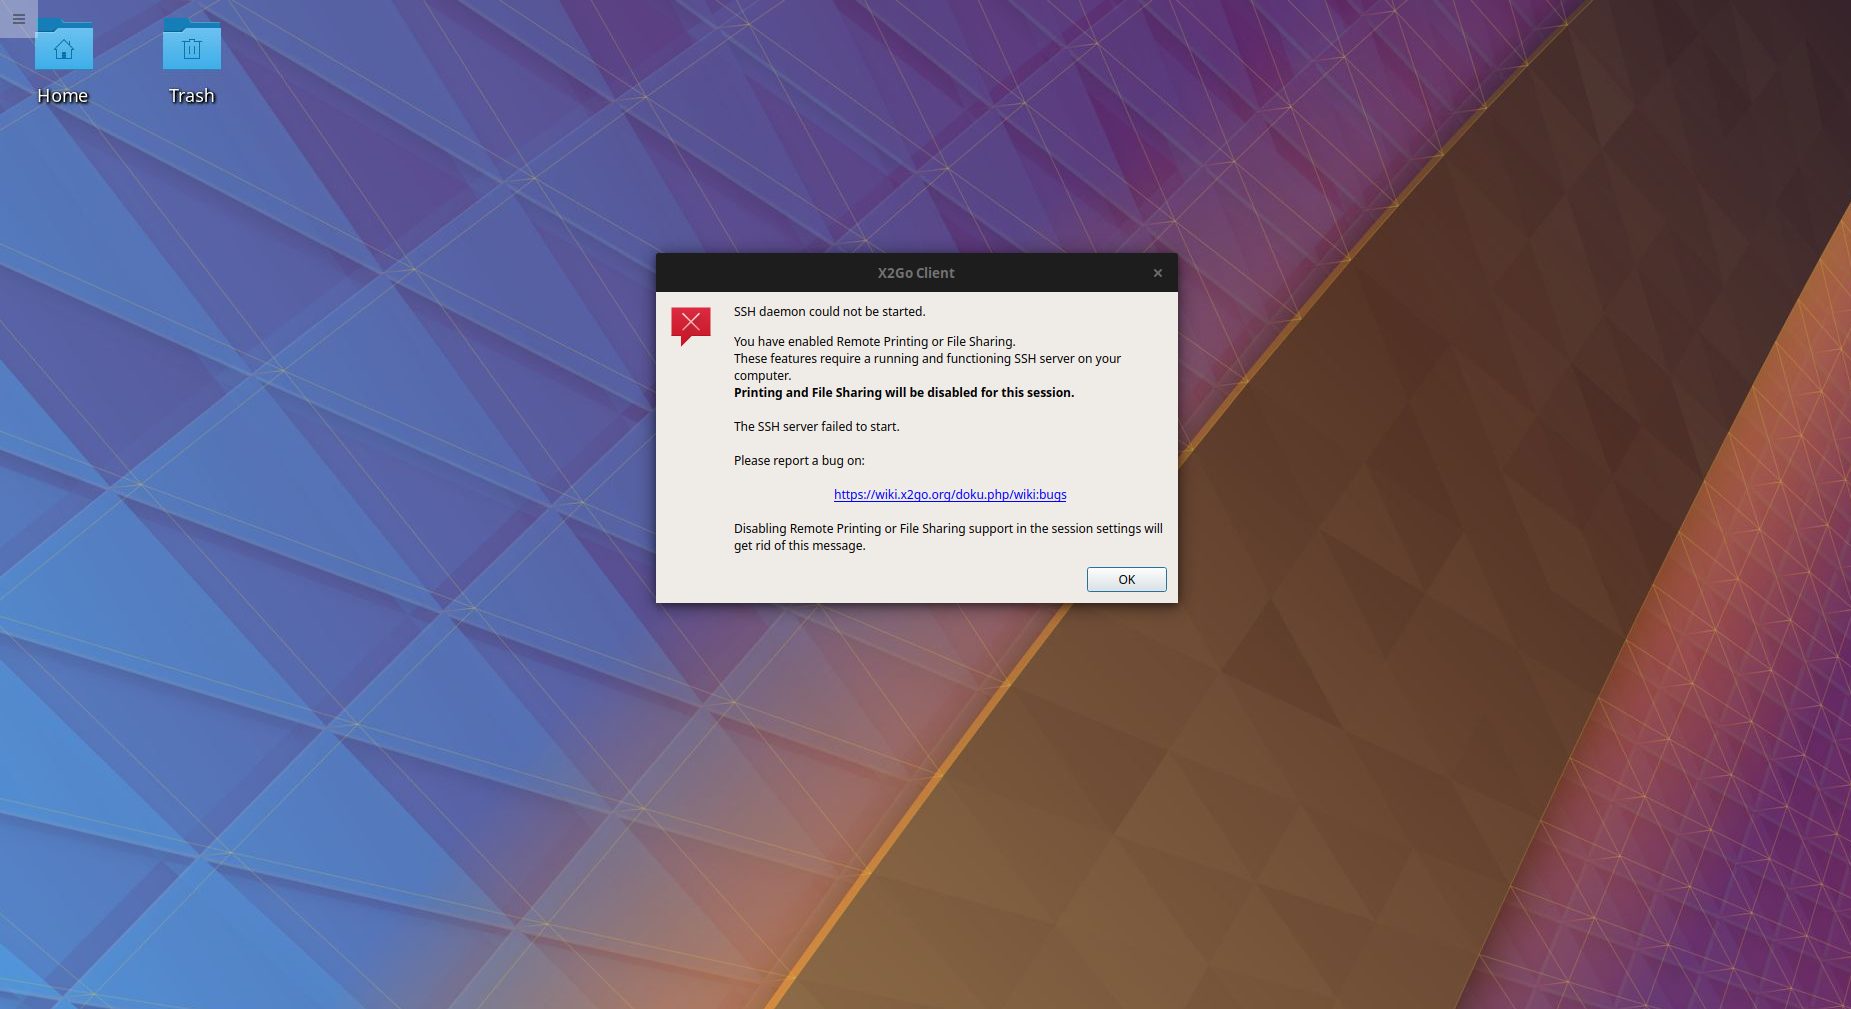
SSH daemon could not be started
In some versions of the X2Go Client, you may get this error when launching the session, although you can just close the error window and continue your work uninterrupted. As you can see in the following screenshot, you can still continue with the session despite the error.

The current fix we’re aware of for this is disabling Client-side printing support.
Tho do this, open the Session preferences for the session you want to launch and go to the Media tab. Under that tab, you’ll see a checkbox with the text Client-side printing support.

Uncheck it and then click OK to save the session preferences and try to connect again. This time the connection should go seamlessly.
Conclusion
If you’d like to dig deeper then you can check out X2Go’s Official Documentation.
Hopefully, this tutorial worked for you. If something went wrong, leave us a comment or contact us, and we’ll try to help ASAP.
Get a High RAM VPS at Entry-level Pricing
Starting with 2GB RAM at $6.99/month
Take your pick from our KVM VPS that offer a generous amount of RAM at an affordable price. We've got 5 plans for you to choose from, our cheapest featuring 2GB RAM at $6.99/mo.
[Main Features] - SSD Drives
- KVM Virtualization
- 1Gbps Shared Uplink
- Location: Chicago, IL
Pick one of our KVM plans


Gracias, si me funcionó! Saudos!
Thank you! So much better / easier than VNC
I’m getting an error. Any tips on how to resolve?
Got keys from plugin meta data (“xcb”)
QFactoryLoader::QFactoryLoader() checking directory path “/usr/bin/platforms” …
loaded library “/usr/lib/x86_64-linux-gnu/qt5/plugins/platforms/libqxcb.so”
qt.qpa.xcb: could not connect to display
qt.qpa.plugin: Could not load the Qt platform plugin “xcb” in “” even though it was found.
This application failed to start because no Qt platform plugin could be initialized. Reinstalling the application may fix this problem.
Available platform plugins are: eglfs, linuxfb, minimal, minimalegl, offscreen, vnc, xcb.