How to Zip and Unzip a Directory / Files in Linux?

New to the Linux Operating System? Struggling to Zip and Unzip files and directories in Linux? Well, worry not. This guide will provide you with a step-by-step tutorial to compress and decompress files in Linux.
To compress and decompress a file in Linux, you can use the “tar” and the “Zip” package. However, this guide will focus mainly on the zip package. Therefore, let’s start with the installation of the zip package.
Install Zip/Unzip Package on Linux
To install the zip and the unzip package on a Debian-based operating system, start by upgrading your apt-packages list:
sudo apt-get update
After that, run the following command to upgrade all the packages as well:
sudo apt-get upgrade
Once the update is done, run the following commands for zip/unzip packages:
sudo apt-get install zip
sudo apt-get install unzip
However, in case you are using FedoraOS or CentOS, then you can use the following command to install the packages:
sudo yum install zip
sudo yum install unzip
After the installation, you can start using the zip package for compressing and decompressing.
How to Zip and Unzip a File/Directory Using the Terminal?
You can use the terminal’s zip package or the GUI to zip any file or directory. We are going first to use the terminal and then use the GUI.
Syntax
The syntax of the zip common to compress a file is as:
zip [optionParams] outFile file1 file2
In this syntax:
- The optionParams are different flags that can be used with the zip command/package
- The outFile will represent the location and name of the zipped file
- The file1 and file2 are the files to be included in the zip
Example of Using the Zip Package From Terminal
To use the zip package, let’s create a new text file that we will include in our compressed file by using the following command:
touch secret.txt
This will create a new text file in the present working directory. After that, let’s create a zipped file in the same pwd using the following command:
zip compress1 secret.txt
Running this command will display the following output on the terminal:
This confirms that the zip file has been created. To verify this, simply run the “ls” command in the same pwd:
You can also verify it by heading over to the same directory using the GUI:
You have successfully compressed a file into a zip using the terminal.
Unzip Using the Terminal
To unzip this file, you will use the unzip package. The syntax of the unzip command is as:
unzip [options] zippedFile.zip
In our example, if you want to extract the content of the “compress1.zip”, you will run the following command:
unzip compress1.zip
This will give the following output on the terminal:
As you can see from the output, it has extracted the file secret.zip
Dracula VPS Hosting Service
Dracula Servers offers high-performance server hosting at entry-level prices. The plans include Linux VPS, Sneaker Servers, Dedicated Servers & turnkey solutions. If you’re looking for quality self-managed servers with high amounts of RAM and storage, look no further.
Check the plans for yourself by clicking Here!
How to Zip and Unzip a File/Directory Using the GUI?
Using the GUI to compress and decompress files and directories is quite easy. Let’s see how to do them both in Linux.
Zip a File/Directory Using GUI
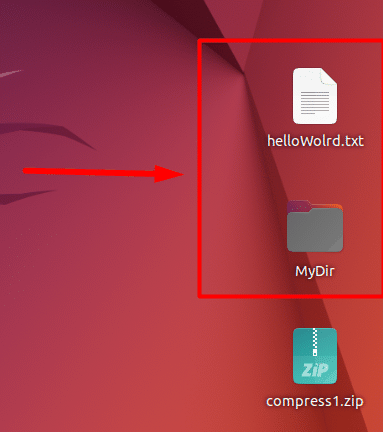
To demonstrate the working of the GUI zipping process, we have the following files inside our present working directory:
Simply select both of them and press right-click from the drop-down menu, select the “compress” option:
Doing this will open up a dialogue box, in which you need to provide the name of the zipped file and select the extension/format of the zipped file and click on the create button:
Doing this will create the zip file in the same directory, which can be seen in the “files” application as well:
Unzip a File Using the GUI
To unzip a compressed file using, open up the zipped file using the “Archive Manager”:
In the Archive Manager, click on the “Extract” button on the top left:
Doing this will open up a new explorer, which will specify the directory for extraction, select the directory and click on the “Extract” button:
As you can see, we are extracting the file on the Desktop. Once the extraction is complete, it will show the following prompt:
Verify the files in the selected directory:
As you can see that the files have been extracted onto the Desktop, which was our desired directory. That brings this post to an end. However, make sure to check out our other blogs Here!
Conclusion
Compressing a file can have major benefits, such as storage, security, and integrity. However, to zip a file in a Linux operating system, you must first install the zip and unzip packages. Once that is done, follow the steps mentioned above to compress and decompress files and directories in Linux.
Subscribe
Login
0 Comments
Oldest


