Become a FreeRADIUS Server Reseller
Is there a market for Radius Servers?
We live in the internet era of software as a service (SaaS). Regardless of the type of SaaS offered, they all have in common one need: the need to authenticate, authorize and account their users. FreeRADIUS was designed to do just that and the protocol is widely supported by a long list of existing programs.
Although very fast and powerful, a radius server can be difficult to install and configure, especially to the business owner that has a lot of other things to do.
Having the opportunity to roll out a server with FreeRADIUS 3 + MySQL + daloRADIUS panel already installed and ready to authenticate your users is alluring to any SaaS developer or network manager.
Table of Contents
Important Notes
- For the most part, this tutorial assumes that you have your own WHMCS setup and that you’ll add our FreeRADIUS reseller module to it, that connects to the Virtualizor Control Panel via an API, so you can automatically fulfill orders for your customers. You’ll also be able to manually deploy servers or edit their specs on the go via Virtualizor.
- If for whatever reason, you don’t have WHMCS set up, you can fulfill orders manually from the Virtualizor dashboard. We’ll cover that below.
In either case, you’ll be given access to the Virtualizor control panel from where you can perform manual actions.
NOTE: This article builds on the article written in the Virtualizor documentation, covering the WHMCS Virtualizor Module for Resellers v2. You can get check the before-mentioned article if in the case you believe we’ve left out any important details.
Now we’ll see how to set it all up.
Step 1 – Order FreeRADIUS Reseller Plan & Initial Steps
To start off, you’ll have to purchase one of our FreeRADIUS reseller plans.
Please open a support ticket and tell us about your site.
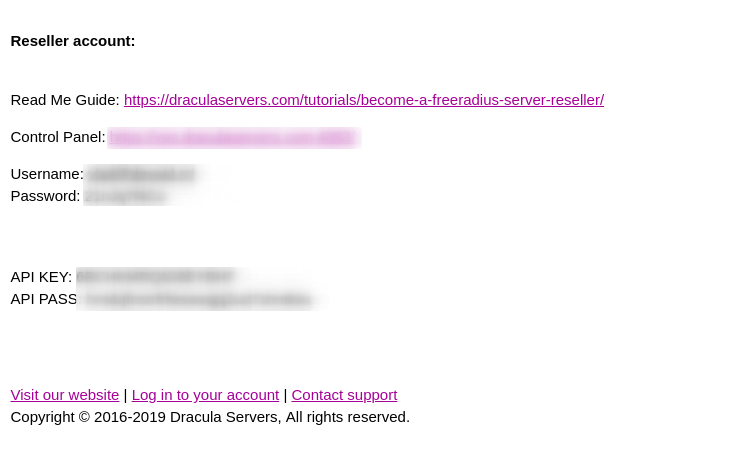
Upon successful payment, you’ll receive an email containing your login credentials for Virtualizor.
From here you can manage your users and allocated resources.
NOTE:We won’t be covering the Virtualizor interface in this tutorial, since we think you’ll find it quite intuitive. If you come across any issue, then please leave a comment and we’ll update this article if needed.
Step 2 – Add & Configure the Reseller Module in your WHMCS
Now that you’ve got your FreeRADIUS package and the resources ready, it’s time to connect them to your WHMCS via the Virtualizor API, so you can automate the FreeRADIUS server deployments.
To do this you’ll need the Virtualizor Reseller WHMCS Module added to your WHMCS installation and the Virtualizor API credentials.
The API Credentials
The Virtualizor API credentials are located in the menu on the left, under API Credentials. Just visit the link to get to the credentials page.

On the next page, you’ll see your credentials. If you do not have them already generated then click on “Create API Key Pair”.
The WHMCS Virtualizor Reseller Module
In order to connect your WHMCS to Virtualizor, you’ll need to add this module to your WHMCS installation.
To do this download the module from HERE (Oct 26, 2018).
Unzip it and upload the folder virtualizor_cloud (the folder itself), in your /path/to/whmcs/modules/servers/ directory.
Please make sure that the upload was done properly and the following folder exists :
/path/to/whmcs/modules/servers/virtualizor_cloud
Now you should be able to connect Virtualizor to WHMCS. Go ahead and visit your WHMCS Panel, and in the navigation, go to Setup -> Servers -> Add New Server
And fill in the form as follows:
   Name		[any_name_want]
   Hostname	vps.draculaservers.com
   IP Address	vps.draculaservers.com

   Type		Virtualizor_cloud
   Username	[your_api_key]
   Password	[your_api_password]
Here is an example:
Click on Test Connection to make sure everything is working correctly, and then save the changes.
Step 3 – Create Products
Now you can create a new product group, if you’d like, and create a new product.
NOTE: We’re assuming you know how to create new product groups, but for continuity purposes we’re including a short description on how to do that.
Creating a Product Group
To create the new group, in your WHMCS Admin area, navigate to Setup -> Products/Services and click on the + Create a New Group button.
For example, I’ve created the following group.
Creating a Product
Now you’ll need to create a new product.
Details
To do this, in your WHMCS Admin area, navigate to Setup -> Products/Services and click on the + Create a New Product button.
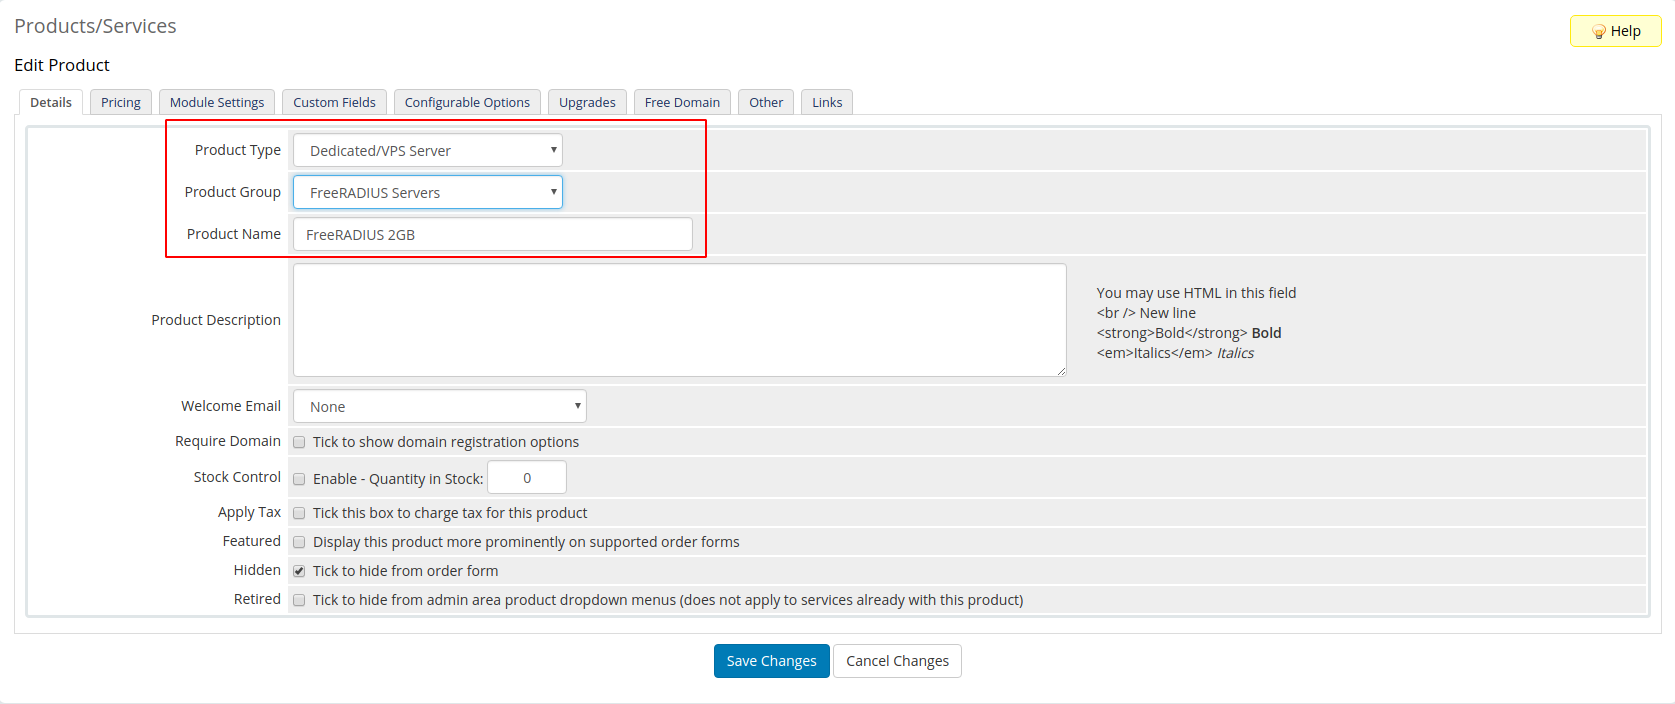
In the Details tab, fill in the form as follows:
Product Type	Dedicated/VPS Server
Product Group	[group_of_your_choice]
Product Name	[name_of_your_choice]
Example:
We’ll leave the other details, such as Pricing, up to you. What’s essential to configure now is the Module Settings tab.
Module Settings
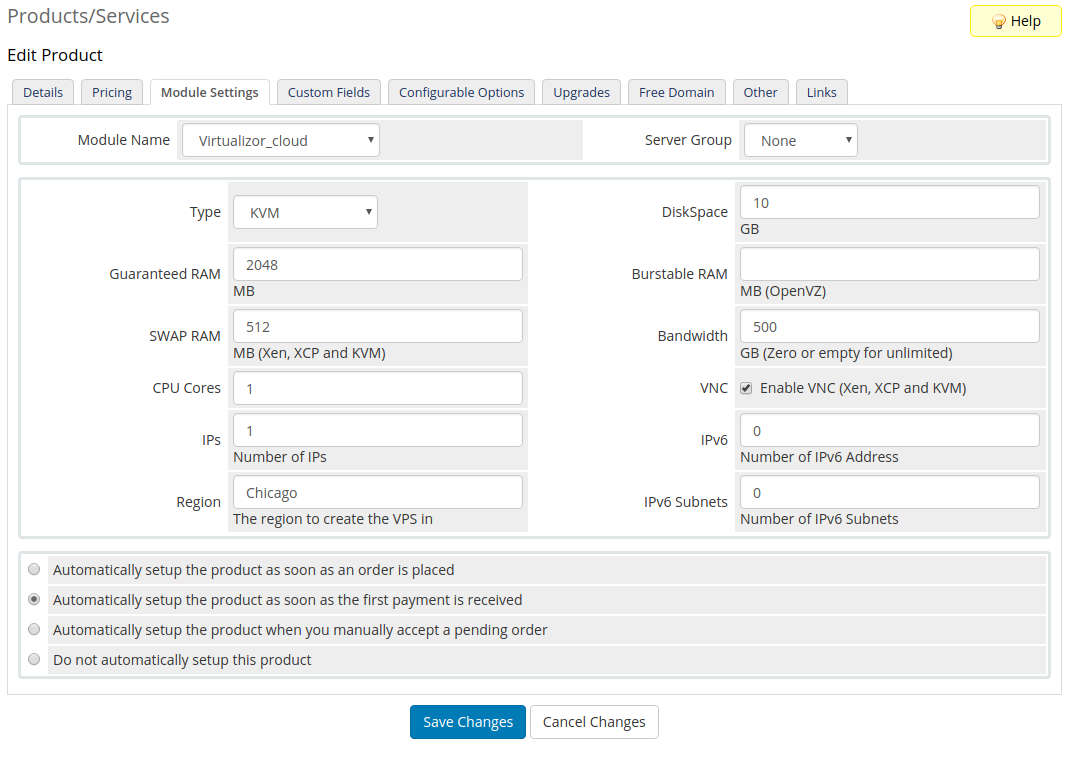
Fill in the Module Name and Type as follows:
Module Name		Virtualizor_cloud
Type			KVM
The rest of the fields can be filled according to how you want to allocate your given resources.
Example:
The fields are self-explanatory, but the following is a detailed explanation:
- Type : The Virtualization type of the server you added.
- Disk Space : The amount of disk space that the VPS will be allowed to use.
- Guaranteed RAM : The amount of RAM to be allocated to the VPS
- Burstable RAM : The amount of Burstable RAM allowed to the VPS in MBs. This is only for OpenVZ
- SWAP RAM : Swap Ram for the VPS. This is for Xen and KVM VPSs
- Bandwidth : The allowed bandwidth to the VPS in GBs
- CPU Cores : Number of CPU Cores
- VNC : Whether to enable VNC or not for the VPS. Applies to Xen and KVM
- IPs : The number of IPs to be allocated to this VPS.
- IPv6 Subnets : The number of IPv6 Subnets to be allocated to this VPS.
- IPv6 : The number of IPv6 Addresses to be allocated to this VPS.
- Region : Name of the Region that the VPS must be created on. You can also specify auto as the name of the Region. If you specify auto then the WHMCS module will AUTO select the server based on the Virtualization tecnology.
Custom Fields
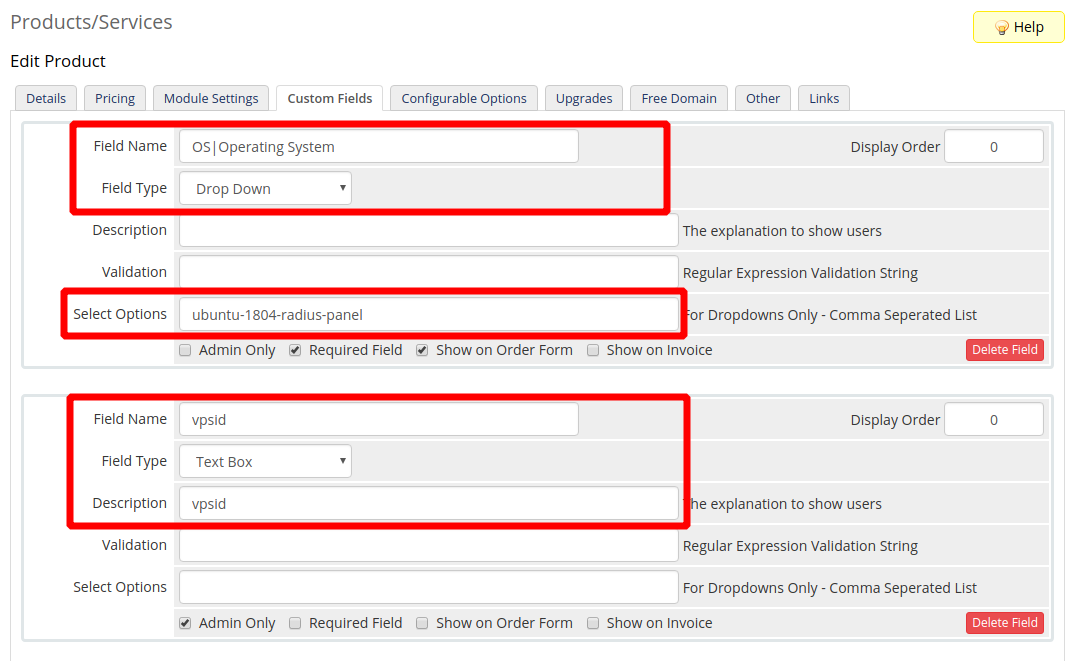
The final step when configuring your FreeRADIUS product is to add 2 mandatory custom fields.
To do this, click on the Custom Fields tab and fill in the form as in the following image:
Just for your information the vpsid is the VPS ID as per the Virtualizor Database and needs to be stored for any future action like Terminate, Suspend, etc. Please fill it as per the above image.
The OS field is the List of Operating System Templates on your server. Virtualizor provides templates to its users. Its a COMMA separated value. This will allow the USER to choose the OS when he is signing up for the VPS. Since the servers will only have Ubuntu running FreeRADIUS on them, just fill in ubuntu-1804-radius-panel.
There are additional custom fields that you can add, but these two are the only ones required for our purposes.
If you need a more in-depth explanation, then feel free to visit the official Virtualizor WHMCS Module for Resellers Docs.
Conclusion
That’s it. After you’ve saved your changes, a user should be able to order one of your products and it should be automatically set up.
NOTE: Should you need further assistance, then please leave a comment and we’ll do our best to immediately answer and update this tutorial with your requirements if necessary.
To your success!
Subscribe
Login
0 Comments
Oldest

