![]()
A Step-by-step Guide to Adding Users to Ubuntu

Like other operating systems, Linux also supports multiple users with different privileges; each user is assigned a distinguishable user account with their username and password. System admin can add or remove users and also assign system management tasks and privileges to other users. In this way, multiple users are managing the system environment, which leads to an increase in the overall performance and keeps the system up-to-date.
There are two methods by which you can add users to a Linux system: using the command line or by using GUI (Graphical user interface).
Add User by Using Command Line
The command line comes with more options and has more functions than GUI-based user management. On top of that, the command line also has greater control and flexibility over the user management process.
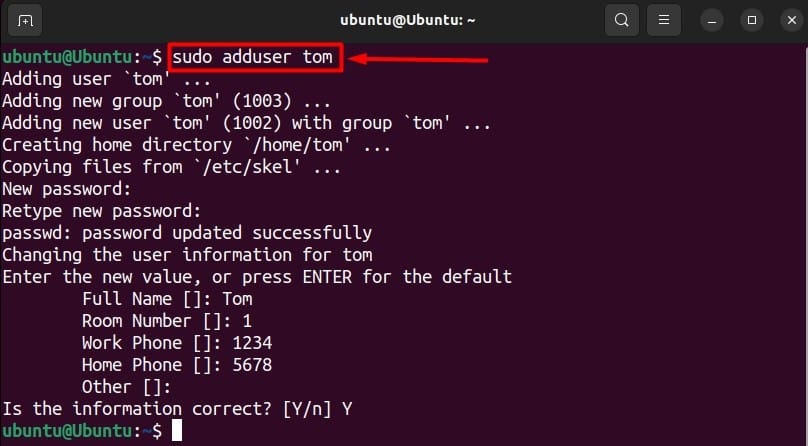
To add a new user, first open the terminal by pressing CTRL+ALT+T. Once the terminal window is up, write the following line of code to add a new user.
sudo adduser tom
In this command, “sudo” is to access admin privileges, “adduser” is the command to add a new user, and “tom” is the name of the new user account.
After writing this command, click enter, and the system might ask you for your password to create a new user. After entering the password, simply fill in the details of the user or skip the details by pressing “Enter.” Finally, enter “Y,” and click enter.
Now you have successfully added “tom” as your new user. Let’s verify our newly added user in our system. To do that, you have to use “id” command followed by the username:
id tom

After executing the command, you can see that your new user is now available.
Grant User Sudo Privileges
The Above user is a normal new user without any sudo privileges. You can also assign sudo privileges to any user by using this command:
sudo usermod -aG cdrom tom
In this command, “usermod” is used to modify the user, where “-aG” signifies that you are granting this user sudo privileges, “cdrom” changes the access privileges of user tom.
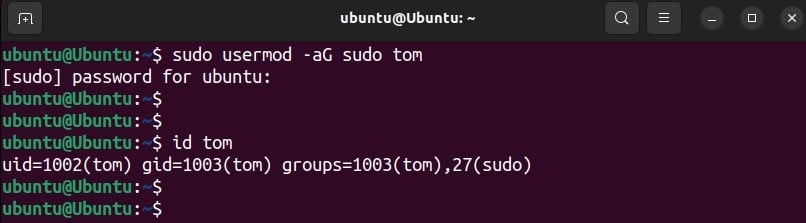
After running the above command, re-run the “id” command. You can observe that there is a new value added in last, which shows that your user now has sudo privileges.
Add a User with Sudo Privileges:
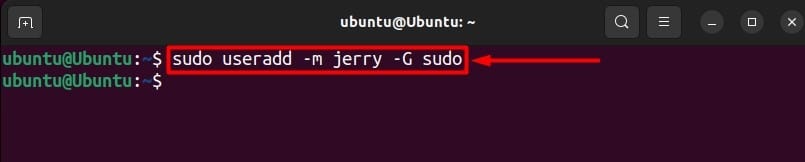
You can also directly add a user with sudo privileges by executing this command in the terminal window:
sudo useradd -m jerry -G sudo
In the above command, “useradd” is used to add a new user, “-m” is used to modify user-defined tables, “jerry” is the username “-G sudo” grants the sudo privileges to our new user.
By running the id command, you can check the user status

You have just added “jerry” as your new user with sudo privileges.
Add a Temporary User
In the Linux operating system, you can also add temporary user accounts with a known expiry date. This helps when you have to grant access to a user for a specific period, and it also doesn’t burden your admin to maintain the account. To create a temporary user execute this command in terminal windows:
sudo useradd -e 2024-01-25 temp_user
In this command, “useradd” is used to add a new user, where “-e 2024-01-25” represents the expiry date for this user account and “temp_user” is the user name.

By running this command, the temporary user is now added. Let’s check all the available users, and to do that, you will have to run this command:
less /etc/passwd

After running this command, scroll down the output, and you will find all available users at the very bottom of the list.
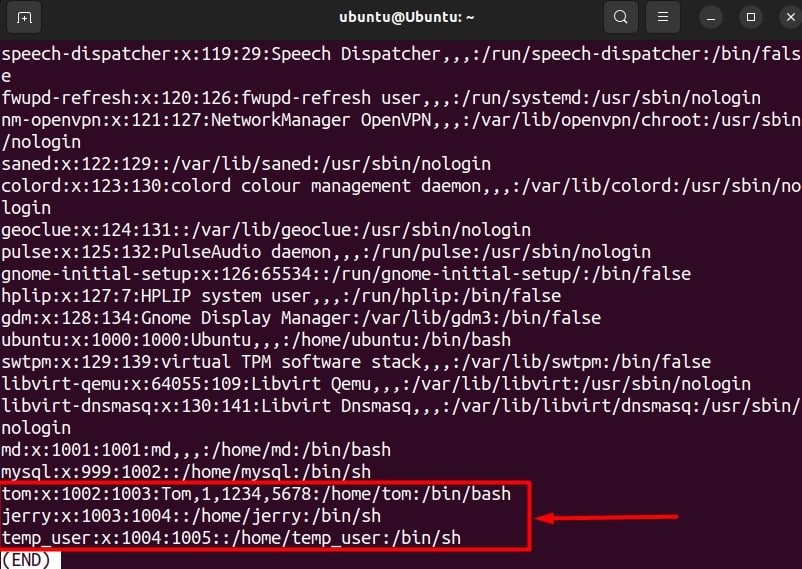
As you can see, your three newly added users are listed at the bottom of the list.
Add a new User by Using a GUI
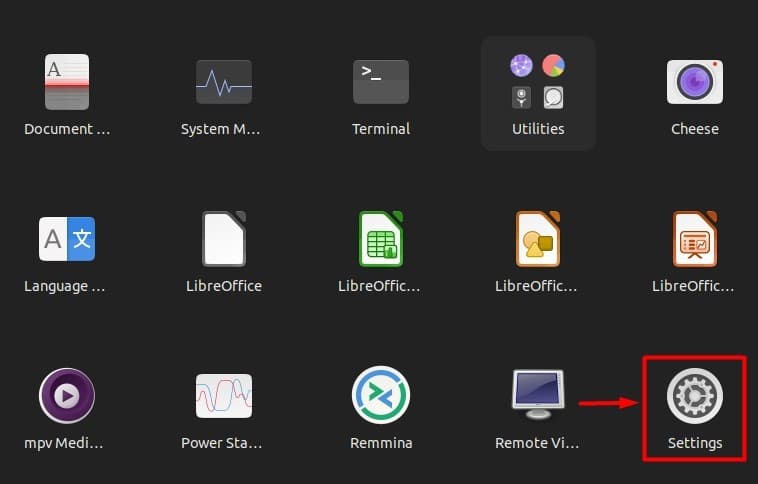
To add a new user by using GUI, click on the show application button at the bottom left corner of your activity bar.

Next, click on settings to access the settings menu.
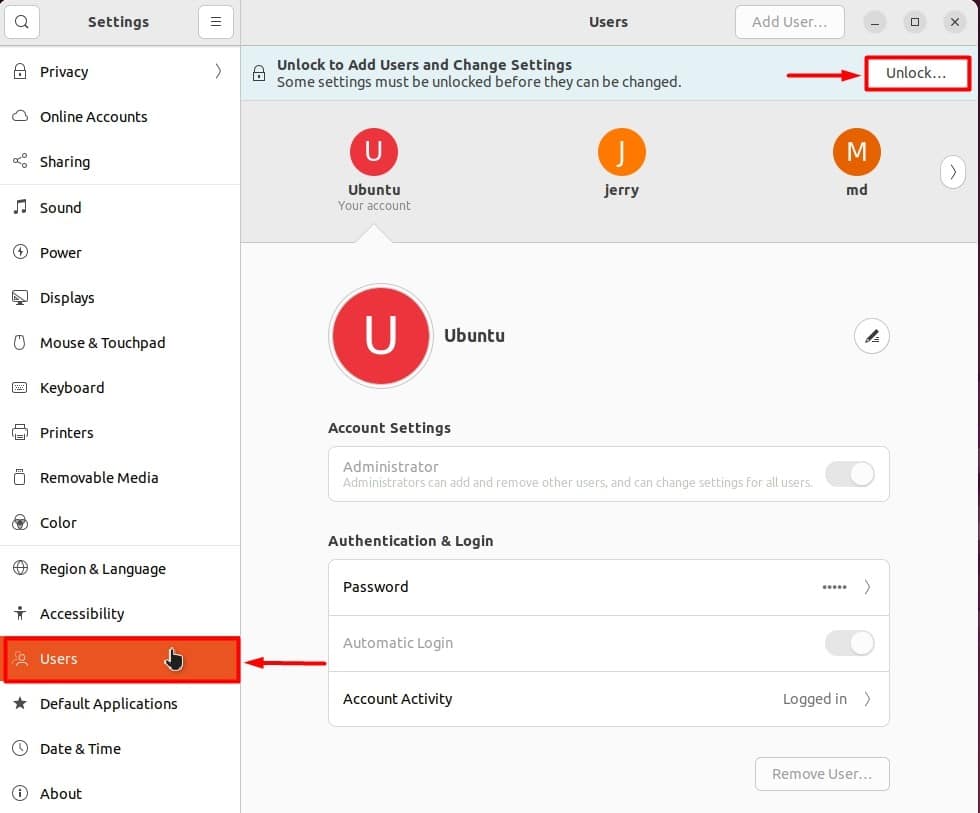
Once you have accessed the settings, scroll down in the settings tab and open the “Users” tab, next click on the “Unlock” button and enter your system password to unlock user management settings.
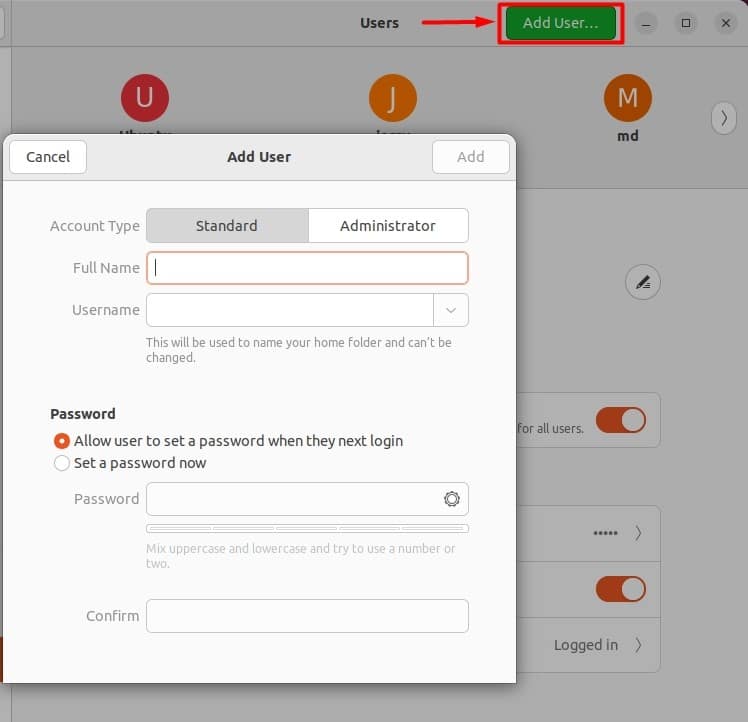
Now click “Add User…” at the top right corner of your settings window. After clicking the add user button, a pop-up will appear where you can select which type of user privileges you are assigning to the new user: standard privileges or administrator sudo privileges.
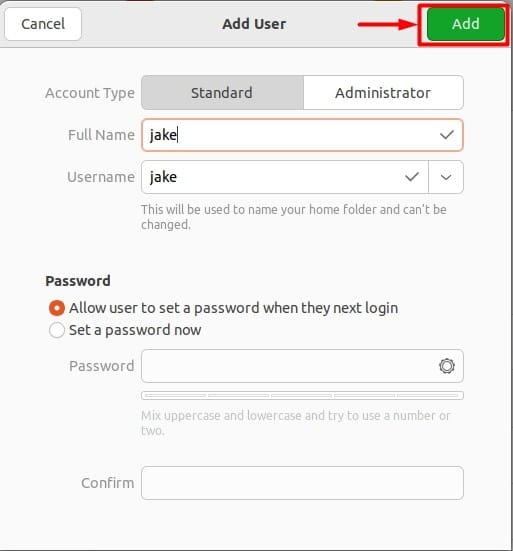
After the user type selection, you can now enter the details of your new user, “Full name,” “Username,” and “Password,” and click “Add” to add the user.
Note: You can also select not to set “Password” and let users themselves enter a password when they log in for the first time.
Now your new user is added to the user list.
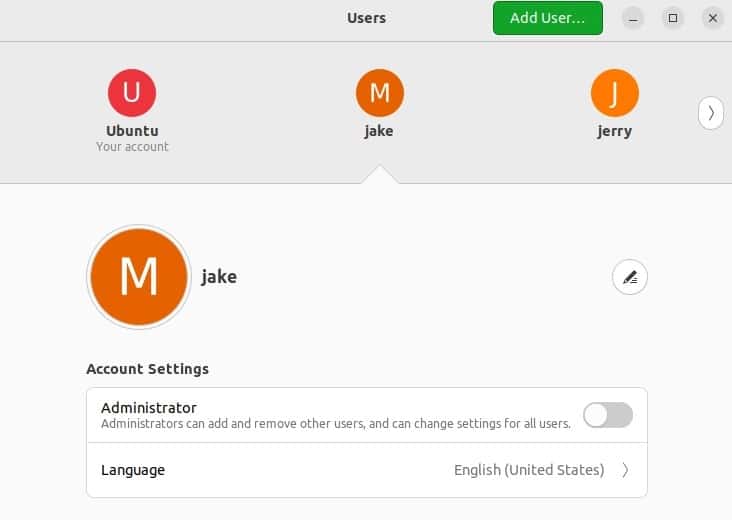
Assign sudo Privileges to Standard User
In GUI setup, it’s easy to assign or remove sudo privileges from any user. Simply access the user menu, select the user you are assigning or removing privileges from, and toggle the administrator button on or off.
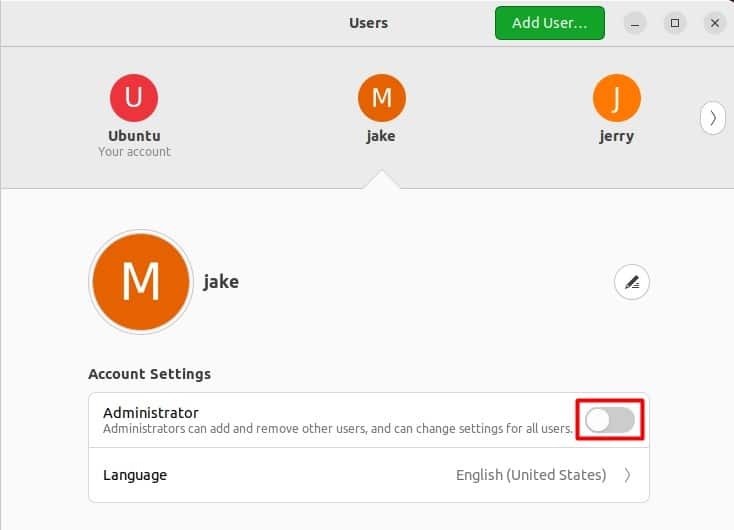
As you can see, the user “jake” admin privileges are turned off, which means this user is only a standard user and can’t access or run sudo commands.
How do I add a user to my home directory in Ubuntu?
By default, all the new users are added to the /home/user directory. However, you can change the default directory of a user or assign them a new directory by using the following command.
usermod -d /var/directory username
In this command, “usermod” is for user modification, -d is used to change the directory followed up with a new directory location and user name of the user you are assigning the directory to.
How do I Disable or Enable a User Account?
To disable a user account, you can use the following command:
usermod -L username
In this command, “-L” is used to Lock the account of the given username.
To enable a user account, you can use the following command:
usermod -U username
In this command “-U” option is used to Unlock the user account of the given username.
Conclusion
Managing the old users and adding new users is one of the major tasks performed by a system administrator. Adding a new user with proper privileges and configuration keeps the system secure and also enables the administrator to monitor the team or project progress.
Subscribe
Login
0 Comments
Oldest