![]()
How to Install Ajenti Control Panel & Add a New Website on Ubuntu 18.04
Ajenti is a popular, lightweight, open-source, web based control panel for managing servers. It also comes with an easy-to-install addon package, called Ajenti V, that comes with plugins for managing emails, websites, domains and more.
In this tutorial we’ll be installing Ajenti and Ajenti V on an Ubuntu 18.04 VPS. We’ll also add a domain to it and set up a WordPress website using the Ajenti control panel.
Table of Contents
Get a High RAM VPS at Entry-level Pricing
Starting with 2GB RAM at $6.99/month
Take your pick from our KVM VPS that offer a generous amount of RAM at an affordable price. We've got 5 plans for you to choose from, our cheapest featuring 2GB RAM at $6.99/mo.
[Main Features] - SSD Drives
- KVM Virtualization
- 1Gbps Shared Uplink
- Location: Chicago, IL
Pick one of our KVM plans
Prerequisites
For this tutorial we’re assuming:
- You’re using a machine running Ubuntu 18.04 with at least 1GB RAM
- You’ve got a domain with an A record pointing to the IP address of your Ubuntu machine
Update:
$ sudo apt update
$ sudo apt -y upgrade
Reboot after upgrade:
$ sudo rebootSet the FQDN on the Server
To access Ajenti by visiting a certain URL, like https://panel.dracula.host, we’l have to configure the server’s FQDN.
NOTE: If you just want to access Ajenti by visiting your server’s IP address ( https://your_server_ip:8000 ), then you can skip this.
With the following line we’l change the hostname of the server to our subdomain:
$ sudo hostnamectl set-hostname panelOpen and edit /etc/hosts using your favorite text editor, and add the following line at the end:
$ sudo nano /etc/hosts
SERVER_IP_ADDRESS SUBDOMAIN.DOMAIN.COM SUBDOMAIN
Here’s an example on how I set it up:
$ sudo nano /etc/hosts
123.234.12.32 panel.dracula.host panel
Save and exit the file when you’re done.
Now run the following command to install the network-manager package, in case you don’t already have it installed.
$ sudo apt install network-managerAnd run the following command to restart the Network Manager and apply the changes you’ve made:
$ sudo systemctl restart NetworkManager.serviceCheck the hostname and the FQDN by running the following commands:
$ hostname
panel
$ hostname -f
panel.dracula.host
Install Ajenti 1.x Server Admin Panel on Ubuntu 18.04
Install python-imaging dependency:
$ sudo apt -y install wget
$ wget http://security.ubuntu.com/ubuntu/pool/universe/p/pillow/python-imaging_4.1.1-3build2_all.deb
$ sudo dpkg -i python-imaging_4.1.1-3build2_all.deb
If you can’t find it, and receive a 404 ERROR 404: Not Found., then download it from a different location:
$ wget http://mirrors.mit.edu/ubuntu-ports/pool/universe/p/pillow/python-imaging_3.1.2-0ubuntu1.1_all.deb
$ sudo dpkg -i python-imaging_3.1.2-0ubuntu1.1_all.deb
It’s possible that you’l receive an error such as the following:
Selecting previously unselected package python-imaging.
(Reading database ... 102395 files and directories currently installed.)
Preparing to unpack python-imaging_4.1.1-3build2_all.deb ...
Unpacking python-imaging (4.1.1-3build2) ...
dpkg: dependency problems prevent configuration of python-imaging:
 python-imaging depends on python:any (<< 2.8).
 python-imaging depends on python:any (>= 2.7.5-5~).
 python-imaging depends on python-pil; however:
  Package python-pil is not installed.

dpkg: error processing package python-imaging (--install):
 dependency problems - leaving unconfigured
Errors were encountered while processing:
 python-imaging
To fix this and install the python-imaging dependency run:
$ apt --fix-broken installImport Ajenti repository GPG key:
$ sudo wget http://repo.ajenti.org/debian/key -O- | sudo apt-key add -Add Ajenti repository:
$ echo "deb http://repo.ajenti.org/ng/debian main main ubuntu" | sudo tee /etc/apt/sources.list.d/ajenti.listInstall Ajenti 1.x on Ubuntu 18.04
$ sudo apt update
$ sudo apt -y install ajenti
Output:
...
------------------------------------------------
Now start Ajenti with 'service ajenti restart'
Ajenti will listen on HTTPS port 8000 by default

Default username : root
Default password : admin
------------------------------------------------
...
Restart and enable Ajenti so it loads on boot:
$ sudo systemctl restart ajenti
$ sudo systemctl enable ajenti
Now Ajenti 1.x should be installed and ready to be accessed. Ajenti listens on HTTPS port 8000 by default.
To access it, open up a browser and navigate to https://your_ip_or_domain:8000.
IMPORTANT: It’s important that you access via
https://and nothttp://, or else you won’t be able to access Ajenti.
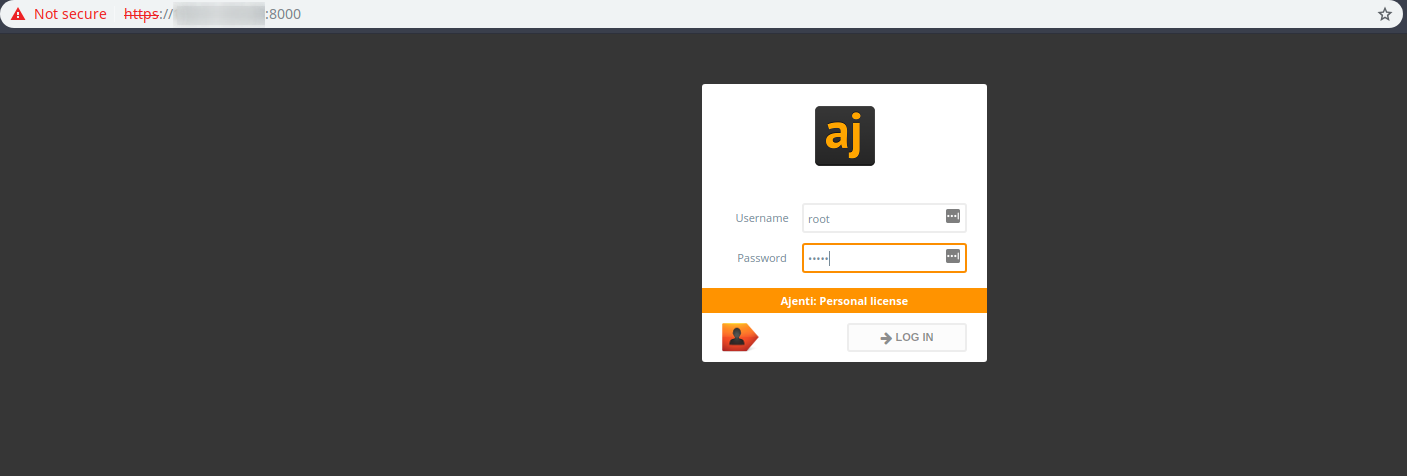
The browser will probably complain that the connection is not secure. It’s safe, so you can proceed.
Next, you should see the login form.
The default credentials are:
Username: root
Password: admin
After you login, you’l be taken to the Ajenti dashboard:
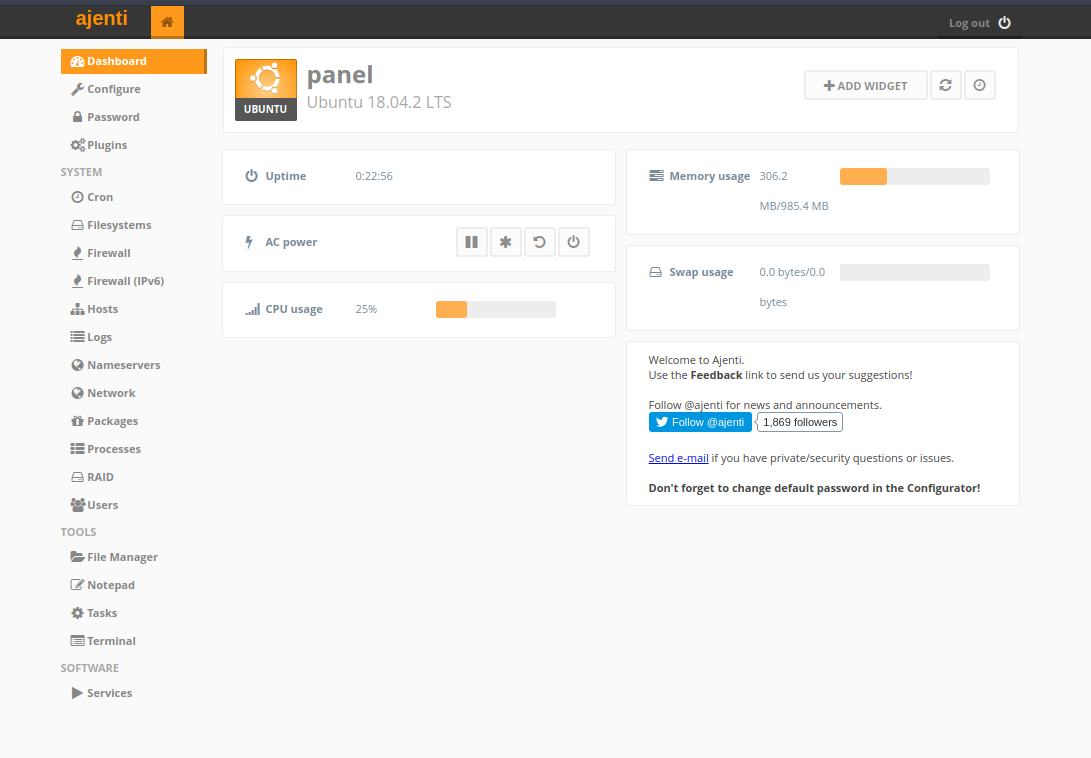
Since your password is so simple, it’s mandatory that you set a stronger password so you won’t be compromised. You’l notice the Password section in the menu on the left. Navigate there, and change your password into a stronger one.
Install Ajenti V Plugin
Ajenti V is a plugin suite that adds a good deal of additional functionalities to Ajenti 1.x. At the time of writing, it extends the capabilities of the Ajenti core with packages such as:
- gunicorn
- MySQL
- NodeJS
- php-fpm
- puma
- pureftpd
- unicorn
- NGINX
With the following line we will install Ajenti V our our Ubuntu 18.04 machine:
$ sudo apt -y install ajenti-v ajenti-v-nginx ajenti-v-mysql ajenti-v-php7.2-fpm php7.2-mysqlRestart Ajenti once the installation is done:
$ sudo systemctl restart ajentiTo enable Ajenti V, go inside the Ajenti dashboard again and navigate to “Services”, in the left menu. After which click on the Restart icon, in the ajenti row, with the origin systemd. The page should reload and you will have to log back in. Once you’ve logged in you’l see the left sidebar having a Web section.
Click on Websites under the Web section and you should be taken to a page to enable Ajenti V:
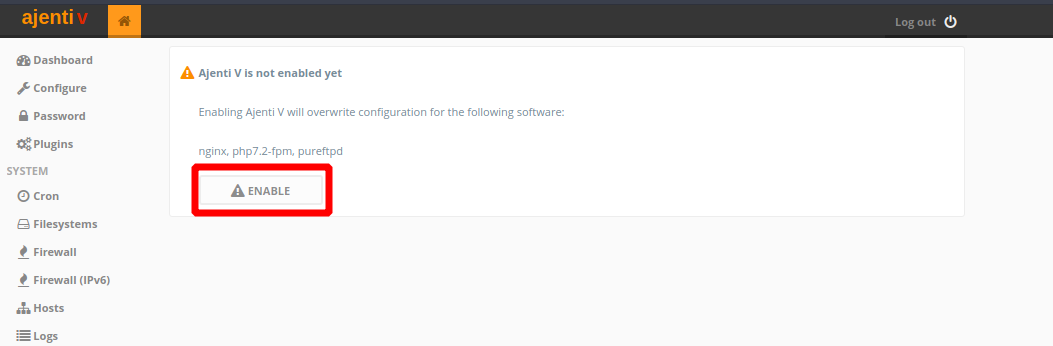
With Ajenti V enabled, your panel has just gained more power, like adding websites, enabling webmail, and a number of other tasks.
Add a Domain & Install WordPress on Ajenti V
To demonstrate how to use Ajenti V to add and manage websites, we’ll add a WordPress website with our Ajenti dashboard.
Prerequisites
- Ajenti with Ajenti V installed
- A registered domain name, that resolves to the server with Ajenti and Ajenti V installed
Step 1 — Configure WordPress
In your browser, navigate to your Ajenti dashboard. I’ll navigate to https://panel.dracula.host and log into Ajenti.
- In the sidebar on the left, under
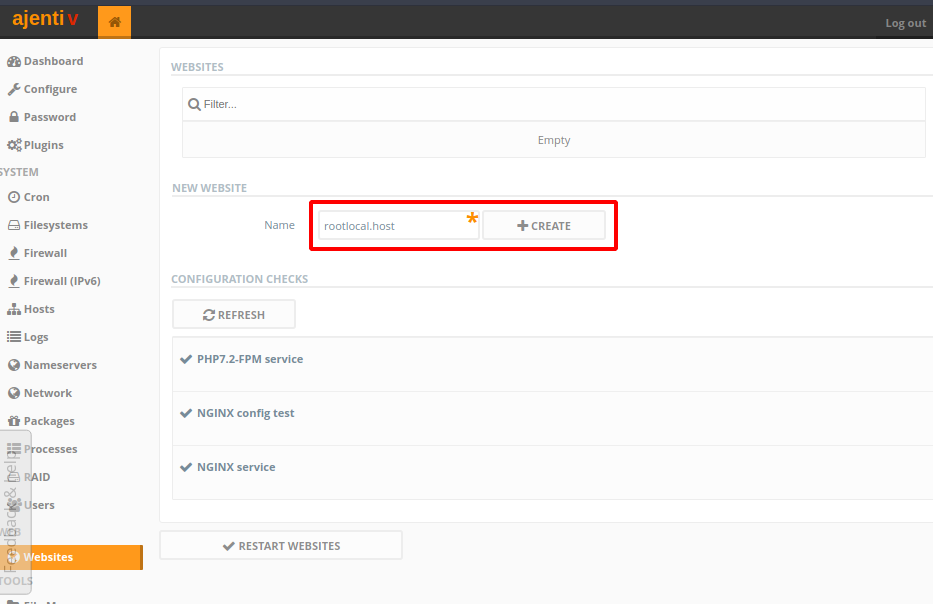
Websection clickWebsites. - There’s a section
New Website. Under it, fill in the name of your website in theNameinput field and clickCreate. The name can be anything you want.
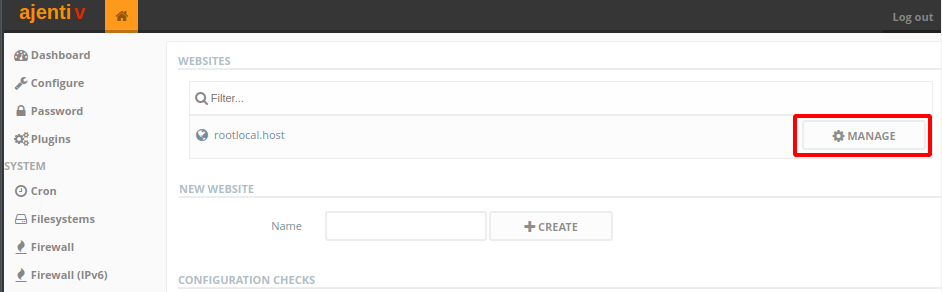
- With the website added, click on the
Managebutton next to it. - In the
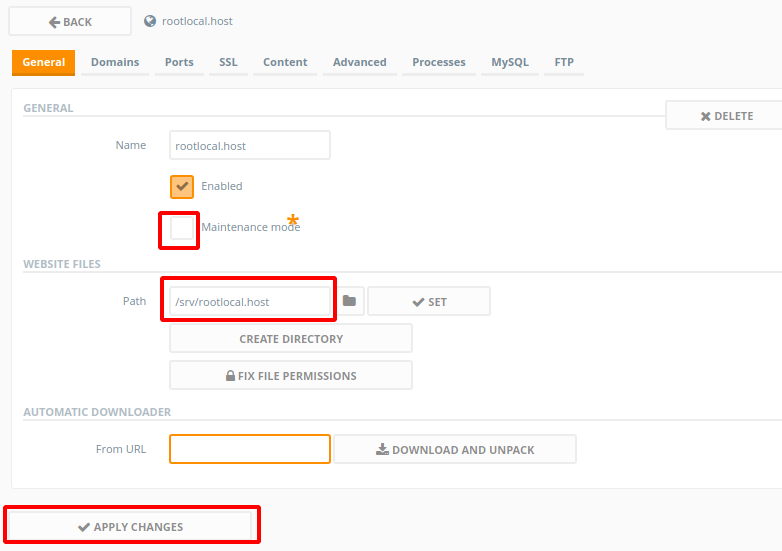
Generalsection, underWebsite Files, rename thePathto anything you want, and click onSET, and after which clickCreate Directory. I’ll set my path to/srv/rootlocal.host.Now, in the
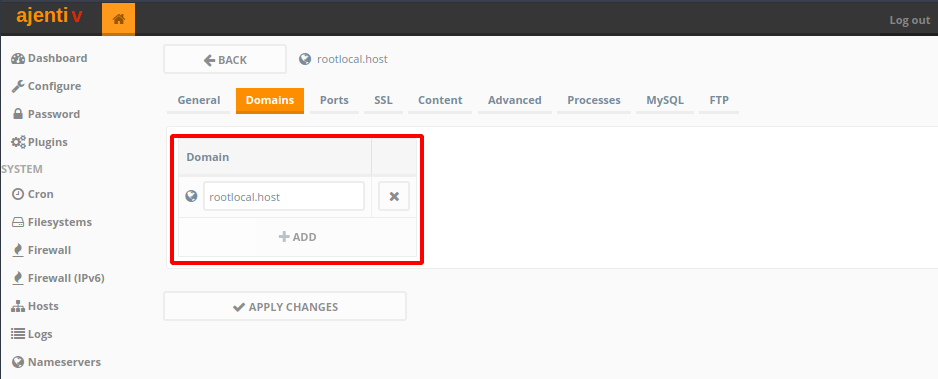
Generalsection of this page, uncheckMaintenance Modeand clickApply Changesat the bottom of the page. - At the top navigation menu, go to the
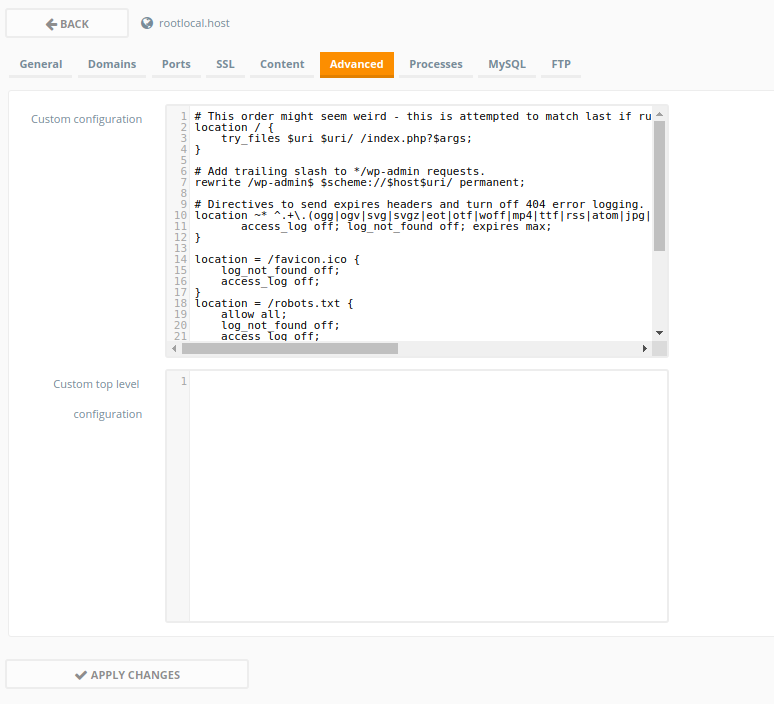
Domainstab, in theDomainsection, click toAddto add your domain, and fill it into the input field (in my caserootlocal.host), and click theApply Changesbutton. - Now switch to the
Advancedtab at the top of the page, and add the following content in theCustom Configurationfield:# This order might seem weird - this is attempted to match last if rules below fail. location / { try_files $uri $uri/ /index.php?$args; } # Add trailing slash to */wp-admin requests. rewrite /wp-admin$ $scheme://$host$uri/ permanent; # Directives to send expires headers and turn off 404 error logging. location ~* ^.+\.(ogg|ogv|svg|svgz|eot|otf|woff|mp4|ttf|rss|atom|jpg|jpeg|gif|png|ico|zip|tgz|gz|rar|bz2|doc|xls|exe|ppt|tar|mid|midi|wav|bmp|rtf)$ { access_log off; log_not_found off; expires max; } location = /favicon.ico { log_not_found off; access_log off; } location = /robots.txt { allow all; log_not_found off; access_log off; } # Deny all attempts to access hidden files such as .htaccess, .htpasswd, .DS_Store (Mac). # Keep logging the requests to parse later (or to pass to firewall utilities such as fail2ban) location ~ /\. { deny all; } # Deny access to any files with a .php extension in the uploads directory # Works in sub-directory installs and also in multisite network # Keep logging the requests to parse later (or to pass to firewall utilities such as fail2ban) location ~* /(?:uploads|files)/.*\.php$ { deny all; }Then press the
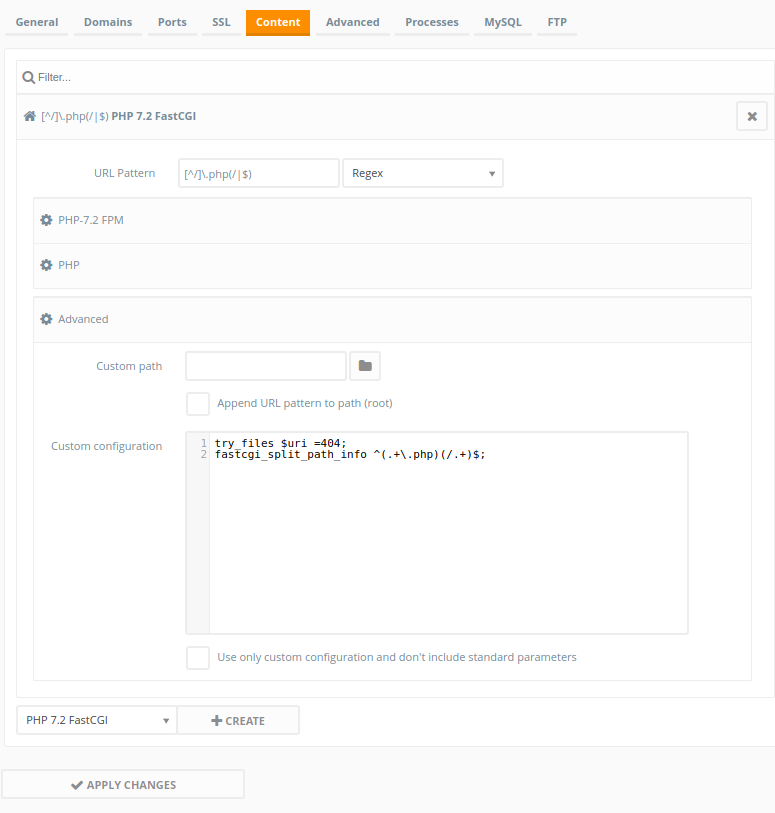
Apply Changesbutton. - Now switch to the
Contenttab. In the dropdown menu selectPHP 7.2 FastCGIand clickCreate. Click on theAdvancedmenu underPHP, and paste the following content in theCustom configurationfield. NOTE: this is a differentCustom configurationthan the one before.try_files $uri =404; fastcgi_split_path_info ^(.+\.php)(/.+)$;Press the
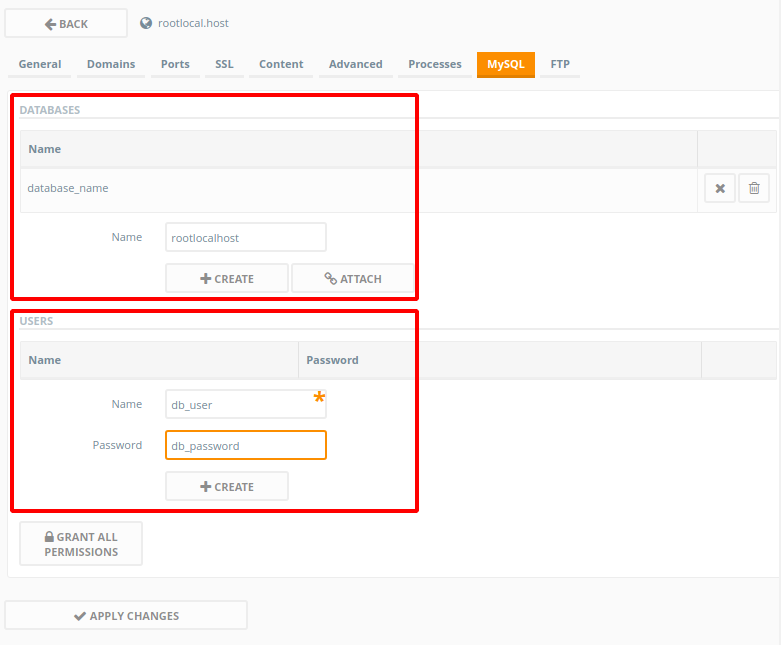
Apply Changesbutton when you’re done. - WordPress needs a database to add, manage and retrieve data. Browse to the
MySQLtab. UnderDatabaseswrite in the name of the database you want to create – in this example I’ll writedatabase_name– after which clickCreate.WordPress will need a user to manage the database as. To create a MySQL User, under
Users, give a Name and Password to your new user, then clickCreate. In this example we’ll usedb_useranddb_password. Remember them, because you’ll need them later.When you’re done, click on Apply Changes.
Step 2 — Download WordPress & Finishing Touches
Next we’ll have to download and unpack WordPress. To do this, first we’ll need to install zip utilities on the server.
Install it by first clicking on Tools > Terminal on the left sidebar.
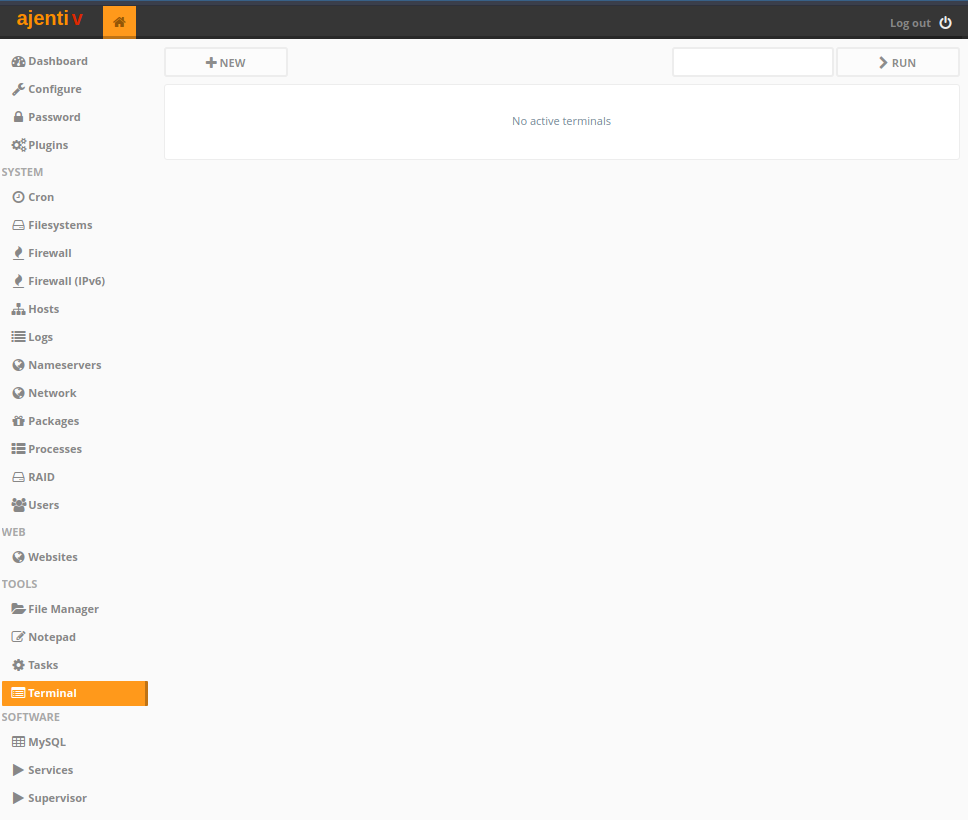
After which, launch a new terminal session by clicking New and then on the black box that appears.
To install zip/unzip run the following line:
$ sudo apt install zip unzip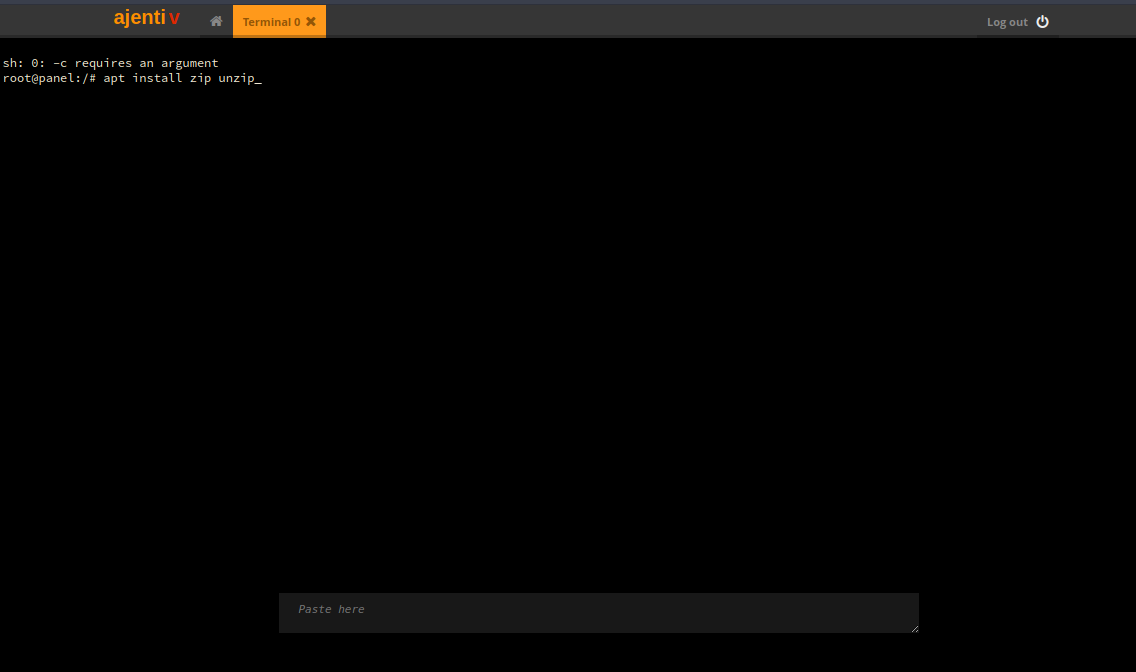
After the installation is complete, click the X next to Terminal 0 to close the terminal.
Now go back to Websites in the left sidebar, and click Manage next to the website you created. In the General tab, at the bottom you should see a section named Automatic Downloader that offers an input field. In the input field put http://wordpress.org/latest.zip and click Download and Unpack. A terminal should appear – just wait it out until the process it’s finished. If you see it’s finished but the terminal doesn’t disappear just close the Terminal 0 tab.
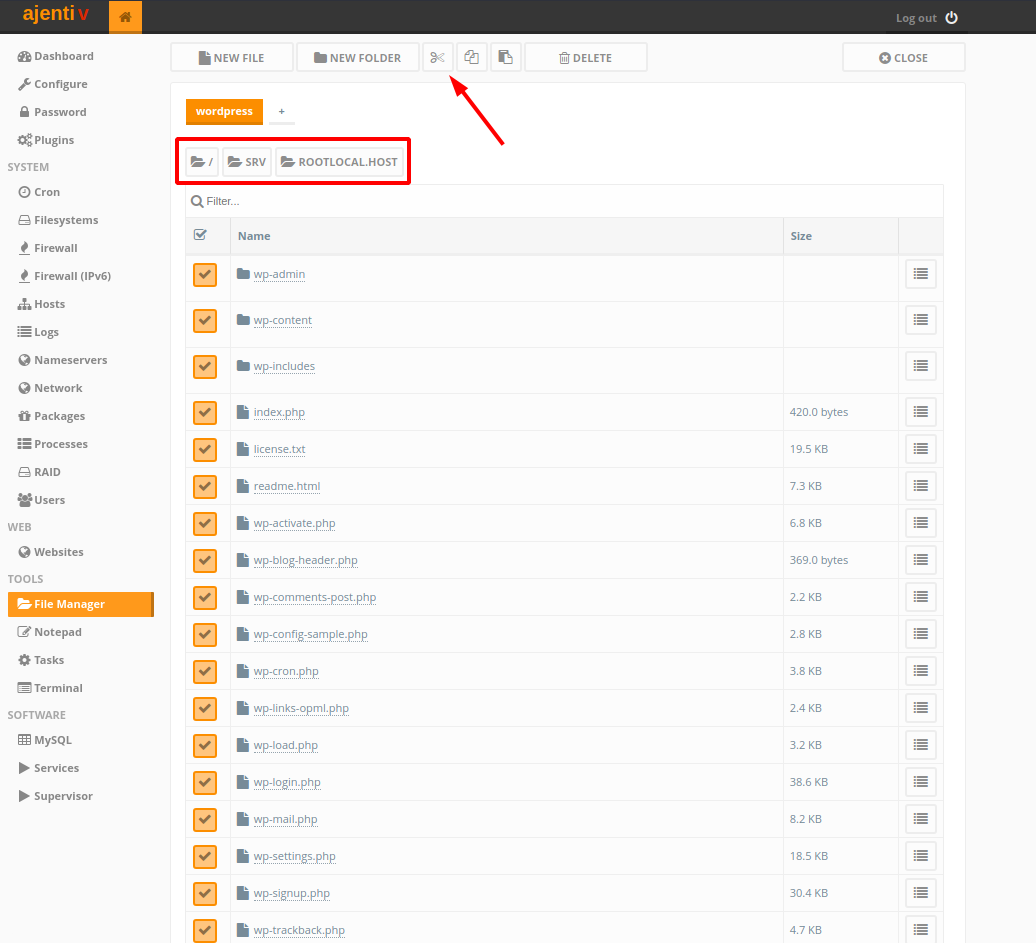
Next, in the left sidebar, navigate to File Manager and click on the srv folder, and then on your website’s folder (in this demo rootlocal.host) and then into wordpress. We want to move the content of the wordpress folder up one level.
When in the wordpress directory, select all the files and click on the Cut icon, move back up one level, into your website’s folder ( rootlocal.host in my case ) and paste them by clicking the Paste button next to Cut.
Assuming that the WordPress files are now in your websites’ root folder, we can get to installing WordPress.
Step 3 — Installing WordPress in the Browser
Now browse to your domain in your browser ( in my case https://rootlocal.host ). You’ll be greeted by the initial installation page where you can select your preferred language. Next click Continue and then Let's go!.
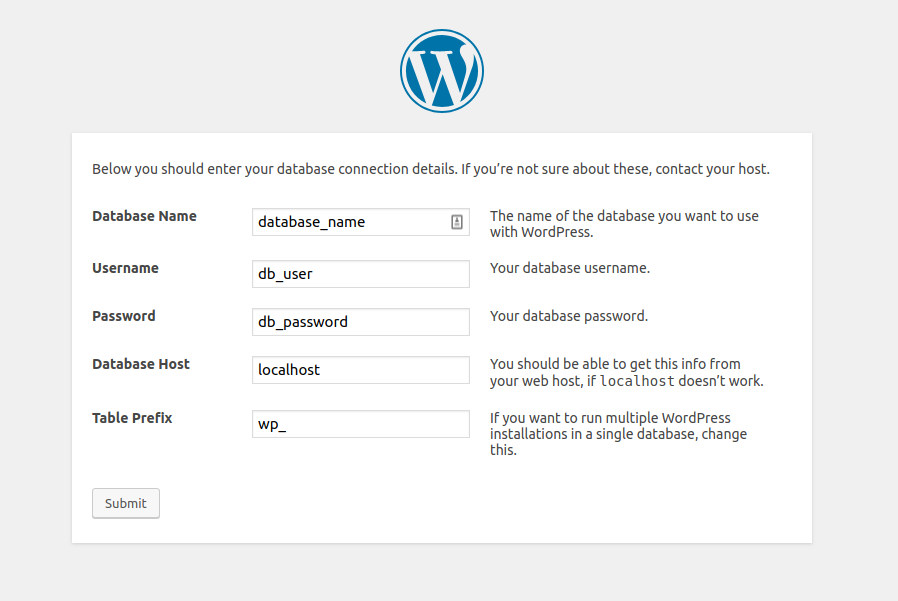
Add in your database details that you created earlier, in the next form. The details I created are database_name, db_user and db_password.
Yon change wp_ to a different prefix since it’s very commonly used, and it could improve security by changing it to something like myblog_ or whatever else you prefer.
After you click submit you’ll just have to fill in a few details regarding WordPress and set your login credentials, and then the installation should be done in a few seconds.
Conclusion
Well done. You’ve successfully installed Ajenti and Ajenti V on CentOS 7, added your first website and installed WordPress. Congratulations!
Need Help?
Have a server from a different provider and need help? Hit us up!
We offer various services to assist you in achieving your business goal. Working in the industry, we've gained proficiency various areas related to hosting.
[Proficiencies Include] - RADIUS
- WHMCS
- LAMP Stack
- LEMP Stack
- VPN Protocols
- SMTP
- Remote Desktop Solutions
- Linux in general
- WHMCS
- LAMP Stack
- LEMP Stack
- VPN Protocols
- SMTP
- Remote Desktop Solutions
- Linux in general
Hire Us
I’m Sorry sir, but this link :
wget http://security.ubuntu.com/ubuntu/pool/universe/p/pillow/python-imaging_4.1.1-3build2_all.deb
and this link :
wget http://mirrors.mit.edu/ubuntu-ports/pool/universe/p/pillow/python-imaging_3.1.2-0ubuntu1.1_all.deb
all of them was error.